Category: Uncategorized

  • How Many Carbon Monoxide Detectors Do I Need to Protect My Loved Ones?

    How many carbon monoxide detectors do I really need in my home? It’s a life-saving question that is worth thinking and finding answers to now rather than later. Because ensuring your home is equipped with the right number of carbon monoxide detectors can mean the difference between safety and tragedy.
    how many carbon monoxide detectors do I need

    Let’s explore the essential guidelines and considerations that will help you secure your living space against this silent killer.

    Key Takeaways

    • Placement is crucial: Install carbon monoxide detectors on every level of your home, especially near sleeping areas.
    • Maintenance is key: Regularly test and replace batteries to ensure detectors are always operational.
    • Legal requirements: Check local laws to ensure compliance with safety regulations.

    How Many Detectors Do You Need?
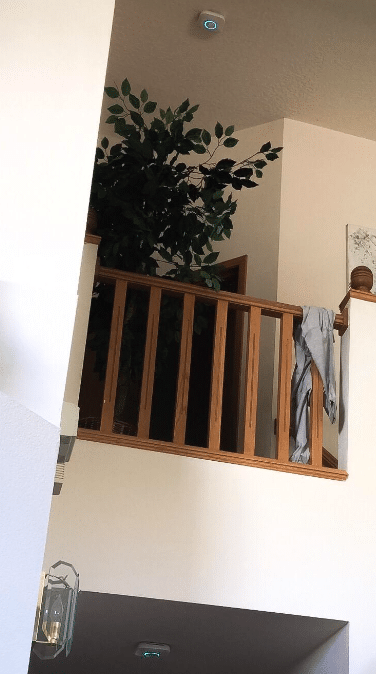
    At least a CO detector on each floor

    The number of carbon monoxide detectors needed can depend on several factors such as the size and layout of your home, the number of levels, and the presence of gas appliances.

    General Guidelines

    • Levels of the home: At least one detector on each floor including the basement and attic if used.
    • Sleeping areas: Additional detectors near or in bedrooms so the alarm can wake you if CO levels rise during the night. Common areas outside the bedroom like the lounge area is also commended.
    • In or near attached garages since cars produce carbon monoxide, which can seep into the house or a generator house if not detached from your main house. The detector should be near the entrance from the garage into the house.
    • Close to gas-powered appliances, such as stoves, water heaters, or fireplaces.
    • Legal requirements: Some areas have specific laws regarding the number and placement of detectors.

    Learn more about the legal requirements from the NFPA Guidelines for Carbon Monoxide Alarms.

    Table: Number of Carbon Monoxide Detectors Based on Home Size

    Home FeatureMinimum Number of CO Detectors Needed
    One-story home with no garage1 (near bedrooms)
    Two-story home with no garage2 (one per floor)
    Home with a basement3 (one per floor and in basement)
    Home with attached garage3 (include one near garage)
    Large home with multiple bedrooms1 per floor and near each bedroom
    Larger homes or homes with multiple fuel-burning appliances may require more detectors.

    Factors Influencing Detector Quantity

    • Size of the home: Larger homes may need more detectors.
    • Number of gas appliances: Each appliance is a potential source of CO.
    • Age of appliances: Older appliances may pose a higher risk of CO emission.
    FactorImportance
    Home sizeLarger homes require more detectors
    Number of appliancesMore appliances increase risk
    Sleeping areasCritical for nighttime safety

    Carbon Monoxide Risks

    Carbon monoxide (CO) is a deadly gas that can be produced by any fuel-burning device. Preventing CO poisoning starts with understanding its sources, such as furnaces, stoves, and water heaters. Unfortunately, without a detector, CO is undetectable by human senses, which is why it’s essential to equip your home properly.

    What is Carbon Monoxide?

    • Invisible danger: CO is impossible to see, taste, or smell.
    • Sources in the home: Common household appliances like gas stoves, heaters, and dryers can emit CO. Also included in this list are any fossil fuel burning engines such as cars and generators.
    • Health risks: Exposure can lead to serious health issues, dizziness, headaches and even death.

    Why Carbon Monoxide Detectors?

    Installing CO detectors can be the single most important step you take to safeguard your family against carbon monoxide poisoning.

    Types of Detectors

    Carbon monoxide detectors vary in technology and design, each suited for different monitoring needs:

    Electrochemical Sensor

    • High sensitivity: Detects low levels of CO.
    • Accurate: Provides precise readings.

    Biomimetic Sensor

    • Color change: Uses a gel that changes color when CO is present.
    • Visual alert: Offers a clear indication of CO levels.

    Metal Oxide Semiconductor

    • Advanced technology: Utilizes a silica chip that reacts to CO by changing its electrical resistance.
    • Durable: Effective for long-term monitoring.

    How They Work

    All these sensors trigger an alarm when dangerous levels of CO are detected, alerting you to potential danger. Regular testing and maintenance are crucial to ensure they function properly when you need them most.

    Importance in Home Safety

    • Early warning: Detectors provide crucial time to evacuate, potentially saving lives.
    • Legal compliance: Many jurisdictions require CO detectors by law.

    Proper Placement of Detectors

    Choosing the right locations for carbon monoxide detectors is crucial for effective operation and early detection of this deadly gas.
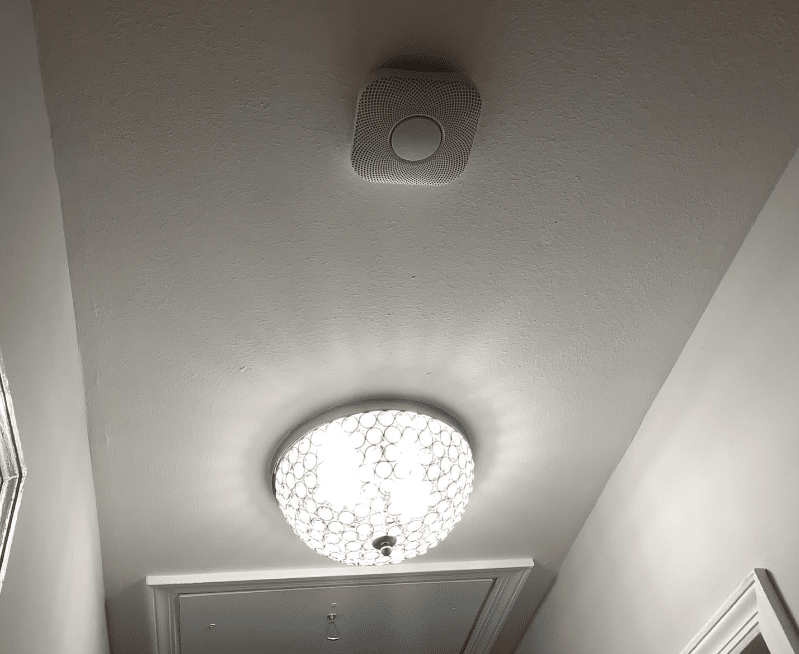
    Choose the right location for your carbon monoxide detector

    Recommended Placement

    • Near bedrooms: To ensure alarms can be heard at night.
    • Away from fuel-burning appliances: To avoid false alarms and ensure proper detection.
    • On every level: Including the basement and attic.

    Placement Tips

    • Height considerations: CO mixes with air, so detectors can be placed at any height.
    • Avoiding false alarms: Keep detectors away from high humidity areas like bathrooms and kitchens.

    Maintenance and Testing

    Keeping your carbon monoxide detectors in tip-top shape is as crucial as having them in the first place. It’s all about ensuring they are ready to protect you when it matters most.

    Regular Testing

    • Weekly checks: Press the test button on your detector to ensure it’s working.
    • Hear the beep: If it beeps, you’re good to go. If not, it might be time for a battery change or a checkup.

    Battery Replacement

    • Schedule changes: Replace batteries at least once a year, or as recommended by the manufacturer.
    • Stay powered: For detectors plugged into outlets, ensure they have battery backups.

    Lifespan of Detectors

    Carbon monoxide detectors don’t last forever. They need to be replaced every 5 to 10 years depending on the brand and model. Some newer models will alert you when they’ve reached the end of their useful life. Regularly check the battery and test your detectors monthly to ensure they’re working properly

    ActionFrequency
    Test your detectorWeekly
    Change batteriesAnnually or as needed
    Replace detectorEvery 5-10 years

    Pro tip: Check the manufacturer’s guidelines to know exactly when to replace your unit.

    Advanced Tips and Common Mistakes

    Enhancing your CO safety strategy involves more than just installation. Avoid common pitfalls and adopt advanced tips to ensure maximum protection.

    Common Mistakes

    • Improper placement: Near windows or doors can dilute CO concentration, leading to false negatives. Therefore, Avoid placing detectors:
      • Directly in kitchens or bathrooms where humidity and steam can cause false alarms.
      • Behind curtains or furniture, where airflow may be restricted.
      • Near open windows or doors, as fresh air can disperse CO, preventing proper detection​.

    • Ignoring maintenance: Skipping regular tests can lead to non-functional alarms when you need them most. Testing your carbon monoxide detectors once a month is crucial to ensuring they’re functioning correctly. Also, be sure to change the batteries at least once a year, or sooner if the detector indicates a low battery.

    Advanced Tips

    • Integration with smart home systems: Connect your CO detectors with your smart home to receive alerts on your phone. There are countless ways you can achieve this with smart smoke and CO devices. See here for current prices and reviews.
    • Regular professional inspections: Have a professional inspect your fuel-burning appliances annually.

    Preventing Carbon Monoxide Poisoning

    To further protect your home from carbon monoxide poisoning:

    • Have your heating system inspected annually by a professional to ensure it’s functioning safely​
    • Never use outdoor grills or generators indoors, as they produce high levels of carbon monoxide​
    • Don’t leave your car running in an enclosed space, like a garage, even if the door is open​

    Frequently Asked Questions

    Here are some of the most common questions about carbon monoxide detectors:

    1. How do I know if my carbon monoxide detector is working?

    Press the “test” button on your detector monthly to ensure it’s functioning properly. If you don’t hear a sound, check the battery or consider replacing the unit.

    2. Can carbon monoxide detectors detect natural gas leaks?

    No, carbon monoxide detectors only detect CO. For natural gas leaks, you will need a separate gas detector.

    3. What should I do if my carbon monoxide detector goes off?

    Immediately turn off any appliances that could be emitting CO, evacuate your home, and call emergency services.

    4. Where should carbon monoxide detectors NOT be installed?

    Avoid placing detectors in humid areas like bathrooms or too close to fuel-burning appliances to prevent false alarms.

    5. How many carbon monoxide detectors do I need for a small apartment?

    At least one detector should be installed near the sleeping area, and if your apartment has multiple levels, place one detector per floor.

    6. Are plug-in carbon monoxide detectors effective?

    Yes, plug-in detectors are effective, but it’s essential to choose one with a battery backup in case of a power outage.

    7. How often should I test my carbon monoxide detector?

    Test your carbon monoxide detector at least once a month and replace the batteries yearly.

    More FAQS

    How many carbon monoxide detectors should I have in my home?

    • Install one on each level and near each sleeping area for optimal protection.

    Where is the best place to install a carbon monoxide detector?

    • Install them near bedrooms and living areas but away from high humidity and fuel-burning appliances.

    What types of carbon monoxide detectors are there?

    • There are mainly three types: electrochemical, biomimetic, and metal oxide semiconductor.

    How do I know if my carbon monoxide detector is working?

    • Test it weekly by pressing the test button. If it beeps, it’s working.

    What should I do if my carbon monoxide detector goes off?

    • Evacuate immediately and call emergency services from fresh air.

    Can I install a carbon monoxide detector myself?

    • Yes, follow the manufacturer’s instructions carefully or watch a helpful installation video.

    When should I replace my carbon monoxide detector?

    • Generally, every 5 to 10 years, depending on the manufacturer’s recommendations.

      Conclusion

      Installing the right number of carbon monoxide detectors in your home can significantly reduce the risk of carbon monoxide poisoning.

      Make sure to install detectors on every level, near bedrooms, and close to fuel-burning appliances. Don’t forget to test your detectors regularly and replace them every few years. By following these guidelines, you’ll ensure that your family is well-protected from the dangers of carbon monoxide.

      Stay safe, stay alert, and keep your detectors in check!

    1. How Many Fire Extinguishers Do You Really Need?

      Fire extinguishers are a fundamental part of home and workplace safety, yet many of us don’t know how many we should have or where to place them.

      The number of fire extinguishers you need depends on several factors including the size and layout of the building, the type of materials present, and local fire safety regulations. Generally, the National Fire Protection Association (NFPA) recommends having at least one fire extinguisher for each floor of your home or business, and additional extinguishers for specific high-risk areas like kitchens or workshops.

      How Many Fire Extinguishers Do I Need?

      For commercial buildings, guidelines are more specific, often requiring extinguishers every 75 feet in ordinary hazard situations. It’s essential to consult with local fire safety codes to ensure compliance and adequate protection.

      Key Takeaways:

      • Types of Fire Extinguishers: Know which type is right for your needs.
      • Placement and Accessibility: Ensure extinguishers are visible and reachable.
      • Legal Requirements: Stay compliant with safety standards.

      Fire safety is not just about having fire extinguishers on hand; it’s about understanding the right types, proper placement, and maintenance to ensure they function in an emergency.

      Fire extinguishers can be the first line of defense against small fires, provided they are readily accessible and adequately maintained.

      Types of Fire Extinguishers

      Understanding the Options

      There are several types of fire extinguishers, each designed for different types of fires:

      • Water extinguishers are effective against paper and wood fires.
      • Foam extinguishers tackle liquid fires, such as grease or gasoline.
      • CO2 extinguishers are ideal for electrical fires without leaving residue.

      Types of Fire Extinguishers and Their Uses

      TypeUse CaseProsCons
      WaterWood, paperNon-damaging to materialsNot for electrical fires
      FoamLiquids like grease, gasolineEffective, quick responseLeaves residue
      CO2Electrical firesNo residue, electrical safeLimited cooling power
      Dry PowderMetal fires, versatileWorks on many fire typesMessy cleanup

      Choosing the Right Extinguisher

      It’s vital to select the right type of extinguisher for your environment. A home kitchen, for instance, might benefit from a foam extinguisher for fighting grease fires, while a home office with lots of electronic equipment might be better equipped with a CO2 extinguisher.

      Placement and Accessibility

      Proper Placement

      The correct placement of fire extinguishers is crucial for effective fire response. Fire extinguishers should be placed where they can be quickly accessed, with clear signs marking their location.

      They should not be blocked by furniture or other obstacles and should be mounted at an appropriate height for easy access.

      Key Guidelines for Placement

      • Near exits and in hallways.
      • In high-risk areas like kitchens and garages.
      • At least one on each floor of a home or building.

      For guidelines on how to place safety equipment effectively in homes, check our internal resource here.

      Accessibility and Visibility

      Fire extinguishers must be visible and easy to access. This means no obstructions and clear signage if they are inside a cabinet or behind a door. Regular checks should be made to ensure that nothing is blocking access to an extinguisher.

      In addition to physical placement, educating everyone in your home or workplace on the location and operation of extinguishers is equally important. Conduct regular drills and ensure that all family members or employees know how to use an extinguisher.

      Determining Your Needs

      When it comes to fire extinguishers, one size does not fit all. You’ll need to consider the layout and size of your building, the materials found within, and the potential hazards present. Each floor should have at least one extinguisher, and high-risk areas may require more.

      Maintenance and Inspection

      Keeping Extinguishers Ready

      Regular maintenance is crucial. You should inspect your extinguishers monthly, checking for any signs of damage or corrosion. Ensure the pressure gauge shows a full charge and that no obstructions block the nozzle or hose.

      Maintenance Checklist:

      • Check the gauge: It should be in the green zone.
      • Inspect the seal: It must be intact.
      • Look for damage: Dents or rust can impair functionality.

      To keep your fire extinguishers in tip-top shape, follow our step-by-step guide here.

      When to Replace

      Fire extinguishers have a shelf life. Typically, rechargeable models need a service every six years and a complete refill every 12 years. Disposable models, however, often require replacement after 12 years.

      Legal Requirements and Recommendations

      Adhering to local fire safety codes is not just a good practice—it’s the law. Different states and municipalities have specific codes regarding the type, size, and placement of fire extinguishers.

      Legal Requirements by Region

      RegionType RequiredSizePlacement Guidelines
      Northeast USAABC2A:10BNear exits, every 5000 sq ft
      Southwest USABC5BAccessible areas, high-risk zones

      Frequently Asked Questions

      1. How do I use a fire extinguisher correctly?
        • Aim low, squeeze the handle, sweep side to side.
      2. What type of fire extinguisher is best for a kitchen?
        • Typically, a Class K extinguisher is recommended for kitchen use.
      3. How often should fire extinguishers be inspected?
        • Monthly visual inspections are advised.
      4. Can I use a water extinguisher on an electrical fire?
        • No, use CO2 or dry chemical extinguishers for electrical fires.
      5. Where should I not place a fire extinguisher?
        • Avoid placing them near heat sources or in direct sunlight.
      6. What should I do if my fire extinguisher is recalled?
        • Contact the manufacturer for a replacement or service.
      7. How many fire extinguishers do I need per square foot?
        • This can vary, but general guidelines suggest one per 500 square feet in residential areas.

      All fire extinguishers are labeled with a letter and a number. what does the number indicate?

      The number on a fire extinguisher label tells us how effectively it can put out a fire, under test conditions. Let’s break it down by type:

      For Class A fire extinguishers, the number shows the equivalent amount of water, in gallons, that the extinguisher can use. For instance, a 2A rating means the extinguisher works as well as 2.5 gallons of water would.

      For Class B extinguishers, the number indicates the square footage of a flammable liquid fire that the extinguisher can handle. So, if you see a 20B rating, it means the extinguisher can tackle a fire covering 20 square feet.

      Classes C, D, and K extinguishers are different, as they don’t have numbers. Their ratings are based solely on the type of fire they are designed to fight, not on the size or volume of the fire.

      Last Word

      In conclusion, you need a fire extinguisher in every cooking space, on every floor and in any additional high risk area e.g. a generator room or garage.

      Properly equipped and maintained, fire extinguishers can be life-saving tools. Always stay informed and ready to act in case of fire.

    2. Silence the Beep: Master the Art of Changing Your Smoke Detector Batteries

      Learning how to change batteries in your smoke detector is a simple yet vital task that ensures your home remains safe and secure. Just a few minutes of maintenance can safeguard you against unforeseen dangers, so let’s dive right in.

      You’ll quickly gain the confidence to handle this essential chore, and you’ll rest easier knowing your alarms are fully operational. By the end of this guide, changing batteries will feel like second nature, and you’ll be prepared for anything!

      Key Takeaways:

      • Regular maintenance of smoke detectors increases home safety.
      • Smoke detector batteries should be changed at least once a year.
      • Follow manufacturer guidelines for your specific model of smoke detector.

      Know Your Smoke Detector

      Types of Smoke Detectors

      Smoke detectors come in various types, each suited for detecting different kinds of fire and smoke conditions. Understanding which type you have installed can help you maintain the device more effectively.

      • Ionization: Quick to detect flaming fires.
      • Photoelectric: Better at sensing smoldering fires.
      • Dual-sensor: Combine both ionization and photoelectric technologies for broader detection capabilities.

      Battery Life and Recommendations

      The battery life of your smoke detector depends on the type of battery used and the model of the detector. It’s crucial to consult the manufacturer’s manual for specific battery replacement recommendations and lifespan.

      Generally, it’s advised to replace smoke detector batteries once a year, but some models equipped with 10-year batteries may not require frequent changes.

      Recommended Battery Changes by Detector Type

      Detector TypeBattery Change Frequency
      Standard BatteryAnnually
      Long-Life BatteryEvery 10 years
      Smart DetectorAccording to manufacturer’s app notifications
      how to change batteries in smoke detector

      Step-by-Step Guide to Changing Smoke Detector Batteries

      Changing the batteries in your smoke detector is a straightforward process, but it varies slightly depending on whether you have a standard battery-operated unit or a hard-wired model.

      Preparation

      Before you begin, ensure you have the correct replacement batteries. Most smoke detectors require 9-volt batteries, but some may need AA or AAA batteries.

      Standard Battery-Operated Detectors

      1. Locate your detector: Find all smoke detectors in your home.
      2. Remove the detector: Depending on the model, you may need to twist the detector off its mounting bracket.
      3. Open the battery compartment: Replace the old battery with a new one, ensuring the positive and negative ends match the terminals.
      4. Test the detector: After replacing the battery, press the test button to ensure it’s working correctly. Listen for a loud beep that indicates everything is in order.

      Hard-Wired Units

      1. Turn off power: Ensure safety by turning off power at the circuit breaker.
      2. Access the battery compartment: Remove the detector if necessary and replace the battery.
      3. Restore power and test: Once the new battery is in place, turn the power back on and test the detector.

      Special Considerations

      • Never deactivate your smoke detector: Even temporarily removing batteries for other uses can leave you unprotected.
      • Check for compatibility: Some detectors are sensitive to specific battery brands or types.

      Troubleshooting Common Issues

      After changing the batteries, some common issues may arise such as continuous beeping or failure to test correctly.

      Continuous Beeping

      • Check battery installation: Ensure the battery is installed correctly and the terminals are not obstructed.
      • Reset the detector: Most detectors have a reset button; use it to reset the device.

      Detector Fails to Test

      • Recheck the battery connection: Make sure the battery is firmly in place.
      • Replace with a new battery: Sometimes, even new batteries can be defective.

      Sometimes, however, issues might arise even with new batteries in place. Here’s how you can address these issues effectively and know when it’s time to call in a professional.

      When to Seek Professional Help

      It’s important to recognize when a situation is beyond your expertise. Here are a few scenarios where you might need professional assistance:

      • Persistent Issues: If your smoke detector continues to beep after you’ve replaced the battery and reset the device, it might indicate a deeper malfunction.
      • Installation Challenges: Installing new smoke detectors or replacing old ones can sometimes require electrical knowledge, especially for hard-wired units.

      For professional installation, you might want to consult with licensed technicians. Ensure they are certified and have good reviews.

      Signs You Need a Professional

      SignAction Suggested
      Continuous false alarmsConsult a professional for a check
      Hard-wired detector issuesProfessional electrical inspection
      Frequent battery replacementsAssessment of device functionality

      Frequently Asked Questions

      How often should I change my smoke detector batteries?

      It’s recommended to change the batteries in your smoke detectors at least once a year. However, if your detector starts chirping before the year is up, replace the batteries immediately to ensure continuous protection.

      Can I use rechargeable batteries in my smoke detector?

      No, most manufacturers recommend against using rechargeable batteries due to their fluctuating voltage levels, which may not provide reliable power for smoke detectors.

      What do I do if my smoke detector keeps beeping after changing the battery?

      First, ensure the battery is installed correctly. If it continues to beep, try resetting the smoke detector by pressing the reset button. If the beeping persists, replace the smoke detector as it may be defective.

      Tips for Long-Term Maintenance

      Maintaining your smoke detectors is an ongoing process. Here are some tips to keep them in working order:

      • Regular Testing: Test each smoke detector monthly by pressing the test button.
      • Keep Them Clean: Dust and debris can impair a detector’s ability to function. Clean them with a vacuum hose or a soft brush attachment every six months.
      • Replace Outdated Units: Smoke detectors should be replaced every ten years from the date of manufacture.

      Quick Battery Replacement Guide: For a visual guide on how to quickly change your smoke detector battery, watch this useful video

      I am hopeful that if you follow these guidelines, it will help keep your smoke detectors reliable and ready to alert you in case of fire. Regular maintenance not only extends the life of your smoke detectors but also enhances your home’s safety. Remember, working smoke detectors save lives!

    3. Timing is Everything: How Fast Can an Electrical Fire Start?

      How long does it take for an electrical fire to start? This question might seem simple, but the answer is crucial to ensuring safety in homes and workplaces.

      Electrical fires can ignite in mere seconds under the right conditions, often catching residents off guard with their rapid development. Getting to know the factors that accelerate these fires is not just informative—it’s essential for preventing potential disasters.

      Key Takeaways:

      • Electrical fires are often caused by faulty wiring, overloaded circuits, or defective appliances.
      • Regular inspections and using appliances wisely are key to prevention.
      • Immediate and correct responses can mitigate damage significantly.

      The time it takes for an electrical fire to start can vary widely depending on several factors including the nature of the electrical failure, the materials involved, and environmental conditions. Here are some key points to consider:

      1. Nature of Electrical Failure: Electrical fires can begin within seconds if there is a direct short circuit. However, in cases where the issue involves overloaded circuits or gradually deteriorating wiring, it might take much longer — possibly hours or even days — for enough heat to build up to ignite nearby combustible materials.
      2. Materials and Conditions: The flammability of materials near electrical sources and the condition of the electrical installation (such as the age and wear of wires, or the presence of dust and debris) play significant roles. Highly flammable materials can catch fire more quickly.
      3. Warning Signs: Often, there are warning signs before an electrical fire starts, such as flickering lights, buzzing sounds from outlets, or the smell of burning plastic. Recognizing and addressing these signs promptly can prevent fires.

      Electrical fires can develop slowly over time through overheating elements, or they can ignite almost instantaneously under certain conditions. Regular inspection and maintenance of electrical systems are crucial to preventing these fires.

      Introduction to Electrical Fires

      how long does it take for an electrical fire to start

      Electrical fires pose a significant risk in both residential and commercial settings. They can cause substantial damage to property and, more importantly, pose serious risks to personal safety. Recognizing the signs and understanding the causes of these fires is the first step in prevention.

      Causes of Electrical Fires

      Electrical fires typically start when heat generated by electricity exceeds what can be safely absorbed by electrical conductors and appliances. Key contributors include:

      • Faulty electrical outlets and aging appliances: Older appliances and outlets are prone to internal damage which can lead to fires.
      • Overloaded circuits: Plugging too many devices into a power strip can exceed the electrical capacity of the circuit.
      • Improper use of extension cords: Frequent use of extension cords instead of permanent wiring can increase risk.
      • Light fixtures: Installing bulbs with wattage that exceeds the fixtures’ ratings can cause overheating.
      Common CausesDetails
      Faulty wiringAging or improperly installed wiring
      Overloaded circuitsToo many devices on one circuit
      Defective appliancesAppliances with frayed cords or faults
      Misuse of extension cordsUsing extension cords as permanent wiring

      Understanding these factors is key for taking proactive steps to prevent electrical fires.

      NFPA Statistics

      Temporal Patterns

      According to National Fire Protection Association , a significant number (30%) of electrical fires fires occurred during the colder months from November through February.

      Electrical fires were less likely to occur overnight (midnight to 8 a.m.), yet this period accounted for over half (54%) of the deaths, indicating the lethal potential of fires that occur while people are likely asleep.

      Origins and Heat Sources

      • Arcing, resulting from unintentional discharges of electrical current, was the heat source in 63% of these fires.
      • Common origins for these fires included kitchens (19%), bedrooms (12%), and concealed spaces like attics or behind walls (10%).

      Prevention Tips

      Preventing electrical fires involves several straightforward, proactive steps:

      • Regular inspections: Have a qualified electrician inspect your home’s electrical system every few years to ensure everything is up to code.
      • Correct appliance usage: Follow manufacturer guidelines for all electrical appliances.
      • Smoke alarms: Install smoke alarms on every level of your home and test them monthly.

      Detection and Safety Measures

      Advancements in technology have led to improved ways to detect and prevent electrical fires before they escalate.

      Technologies for Fire Detection

      Modern homes can be equipped with advanced smoke detectors that not only sense smoke but also monitor electrical installations for abnormal heat signatures. Additionally, arc fault circuit interrupters (AFCIs) can detect dangerous, abnormal electrical patterns and shut down electricity before a fire starts.

      Detection TechnologiesFunction
      Advanced smoke detectorsDetect smoke and abnormal heat
      AFCIs [See products in Amazon]Monitor electrical patterns, prevent fires

      Safety Practices

      Implementing safety measures can significantly reduce the risk of electrical fires:

      • Regular maintenance: Keep electrical appliances and panels free of dust and debris which can ignite.
      • Safe appliance use: Never leave appliances running unattended and always follow manufacturer instructions.

      Staying informed about new safety practices and technologies is crucial. Consider setting up alerts for safety updates or regularly visiting sites like Consumer Product Safety Commission for the latest guidelines.

      Emergency Response

      When an electrical fire starts, quick and decisive action is crucial. Knowing exactly what to do can prevent a fire from spreading and save lives and property.

      Step-by-Step Guide: What to Do

      1. Cut the power: If it’s safe, shut off the main power to the house.
      2. Use the right fire extinguisher: Only use a Class C fire extinguisher for electrical fires.
      3. Evacuate the area: If the fire spreads, leave the house immediately and call 911.
      4. Do not use water: Water conducts electricity and can lead to electrocution if used on an electrical fire.

      Understanding these steps in advance is critical. A quick response can make a significant difference in safety outcomes. For a visual guide on how to respond, watch How to Put Out Electrical Fires.

      When to Call Professionals

      If you’re unsure about the safety of any situation, it’s always best to call professional firefighters. They have the tools and training to handle electrical fires safely.

      ActionExplanation
      Cut the powerStops the flow of electricity, reducing fire risk
      Use a Class C extinguisherSpecifically designed for electrical fires
      Call professionalsThey have the necessary equipment and training

      Recovery and Damage Assessment

      After an electrical fire, assessing the damage and starting the recovery process are your next steps.

      Assessing the Damage

      Hire a professional to inspect electrical systems and appliances involved in the fire. This assessment will determine what is salvageable and what needs replacement.

      Recovery Steps

      1. Document the damage: Take photos and list all damages for insurance claims.
      2. Contact your insurance company: Notify them immediately and start the claims process.
      3. Plan for repairs: Work with licensed contractors to ensure all repairs meet local electrical codes.

      Frequently Asked Questions

      What is the first thing I should do if an electrical fire starts?

      The first step is to shut off the power to your home if it’s safe. This helps prevent the fire from getting worse.

      Can I use water to put out an electrical fire?

      No, never use water on an electrical fire. Water conducts electricity and can cause electrocution.

      Read More: How to Put Out an Electric Fire

      How often should I inspect my home for electrical fire risks?

      It’s recommended to have a professional inspection at least once every five years. Frequent checks for any signs of faulty wiring or overloaded circuits can also help.

      Conclusion

      Staying informed and prepared is your best defense against electrical fires. Understand the steps to take before, during, and after an electrical fire, to ensure the safety of your home and loved ones. Remember, the key is preparation and quick action.

      In addition, emphasis is placed on the importance of modern safety technologies like arc fault circuit interrupters (AFCIs) and smoke alarms in preventing electrical fire incidents.

    4. Understanding the Necessity of a Hearth for Gas Fireplaces

      Gas fireplaces have become a popular choice for homeowners seeking both comfort and convenience. Unlike traditional wood-burning fireplaces, gas fireplaces offer a cleaner, more efficient source of heat without the mess of ash and soot. However, the question of whether a gas fireplace needs a hearth remains a common inquiry among potential buyers and renovators.

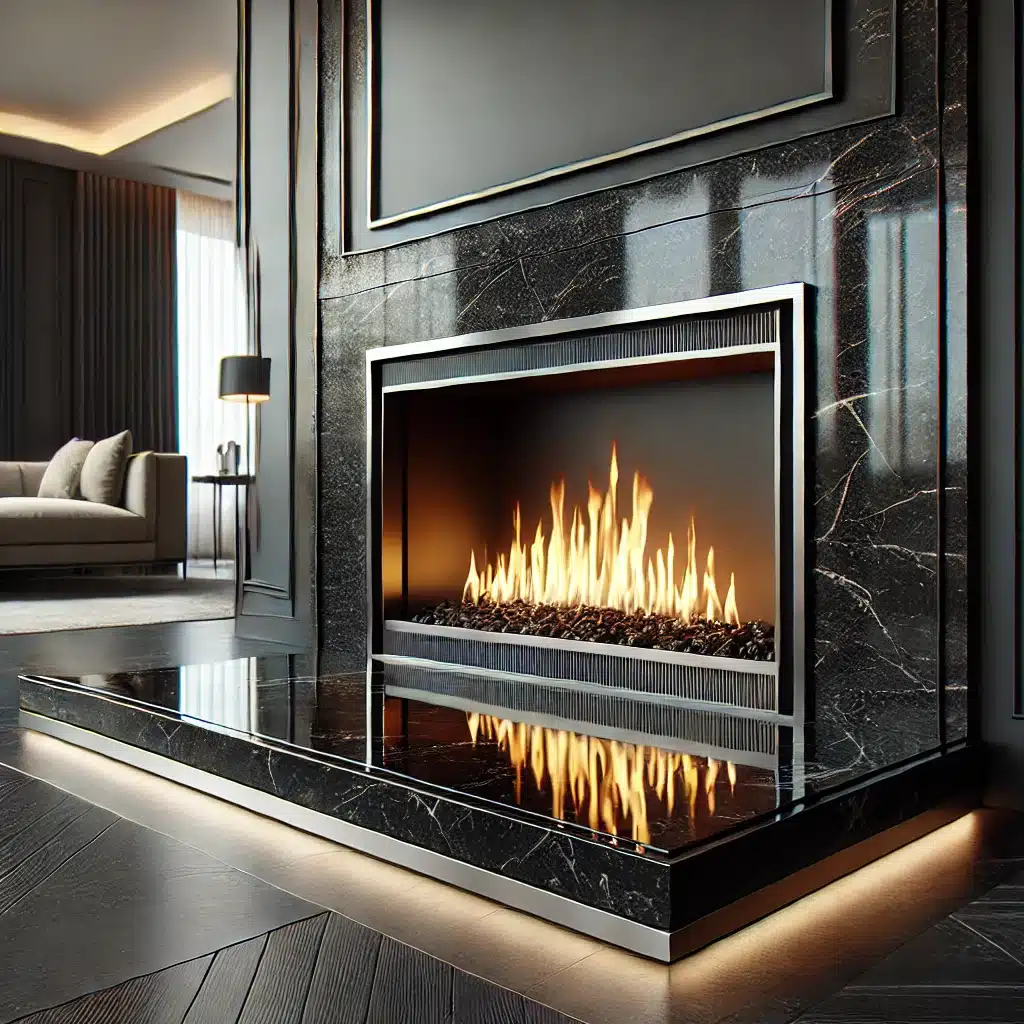
      does a gas fireplace need a hearth

      This article explores the multifaceted answer to this question, focusing on legal, safety, and aesthetic considerations.

      Key Takeaways

      • Legal Requirements: Building codes often mandate hearths for gas fireplaces for safety reasons.
      • Safety Measures: A hearth provides a protective barrier, preventing accidental fires.
      • Design Flexibility: Hearths enhance the visual appeal and can complement the style of any room.
      • Installation Insights: Proper installation is crucial for functionality and safety.
      • Alternative Options: Modern designs offer various alternatives to traditional hearths.

      Legal and Safety Considerations

      Building Codes and Regulations

      When installing a gas fireplace, compliance with local building codes is essential. These regulations often dictate whether a hearth is necessary based on the type of fireplace and its location within the home. For instance, many urban areas require hearths as a safety measure to protect the dwelling from accidental fires.

      • Safety Compliance: Ensures the fireplace installation meets local safety standards.
      • Legal Obligations: Avoids legal issues with housing and fire safety authorities.

      The Role of a Hearth in Fire Safety

      A hearth serves as a critical safety feature for any fireplace, including gas models. Its primary function is to provide a non-combustible barrier between the fireplace and your home’s flooring, which reduces the risk of fire.

      • Protection: Guards against sparks or embers that might escape from the fireplace.
      • Heat Barrier: Shields combustible elements of the house from the heat produced by the fireplace.

      Design and Aesthetic Considerations

      Enhancing Aesthetic Appeal

      The presence of a hearth can significantly enhance the aesthetic value of a gas fireplace. It acts not just as a functional element but also as a centerpiece that can be styled to match the interior décor.

      • Material Choices: Stone, tile, and metal are popular choices that offer versatility in design.
      • Style Matching: Can be designed to complement both modern and traditional decors.

      Hearth Design Options

      Choosing the right hearth design involves considering both the style of the room and the practical aspects of the fireplace’s use.

      Hearth MaterialBenefitsRecommended Uses
      StoneDurable, timeless lookTraditional and rustic settings
      TileCustomizable, various colors and patternsContemporary homes
      MetalModern look, conducts heat wellIndustrial and modern designs

      Installation and Maintenance

      Installing a Hearth for a Gas Fireplace

      Proper installation of a hearth is crucial for ensuring its effectiveness in both safety and function. This process typically involves the following steps:

      1. Base Preparation: Ensuring the floor area is level and capable of supporting the weight of the hearth and fireplace.
      2. Material Selection: Choosing a non-combustible material that complements the overall design of the room.
      3. Installation: Securely installing the hearth material in accordance with building codes and manufacturer’s guidelines.

      Maintenance Tips for Gas Fireplace Hearths

      Maintaining a hearth not only prolongs its life but also ensures that it continues to perform its safety function effectively.

      • Regular Cleaning: Keeps the hearth clear of debris and dust that could catch fire.
      • Inspection: Frequent checks for any cracks or damage that could compromise safety.

      Alternatives to Traditional Hearth Designs

      In modern homes, traditional hearths may sometimes feel out of place or unnecessary. As such, alternative solutions that still comply with safety regulations are becoming more popular.

      • Raised Platforms: Elevate the fireplace, providing a built-in safety barrier.
      • Glass Barriers: Offer protection without the bulk of a traditional hearth, suitable for contemporary homes.

      While not always mandatory, a hearth is an important consideration for anyone installing a gas fireplace. It ensures compliance with safety standards, adds aesthetic value, and provides essential protection against potential fire hazards.

      Traditional hearths, while beautiful and functional, may not suit every home’s style or spatial constraints. Here, we explore modern alternatives that maintain safety without compromising on style.

      Modern Hearth Materials

      Innovative materials offer fire safety while fitting seamlessly into contemporary designs.

      MaterialDescriptionAdvantages
      Tempered GlassHeat-resistant and transparentMaintains clean sight lines
      Polished MetalReflective and heat-distributiveAdds a modern touch
      CompositeManufactured to mimic stone or brickLightweight and versatile

      These materials can be tailored to match any home decor, from ultra-modern to minimalist, ensuring that safety and style go hand in hand.

      Space-Saving Designs

      For smaller spaces, where a traditional hearth might be impractical, consider these options:

      • Wall-mounted Gas Fireplaces: These units require no floor space and can be installed with minimal clearance, eliminating the need for a traditional hearth.
      • Direct Vent Fireplaces: These can be vented directly through a wall, greatly reducing the need for extensive hearth arrangements.

      Explore the latest in fireplace technology and design on the Hearth, Patio & Barbecue Association website, which provides a wealth of information on Hearth design options at Hearth, Patio & Barbecue Association.

      Maintenance and Care of Gas Fireplaces and Hearths

      Maintaining your gas fireplace and hearth not only ensures continued efficiency but also prolongs their lifespan.

      Regular Cleaning and Inspection

      TaskFrequencyImportance
      Visual InspectionMonthlyCheck for cracks or damage
      Professional InspectionAnnuallyEnsure operational safety
      Cleaning Hearth SurfaceAs neededPrevent buildup of debris

      For more detailed maintenance tips and strategies, refer to our article on Effective Strategies for Extinguishing Chimney Fires.

      Safety Checks

      • Check Ventilation: Ensure that your fireplace vents are clear of obstructions to maintain good air quality.
      • Test Safety Features: Regularly test any installed safety devices, such as carbon monoxide detectors, to ensure they are functional.

      Frequently Asked Questions

      Do all gas fireplaces require a hearth?

      No, not all gas fireplaces require a hearth. It depends on the type of fireplace, its installation, and local building codes. Consult with a professional or refer to local regulations to determine specific requirements for your setup.

      Can I install a gas fireplace without professional help?

      While DIY projects can be tempting, installing a gas fireplace typically requires professional expertise to ensure it meets safety standards and operates efficiently. Incorrect installation can lead to serious safety risks.

      What is the best material for a gas fireplace hearth?

      The best material for a gas fireplace hearth depends on your aesthetic preference and functional needs. Non-combustible materials like stone, tile, and metal are popular choices due to their safety and durability.

      How often should I replace my gas fireplace?

      The lifespan of a gas fireplace can vary widely based on the model, usage, and maintenance. On average, a well-maintained gas fireplace can last between 15 to 25 years. Regular service and repairs can extend its usable life.

      In wrapping up, while the article does not end with a formal conclusion, the information provided aims to equip you with a thorough understanding of why and how a hearth can be an essential part of your gas fireplace installation, whether for safety, compliance, or aesthetic reasons.

      Remember, always prioritize safety and compliance with local regulations when planning your fireplace installation.

    5. How to Rapidly Eliminate Fire Smoke Smell from Your Home

      Experiencing a house fire can be one of the most challenging events in a person’s life. Not only does it pose serious risks to physical health and property, but it also leaves behind a persistent reminder of the incident: the smell of smoke. Removing this odor quickly and effectively is crucial for returning life to normal and minimizing long-term damage to your home.

      Key Takeaways:

      • Immediate Actions: Quick response can greatly reduce smoke odor.
      • Cleaning Techniques: Variety of methods depending on the affected materials.
      • Preventative Measures: Steps to avoid future incidents and maintain a fresh environment.

      Immediate Actions to Take

      Ventilate the Area

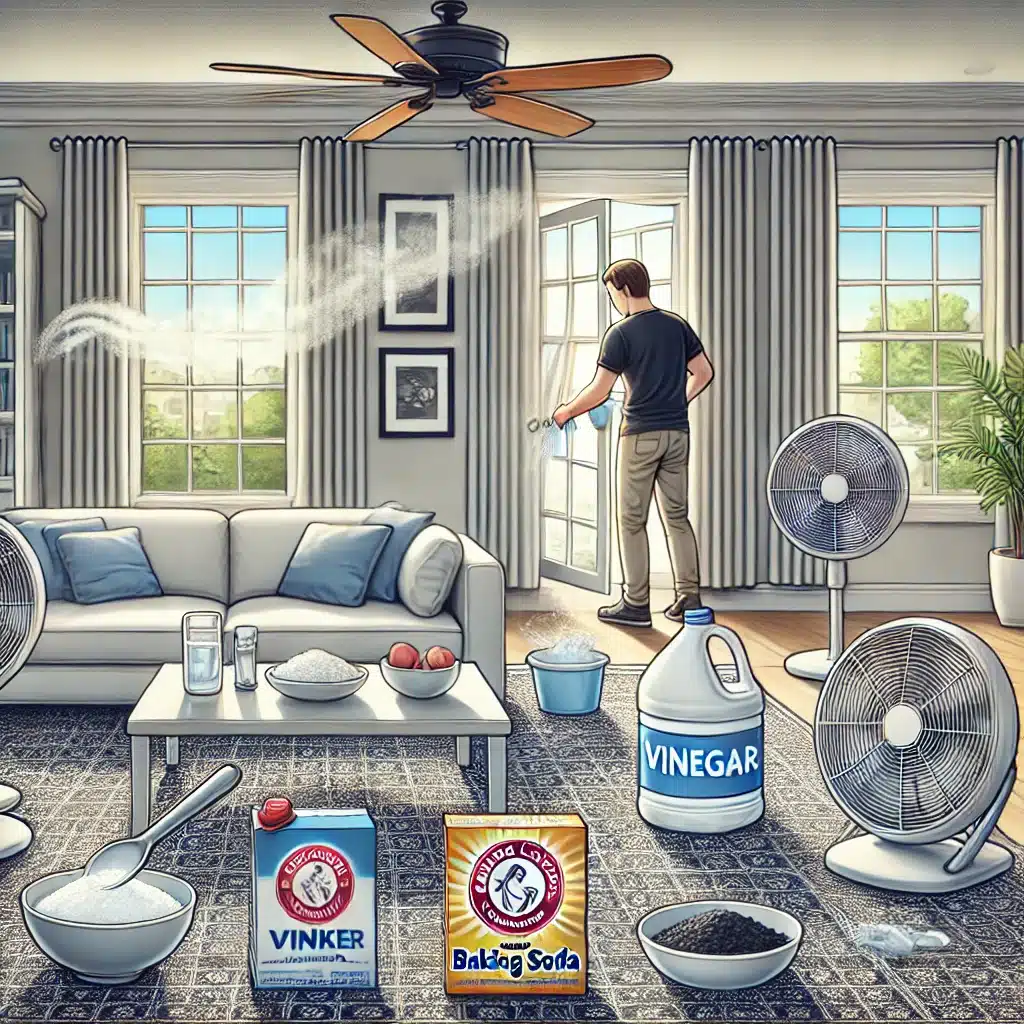
      The first step in eliminating smoke smell is to ventilate your home thoroughly. This involves opening all windows and doors to create a cross-flow of air that helps to carry the smoke out of the house.

      Additionally, positioning fans strategically throughout your home can aid in this process. It’s important to start this as soon as it is safe to enter your home after a fire.

      Remove Contaminated Items

      Items severely affected by smoke should be removed and cleaned outside of the home if possible. This includes curtains, bedding, and clothing.

      Non-porous items, like dishes and metal furniture, should be cleaned separately to avoid contaminating other areas.

      Clean All Surfaces

      Smoke particles can settle on every surface of your home, including ceilings and walls. Cleaning these areas with a solution of water and vinegar can help neutralize the smoke smell.

      For walls and other painted surfaces, the use of trisodium phosphate (TSP) may be required to break down the smoke residue effectively.

      Cleaning Techniques for Smoke Odor Removal

      Natural Remedies

      Using natural substances like vinegar or baking soda can be effective in absorbing and neutralizing odors.

      Bowls of vinegar can be placed around the home to help absorb the smoke odors from the air, and baking soda can be sprinkled on carpets and furniture before vacuuming to help absorb odors from fabrics.

      Use of Activated Charcoal

      Activated charcoal is another natural product that excels at odor absorption.

      Placing bowls of activated charcoal around rooms affected by smoke can help in removing the odor over several days.

      Technological Solutions

      For persistent smoke odors, technological solutions such as air purifiers and ozone generators might be necessary.

      Air purifiers equipped with HEPA filters can capture smoke particles from the air, while ozone generators are used in more severe cases to break down smoke molecules, effectively neutralizing the odor.

      Comparison of Odor Removal Techniques

      MethodEffectivenessCost-EfficiencyEase of Use
      Natural AbsorptionModerateHighVery Easy
      Chemical CleanersHighModerateModerate
      Technological DevicesVery HighLowEasy

      Advanced Cleaning Methods

      For deeper penetrations of smoke odor, especially in porous materials like drywall and wood, more advanced methods may be needed.

      Thermal Fogging

      This technique uses a fogging device that emits a cloud of odor-neutralizing particles that can penetrate building materials similar to how smoke does.

      It is highly effective but should be conducted by professionals due to the chemicals involved.

      Ozone Treatment

      Ozone treatment involves releasing ozone into the room to chemically neutralize smoke odor. This method is very effective but requires the home to be vacated during treatment to avoid health risks associated with high ozone levels.

      These initial steps and techniques provide a foundation for effectively removing the smell of smoke from a house.

      They emphasize the need for quick action and the use of various methods tailored to the severity and scope of the smoke damage.

      For further guidance, consult resources like the EPA’s indoor air quality guidelines or seek professional advice for severe cases. Additional support can be found through services like Red Cross disaster relief.

      Preventative Measures and Maintenance

      Maintaining a smoke-free environment after addressing an initial smoke damage incident is crucial for both comfort and health.

      As a homeowner you can implement preventative measures and regular maintenance routines. This will significantly reduce the risk of enduring severe smoke odor issues in the future.

      Routine Cleaning

      Regular cleaning plays a vital role in preventing the accumulation of dust and potential allergens that can absorb and retain unwanted odors, including smoke.

      Focusing on textiles such as carpets, curtains, and upholstery is particularly important, as these are prime targets for smoke odor absorption.

      Air Quality Management

      Investing in good air quality can drastically improve the longevity of a smoke-free environment.

      Utilizing air purifiers with HEPA filters can help capture any lingering smoke particles and other pollutants. Regularly replacing these filters ensures their effectiveness and maintains indoor air quality at optimal levels.

      Installing Smoke Detectors

      While smoke detectors are crucial for safety, they also serve as an early warning system to manage and mitigate smoke dispersion from any source quickly.

      Ensuring that smoke detectors are functional and placed strategically throughout the home can prevent extensive smoke damage and odor.

      Preventative Measures for Smoke Odor

      Preventative MeasureDescriptionFrequency
      Routine CleaningVacuuming and washing fabrics to remove dust and odors.Weekly
      Filter ReplacementChanging filters in HVAC and air purifiers.Every 3 months
      Detector ChecksTesting and replacing batteries in smoke detectors.Annually

      FAQs on Removing Smoke Odor

      How can I remove smoke smell from books and paper?

      • For books and paper, airing them out in a dry, well-ventilated area can help. Sprinkling baking soda on pages or placing them in a container with activated charcoal can also absorb odors without damaging the material.

      Is it safe to stay in a home during ozone treatment for smoke odor?

      • It is not safe to remain in the home during ozone treatment. Ozone can irritate the lungs and respiratory system, so it’s essential to vacate the premises while this treatment is in progress.

      Can vinegar remove smoke smell from walls?

      • Yes, vinegar can help neutralize smoke odors on walls. Wipe the walls with a mixture of one part vinegar to one part water, then rinse with clean water and dry thoroughly.

      By following these guidelines and utilizing the resources provided, homeowners can effectively manage and prevent smoke odors in their homes, ensuring a safe and pleasant living environment.

    6. First Alert Z Wave Smoke Detector and Home Assistant: Smarter, Safer Homes

      Enhancing your home’s safety is now smarter than ever with the First Alert Z Wave smoke detector integrated with Home Assistant. This game-changing combination not only adds a layer of security but also brings modern convenience into your safety protocols.

      Imagine getting real-time alerts and managing potential hazards with just a few taps on your smartphone. Dive into this article to discover how this innovative setup can revolutionize the way you protect your home and loved ones.

      First Alert Z Wave Smoke Detector and Home Assistant

      Smoke detectors are an essential component of any smart home safety system, providing critical alerts in the event of fire or carbon monoxide presence. The First Alert Z Wave Smoke Detector, integrated with Home Assistant, offers a robust solution for these safety needs.

      Here’s a detailed guide to help you understand, set up, and troubleshoot this smart device in your home.

      Key Takeaways:

      • Understanding the features and setup of First Alert Z Wave Smoke Detector with Home Assistant.
      • Step-by-step guidance on troubleshooting common issues.
      • Insight into product specifications and Home Assistant configurations.

      Understanding the First Alert Z Wave Smoke Detector

      The First Alert Z Wave Smoke Detector is a cutting-edge device that offers protection against smoke and carbon monoxide.

      Its integration with Home Assistant allows for smart home automation and real-time alerts, enhancing the safety and convenience of your home.

      Setting Up the Device with Home Assistant

      Setting up the First Alert Z Wave Smoke Detector with Home Assistant requires a USB Aeotec Z-Stick and involves steps like excluding the device from the network and then adding it back.

      A common initial step is to ensure that the device is properly excluded before integration.

      Excluding the Device

      • Slide out the battery tray.
      • In Home Assistant Z-Wave console, press ‘Remove Node’.
      • Hold the ‘Test’ button and slide in the battery tray, releasing after the first beep.

      Adding the Device to the Network

      • Repeat the process, but use the ‘Add Node’ button.
      • A second beep indicates a successful network join.

      Common Setup Issues and Solutions

      Users often face issues where alarmType and alarmLevel entities do not show up in Home Assistant or the device does not wake up. Solutions include:

      • Re-interviewing the node in Home Assistant.
      • Performing the pairing steps while re-interviewing.
      • Restarting Home Assistant to make entities appear.

      Product Features and Specifications

      The First Alert ZCOMBO detector offers features like:

      • 2-in-1 detection for smoke and carbon monoxide.
      • Battery operation for convenience.
      • Compatibility with Z-Wave and Ring systems.

      Home Assistant Configuration and Automation

      Configuring the detector in Home Assistant involves setting alarm types and levels and creating automation for detection and alerts.

      Real-Time Alerts and Notifications

      • Configure Home Assistant to send mobile alerts.
      • Set up email notifications for detected dangers.

      Troubleshooting Tips

      If you encounter issues like the device not showing up in Home Assistant or not staying awake long enough for the query process to complete, consider these tips:

      • Manually waking the device during the inclusion process.
      • Using the open/close battery method for pairing.
      • Restarting Home Assistant for entities to appear.

      Useful Tables

      Here are some tables filled with valuable information regarding the First Alert Z Wave Smoke Detector:

      Table 1: Feature Comparison

      FeatureDescription
      Detection TypeSmoke and Carbon Monoxide
      CompatibilityZ-Wave, Ring
      OperationBattery-operated
      AlertsMobile and Email Notifications

      Table 2: Troubleshooting Solutions

      IssueSolution
      Entities not showing upRe-interview node, restart Home Assistant
      Device not waking upManually wake during inclusion, open/close battery method

      Advanced Configuration and Automation

      With Home Assistant, you can take the capabilities of your First Alert Z Wave Smoke Detector to the next level. This involves setting up complex automations and integrating it with other smart home devices.

      Customizing Alerts and Automations

      • Setting up different alerts for smoke and carbon monoxide detection.
      • Integrating with smart lights to flash in case of an alarm.

      Table 3: Automation Ideas

      Automation TypeDescription
      Light FlashingSmart lights flash when smoke is detected
      Mobile AlertsReceive alerts on your phone for smoke or CO2

      Additional Troubleshooting Tips

      Sometimes, even after the initial setup, you might encounter issues like the device not responding or false alarms. Here are some additional troubleshooting steps:

      • Ensure the device firmware is up to date.
      • Check for any interference from other wireless devices.
      • Validate that the device is within the Z-Wave network range.

      FAQs

      Here, we address some of the most common questions users have regarding the First Alert Z Wave Smoke Detector and its integration with Home Assistant.

      How do I update the firmware of my First Alert Z Wave Smoke Detector?

      Check the manufacturer’s website for firmware updates and follow their instructions for the update process.

      Can I integrate the First Alert Z Wave with other smart home ecosystems?

      Yes, it is compatible with systems like Z-Wave and Ring.

      What should I do if my detector gives false alarms frequently?

      Ensure it’s not placed near cooking appliances or bathrooms to avoid steam and cooking smoke, which can trigger false alarms.

      Concluding Thoughts

      This guide aimed to provide you with a comprehensive understanding of integrating and maximizing the First Alert Z Wave Smoke Detector with Home Assistant.

      From setup and troubleshooting to advanced configurations and automation, this device, when properly integrated, can significantly enhance the safety and efficiency of your home’s smoke and carbon monoxide detection system.

      Remember, the key to successful integration lies in understanding your device’s capabilities, staying updated with firmware, and leveraging the power of Home Assistant to create a smarter, safer home environment.

      Resources Links

    7. Kitchen Safety Tips for Holiday Cooking

      Holiday cooking brings joy and festivity to the kitchen, but it also introduces unique safety challenges.

      Whether you’re an experienced chef or a holiday cooking novice, understanding and implementing kitchen safety tips is crucial for a safe and enjoyable holiday season.

      Key Takeaways

      • Prepare your kitchen: Ensure it’s clean, organized, and equipped with working smoke detectors and fire extinguishers.
      • Cooking techniques: Manage stove and oven use wisely, avoid cross-contamination, and store food properly.
      • Child and pet safety: Implement measures to keep them safe around the kitchen area.
      • Handle emergencies effectively: Know how to deal with burns, cuts, and fire hazards.

      Preparing Your Kitchen for Safe Holiday Cooking

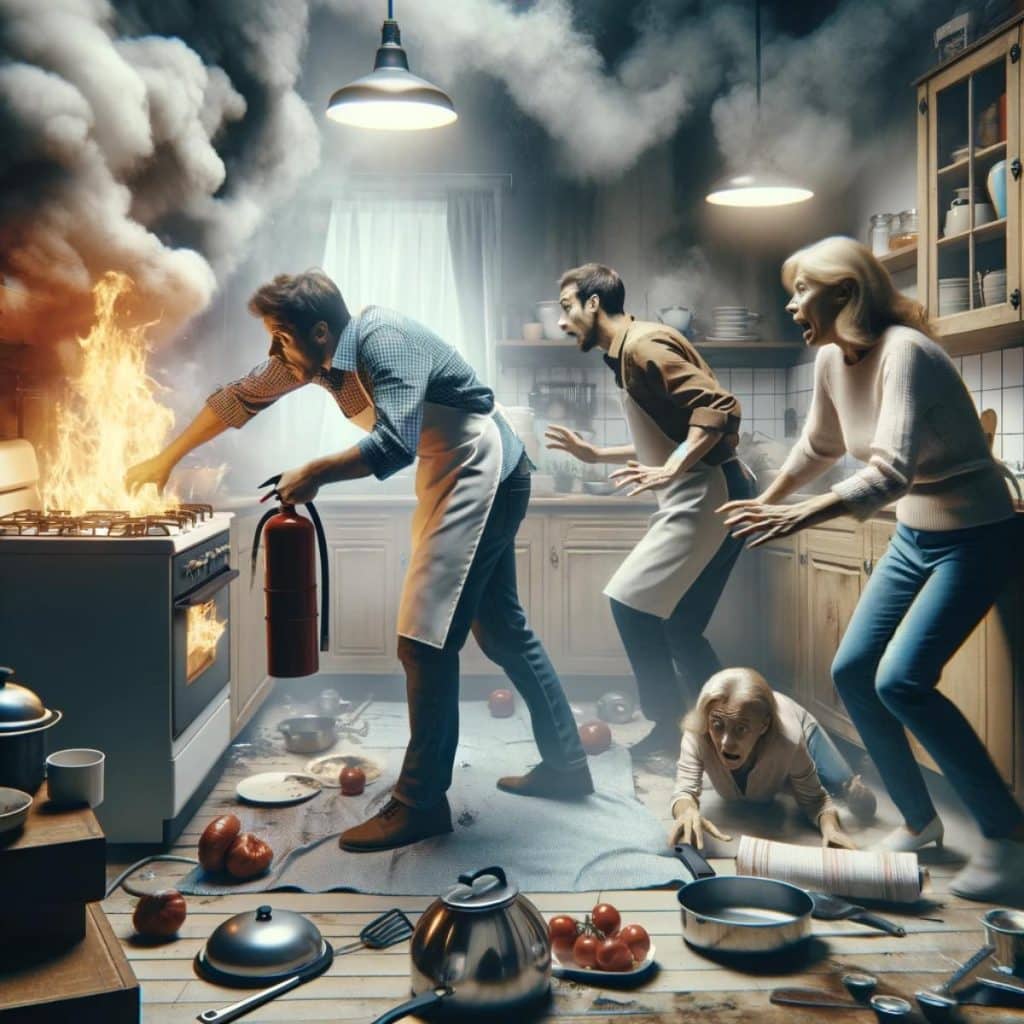
      A chaotic kitchen scene depicting a small fire on the stove. A family is trying to extinguish the fire. They are using a fire blanket

      Ensuring a Safe Environment

      Before the cooking frenzy begins, it’s vital to prepare your kitchen.

      This means cleaning and organizing to avoid accidents and ensuring safety equipment is functional.

      Safety Equipment Checklist

      Table 1: Essential Kitchen Safety Equipment

      EquipmentPurpose
      Smoke DetectorDetects smoke and fire early
      Fire ExtinguisherFor handling small fires
      First-Aid KitFor minor injuries

      Organizing for Efficiency and Safety

      A well-organized kitchen not only makes cooking more efficient but also safer.

      Table 2: Tips for Organizing Your Kitchen

      TipDescription
      Clear CountertopsKeep them free of clutter – minimize chances of flammable materials
      Store Knives SafelyUse a knife block or drawer insert – avoid cuts
      Organize PantryKeep frequently used items within easy reach

      Safe Cooking Techniques

      Stove and Oven Management

      The stove and oven are the heart of holiday cooking, but they also pose significant risks.

      Preventing Burns and Fires

      • Always monitor what you’re cooking. Never leave cooking unattended.
      • Use back burners when possible, especially when kids are around.
      • Keep flammable items away from the stove and oven.

      Avoiding Cross-Contamination

      Cross-contamination can lead to foodborne illnesses, a sure way to spoil holiday festivities.

      Cross-Contamination Prevention Tips

      • Use separate cutting boards for raw meats and vegetables.
      • Always wash hands before and after handling different foods.
      • Store raw and cooked foods separately in the refrigerator.

      Proper Food Storage and Handling

      Proper food storage is key to preventing spoilage and contamination.

      Safe Food Storage Practices

      • Refrigerate perishable items promptly.
      • Use airtight containers to store leftovers.
      • Check food temperatures with a thermometer.

      For detailed guidelines, visit Food Safety for the Holidays.

      Table 3: Ideal Refrigeration Temperatures for Common Foods

      Food ItemTemperature
      MeatsBelow 40°F (4°C)
      Dairy ProductsBelow 40°F (4°C)
      Cooked LeftoversBelow 40°F (4°C)

      Child and Pet Safety in the Kitchen

      Keeping Kids and Pets Safe

      The hustle and bustle of holiday cooking can be dangerous for children and pets.

      Strategies for Safety

      • Create a kid-free zone near the stove and oven.
      • Store hazardous items like cleaning agents and knives out of reach.
      • Engage children in safe activities away from the kitchen.

      Learn more about child safety in the kitchen

      Handling Kitchen Emergencies

      Dealing with Burns, Cuts, and Fire Hazards

      Despite precautions, accidents can happen.

      Emergency Handling Tips

      • For minor burns, run cool water over the area and cover it with a clean, dry cloth.
      • In case of cuts, apply pressure with a clean cloth and seek medical attention if necessary.
      • For small fires, use a fire extinguisher or baking soda to smother it.

      For more on handling fire emergencies

      Handling Kitchen Emergencies Continued

      What to Do in Case of Fire

      Kitchen fires are a common hazard during the holiday cooking frenzy.

      Fire Emergency Tips

      • Never throw water on a grease fire. Use a fire extinguisher or baking soda.
      • If an oven fire occurs, turn off the heat and keep the door closed.
      • Evacuate and call 911 for uncontrollable fires.

      For additional safety tips, view

      Ensuring a Hazard-Free Zone for Children and Pets

      Holidays often mean kids and pets are around the kitchen more than usual, increasing the risk of accidents.

      Safety Strategies

      • Supervise children at all times in the kitchen.
      • Keep pets out of the kitchen during cooking and prep times.
      • Store dangerous items like knives and cleaning agents securely.

      Table 6: Safety Tips for Children and Pets in the Kitchen

      TipDescription
      SupervisionAlways keep an eye on children in the kitchen
      Pet-Free ZoneSet boundaries to keep pets away from cooking areas
      Secure StorageLock away hazardous items

      Frequently Asked Questions

      What should I do if there is a cooking fire?

      • If a small fire ignites, do not pour water on it. Instead, slide a lid over the pan to smother the fire and turn off the stovetop. Leave the pan covered until it has completely cooled. Baking soda can also be used to extinguish small grease fires. For oven fires, turn off the heat and keep the oven door closed. In the event of a large fire, evacuate immediately and call 911.

      How can I prevent kitchen fires during the holidays?

      • Never leave cooking unattended and keep anything that can catch fire, like oven mitts or wooden utensils, away from the stovetop. Avoid wearing loose clothing or dangling sleeves while cooking. Be cautious with steam, as it can cause serious burns. Keep lids nearby to smother small fires quickly. Make sure to have a fire extinguisher accessible and test your smoke detectors regularly.

      Are there specific tips for frying a turkey safely?

      • Frying a turkey is high-risk. Ensure your turkey fryer has temperature controls and a stable stand. It’s safer to start with a smaller turkey, as they require less oil. Make sure the turkey is fully thawed to prevent oil from spilling over when it is placed in the fryer. Always use turkey fryers outside on a cement surface and a safe distance from your home.

      What are common causes of kitchen fires?

      • Common causes include overheating oil (grease fires), leaving pots or fryers unattended, cluttering the cooking area with flammable objects, and misusing equipment. Be vigilant about removing flammable items from heated appliances and turn off ranges and ovens when not in use.

      What safety measures should be taken when using kitchen appliances?

      • Unplug small appliances when not in use to avoid clutter and potential hazards. Be aware of kitchen towels, oven mitts, and other combustible materials that could easily catch fire. Regularly check food while simmering or slow cooking and use timers to avoid overcooking and potential fire hazards.

      By following these guidelines, you can greatly reduce the risk of kitchen fires during your holiday cooking. Stay vigilant and prioritize safety to enjoy a happy and safe holiday season.

      Conclusion

      As you gear up for the holiday season, remember that safety in the kitchen is paramount.

      From organizing your space to ensuring proper food handling and dealing with emergencies, these tips will help you navigate the holiday cooking season with ease and safety.

      Stay informed, stay vigilant, and most importantly, enjoy the time spent cooking and celebrating with your loved ones.

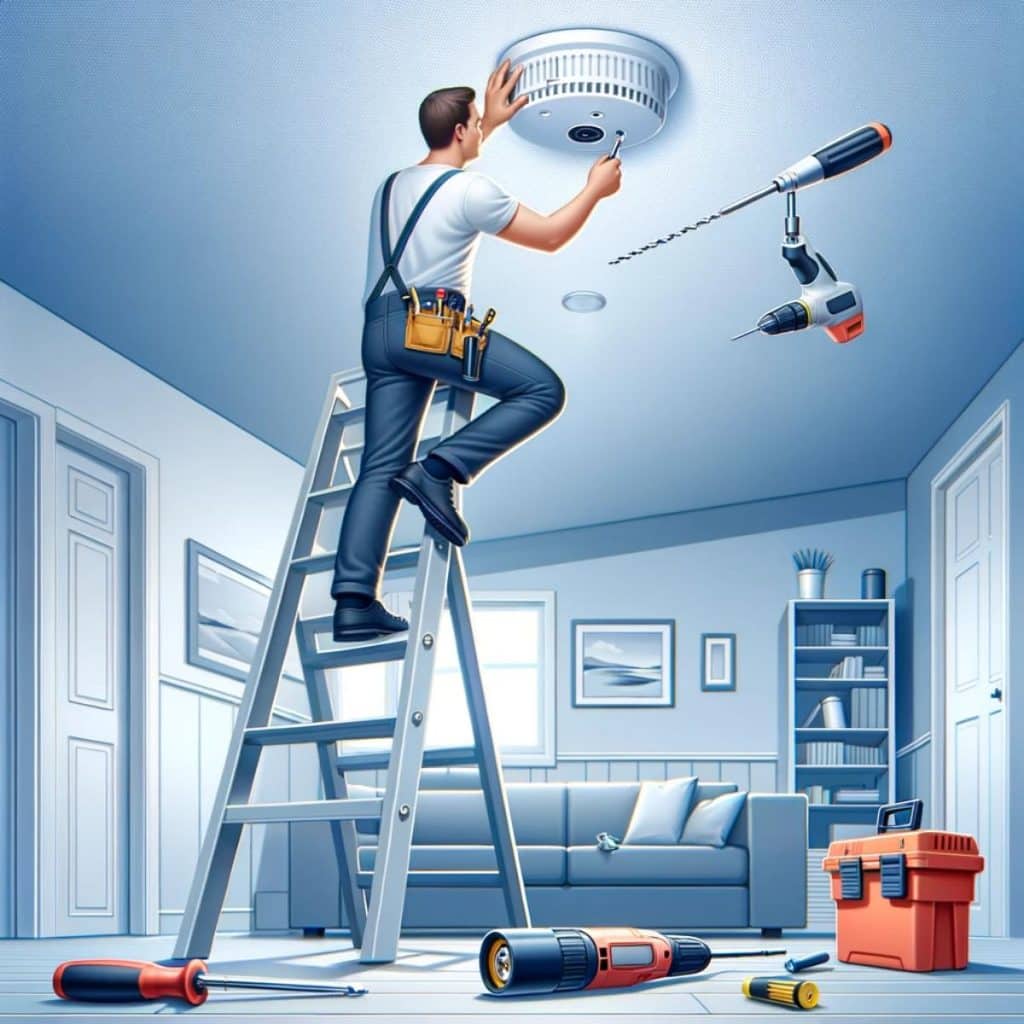
    8. Smoke Detector Camera Installation Guide

      Welcome to the comprehensive guide on installing smoke detector cameras—a clever blend of home safety and surveillance technology. In this article, we’ll walk you through everything you need to know to install and optimize your smoke detector camera for maximum security and efficiency.

      Key Takeaways:

      • Understanding the basics and types of smoke detector cameras.
      • Step-by-step guide on installation.
      • Legal considerations for privacy and compliance.
      Smoke Detector Camera Installation Guide

      Understanding Smoke Detector Cameras

      Smoke detector cameras are ingenious devices that combine the functionality of a smoke detector with the surveillance capability of a camera. They provide discreet monitoring while maintaining the appearance of a standard smoke detector.

      Types of Smoke Detector Cameras

      • Standard Definition (SD) Cameras: Cost-effective but lower video quality.
      • High Definition (HD) Cameras: Offer clearer, more detailed footage.
      • Night Vision Enabled Cameras: Ideal for low-light conditions.
      • WiFi-Enabled Cameras: Allow remote access and control.

      Selecting the Right Camera

      Choosing the right smoke detector camera depends on your specific needs and environment.

      Factors to Consider

      • Video Quality: HD cameras provide clearer footage.
      • Connectivity: WiFi-enabled cameras offer remote access.
      • Power Source: Battery-powered or wired.
      • Legal Compliance: Ensure the camera complies with local privacy laws.

      Where to Purchase

      Smoke detector cameras can be purchased from electronics stores, online retailers, or directly from manufacturers. Always ensure you buy from reputable sources.

      Installation Guide

      Installing a smoke detector camera requires some basic tools and understanding of home electronics.

      Tools Required

      • Screwdriver
      • Drill (if required for mounting)
      • Ladder or step stool

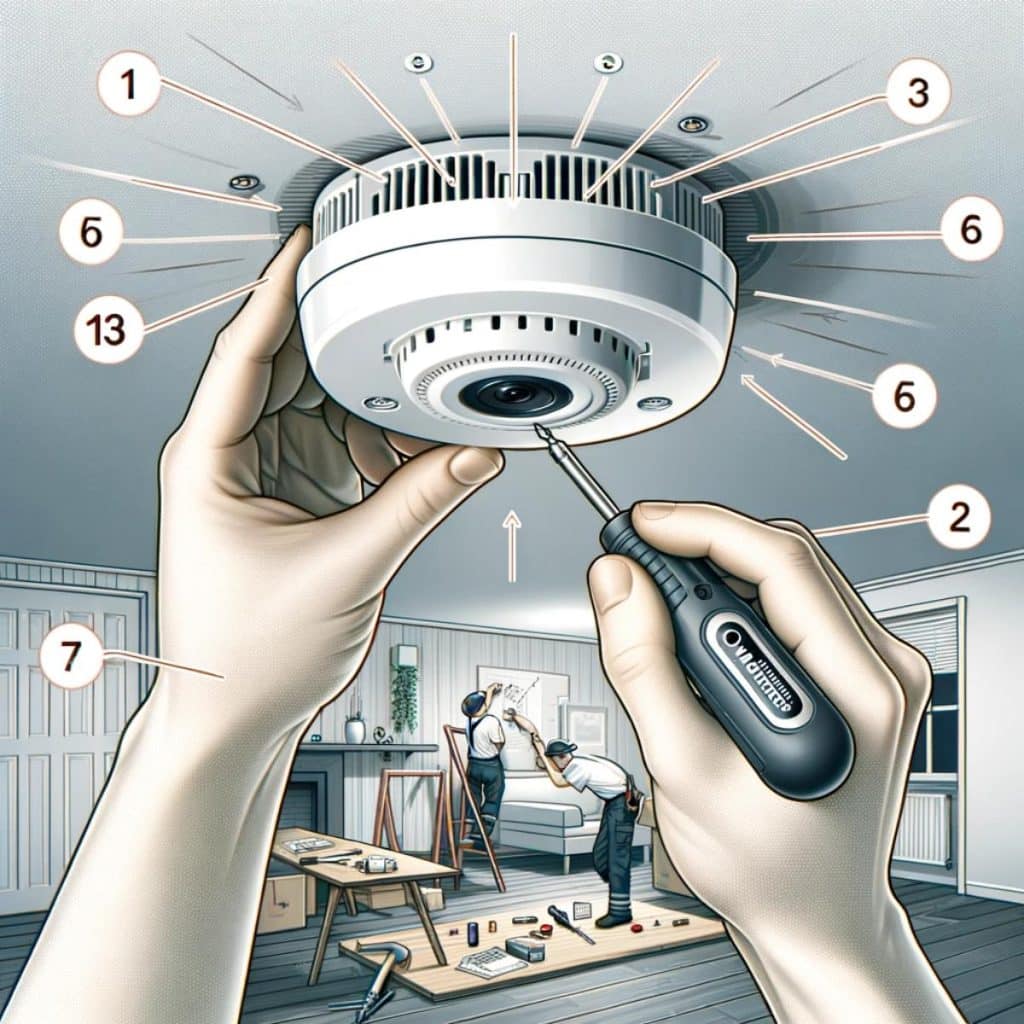
      Installation Steps

      • Choose the Location: Ideally, it should be installed on the ceiling in the center of the room for maximum coverage.
      • Mount the Bracket: Use the screws provided to secure the mounting bracket.
      • Install the Camera: Attach the camera to the bracket and ensure it’s securely in place.
      • Connect to Power Source: Depending on the model, connect it to the power source, whether it’s wiring it to your home’s electrical system or inserting batteries.

      Testing the Camera

      After installation, test the camera to ensure it’s functioning properly. Check the video feed, motion detection, and any other features your camera may have.

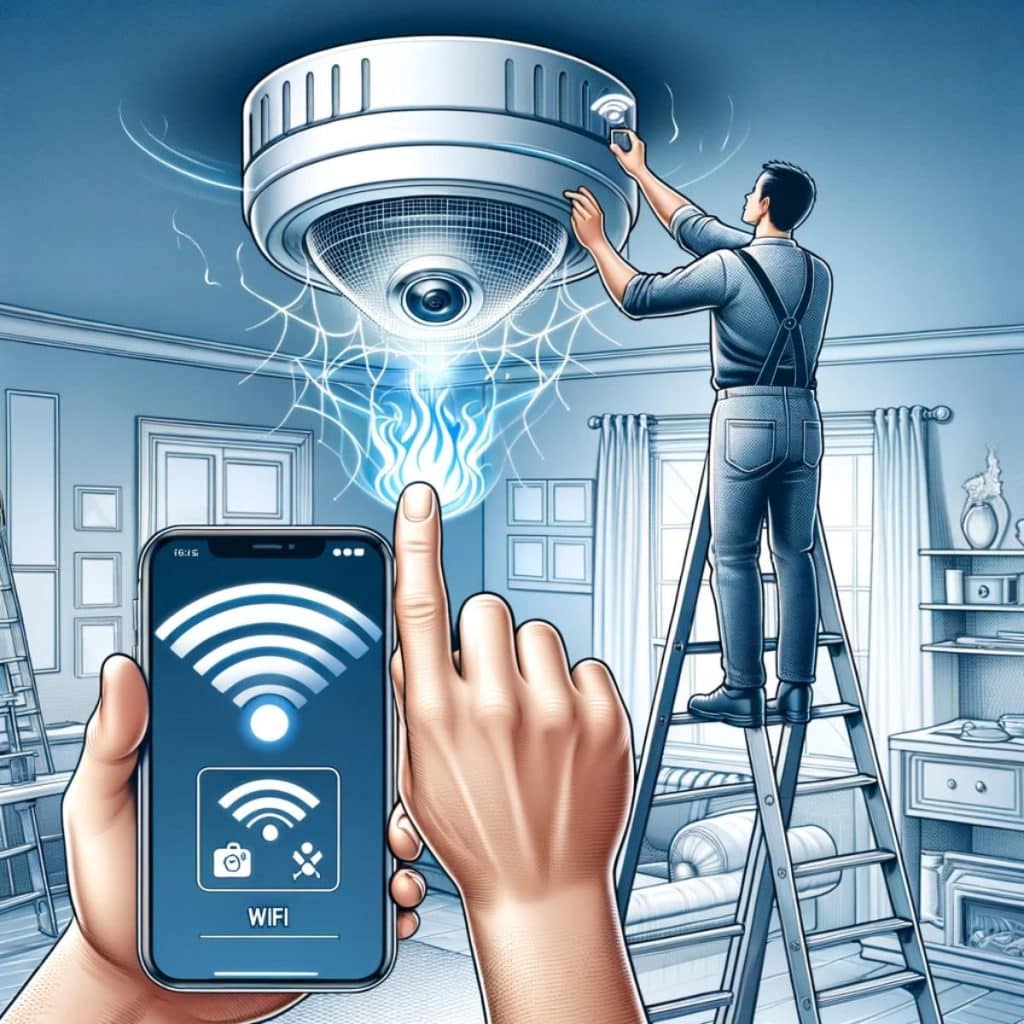
      Connecting to WiFi and Setting Up the App

      For WiFi-enabled smoke detector cameras, the next step is to connect them to your home network and set up any associated mobile apps.

      Steps for WiFi Connection

      • Download the App: Download the app associated with your camera.
      • Create an Account: Register for an account if required.
      • Connect to WiFi: Follow the app instructions to connect the camera to your home WiFi network.
      Smoke detector camera with two-way communication

      Using the App

      • View Live Feed: Check the live feed from your camera anytime.
      • Adjust Settings: Customize settings such as motion detection sensitivity and notifications.

      Legal Considerations

      It’s crucial to understand and comply with legal considerations when installing and using a smoke detector camera.

      Privacy Laws

      • Consent for Audio Recording: In some jurisdictions, it’s illegal to record audio without consent. Check local laws before using this feature.
      • Notification to Occupants: In some areas, you may be required to notify occupants or guests about the presence of surveillance devices.

      For an in-depth understanding of what features to look for in a hidden camera smoke detector, you can refer to this article,

      Maintenance and Troubleshooting

      Regular maintenance ensures your smoke detector camera works effectively.

      Maintenance Tips

      • Regularly Check Battery Levels: Replace or charge batteries as needed.
      • Clean the Lens: Keep the camera lens clean for clear footage.
      • Update Software: Keep the camera’s software up to date for optimal performance.

      Troubleshooting Common Issues

      • Connectivity Issues: Check WiFi settings and router connection.
      • Video Quality Problems: Clean the lens and check camera settings.

      For a practical demonstration of smoke detector camera installation, you can watch this video on YouTube

      Advanced Features and Customization

      Continuing our journey with smoke detector cameras, let’s delve into the advanced features and customization options that can elevate your home security experience.

      Motion Detection and Alerts

      • Motion Sensitivity: Customize the sensitivity settings to avoid false alarms.
      • Instant Alerts: Receive real-time notifications on your smartphone when motion is detected.

      Recording and Storage Options

      • Local Storage: Some models offer SD card storage for easy access to footage.
      • Cloud Storage: Provides off-site storage, ensuring your data is safe even if the camera is tampered with.

      Integration with Home Security Systems

      • Compatibility: Check if your smoke detector camera can integrate with existing home security systems for a unified approach to home safety.

      Customizing Camera Settings

      • Field of View: Adjust the camera angle to ensure optimal coverage of your space.
      • Resolution: Modify the resolution settings based on your preference and storage capacity.

      Frequently Asked Questions

      Let’s address some common queries regarding smoke detector cameras:

      • Can smoke detector cameras be used outdoors?
        • Generally, they are designed for indoor use due to their appearance and functionality.
      • How do I know if my smoke detector camera is working?
        • Regular testing and checking the app for live feeds can ensure your camera is operational.
      • Are these cameras visible to others?
        • They are designed to be discreet, but a close inspection may reveal their true nature.

      Privacy and Legal Compliance

      Adhering to legal standards is crucial when installing and using smoke detector cameras.

      Understanding Surveillance Laws

      • Recording Consent: Be aware of the laws regarding video and audio recording in your region.
      • Informing Households and Guests: It’s ethical and often legally required to inform others about surveillance devices in your home.

      Avoiding Legal Pitfalls

      • Consult Legal Advice: If in doubt, consult with a legal expert to ensure compliance with surveillance laws.

      For more insights into the legal aspects of audio recording with hidden devices, consider reading this comprehensive guide

      Long-Term Maintenance and Upgrades

      Maintaining your smoke detector camera ensures its longevity and effectiveness.

      Regular Firmware Updates

      • Security Patches: Keep your camera’s firmware updated to protect against security vulnerabilities.
      • Feature Enhancements: Firmware updates often include improvements and new features.

      Physical Maintenance

      • Dust and Debris: Regular cleaning can prevent dust accumulation, ensuring clear video quality.
      • Battery Checks: For battery-operated models, replace batteries periodically to avoid power interruptions.

      Understanding the Technology Behind Smoke Detector Cameras

      Gaining a deeper understanding of the technology can help you make informed decisions and troubleshoot issues effectively.

      Image Sensors and Lens Technology

      • CMOS Sensors: Common in modern cameras, offering good image quality in various lighting conditions.
      • Lens Quality: Affects the clarity and field of view of the footage.

      WiFi Connectivity and Network Security

      • Secure Networks: Ensure your home WiFi network is secure to protect the camera feed from unauthorized access.
      • Bandwidth Usage: Consider the impact of continuous video streaming on your home network’s bandwidth.

      For additional tips and instructions on installing smoke detector cameras, you might find this video useful:

      Remember, while smoke detector cameras offer an added layer of security, they should complement, not replace, your standard smoke detectors and home security measures. Stay informed, stay compliant, and stay safe!

    9. Smoke Detector Blinking Green? Here’s Why!

      If you’re wondering why your smoke detector is blinking green, you’re not alone. This can be a common occurrence for many homeowners and can be caused by a variety of factors.

      In some cases, a blinking green light may simply indicate that your smoke detector is working properly. However, in other cases, it could be a sign of a more serious problem.

      The green light on your smoke detector plays an important role in letting you know that the device is functioning correctly. In most cases, a steady green light means that the unit is connected to a power source and is working properly.

      However, if the light is blinking, it can be an indication that there is a problem that needs to be addressed. Understanding the reasons for a blinking green light can help you respond appropriately and ensure that your home is safe from potential fire hazards.

      Key Takeaways:

      • A blinking green light on your smoke detector can indicate a variety of problems, from low batteries to serious malfunctions.
      • Understanding the role of the green light and the reasons for a blinking light can help you respond appropriately and keep your home safe.
      • If you’re unsure of how to respond to a blinking green light, or if you suspect that there is a more serious problem with your smoke detector, it’s always best to seek professional help.

      The Role of the Green Light

      When it comes to smoke detectors, the green light serves a crucial role in indicating the status of your device. Here are some possible reasons why your smoke detector might be blinking green:

      • Power indication: In most cases, a flashing green light on your smoke detector indicates that the device is receiving power. The color and frequency of the flashing can vary depending on the model of your smoke detector. For example, some models might have a steady green light, while others might have a blinking green light.
      • Battery issue: If your smoke detector is running on batteries, a blinking green light might indicate that the battery is low and needs to be replaced. Some models might have a specific pattern of blinking to indicate a low battery.
      • Program waiting: In some cases, a green light might blink rapidly every few seconds, indicating that the device is waiting to receive data from its program.

      It’s important to note that the meaning of the green light can vary depending on the model of your smoke detector. Therefore, it’s always a good idea to check the user manual or contact the manufacturer if you’re unsure about what the green light means.

      In general, it’s a good practice to test your smoke detector regularly to ensure that it’s working properly. This can help you catch any issues with the device early on and prevent potential fire hazards.

      Reasons for a Blinking Green Light

      If you notice a green light flashing on your smoke detector, it can be an indication of several things. Here are some reasons why your smoke detector might be blinking green:

      1. Power Reset

      If your smoke detector is blinking green, it could be due to a power reset. This can happen when there is a power outage or when you replace the batteries.

      In such cases, the green light will blink for a few seconds before settling down. If the green light continues to blink after a few minutes, it could be an indication of a different issue.

      2. Interference

      Another reason why your smoke detector might be blinking green is due to interference. This can happen when there are other electronic devices in close proximity to the smoke detector.

      The interference can cause the smoke detector to malfunction and trigger the blinking green light. To fix this issue, move any electronic devices away from the smoke detector.

      3. End of Life Warning

      If the green light on your smoke detector is blinking rapidly, it could be an indication that the battery is low and needs to be replaced.

      This is the end of life warning, and you should replace the batteries as soon as possible. Ignoring this warning can lead to the smoke detector malfunctioning and not detecting smoke or fire.

      How to Respond to a Blinking Green Light

      If you notice a flashing green light on your smoke detector, don’t panic. The green light is an indicator that something is not right with your smoke detector.

      Here are some steps you can take to troubleshoot the issue.

      Checking the Power Source

      The first thing you should do is to check the power source of your smoke detector. If your smoke detector is battery-powered, the flashing green light could indicate that the battery is low and needs to be replaced.

      Check the user manual to see what type of battery your smoke detector uses, and replace it if necessary.

      Hardwired Smoke Detector Blinking Green Light

      If your smoke detector is hard-wired, the flashing green light could indicate that there is a problem with the wiring. Check the wiring to make sure that it is properly connected and not damaged.

      If you are not comfortable working with electrical wiring, it is best to call a professional electrician to help you.

      Resetting the Smoke Detector

      If replacing the battery or checking the wiring does not solve the problem, you may need to reset your smoke detector. To do this, you will need to turn off the power to the smoke detector by either unplugging it or turning off the circuit breaker that powers it.

      Wait for a few minutes, and then turn the power back on. This should reset the smoke detector and stop the flashing green light.

      If you have tried all of these steps and the green light is still flashing, it is possible that your smoke detector is malfunctioning and needs to be replaced. It is important to have a working smoke detector in your home to ensure your safety in case of a fire.

      Remember, if you are not comfortable working with electrical wiring or troubleshooting your smoke detector, it is best to call a professional for help.

      When to Seek Professional Help

      If you are not familiar with the technicalities of smoke detectors, it is advisable to seek professional help when you encounter any issues. Here are some situations where you should consider calling a professional:

      Persistent Green Light Blinking on Smoke Detector

      If your smoke detector’s green light continues to blink even after changing the batteries, it could indicate a more serious issue.

      In such cases, it is best to call a professional to check the device thoroughly. They can diagnose the problem and suggest the best course of action.

      Multiple Detectors Blinking

      If you have multiple smoke detectors in your home, and all of them start blinking green, it could indicate a problem with the electrical wiring. This is a potentially dangerous situation, and you should immediately call a professional to inspect the wiring.

      Remember, smoke detectors are an essential safety feature in your home, and you should never ignore any issues with them. Regular maintenance and prompt repairs can help keep you and your family safe from fire hazards.

      Frequently Asked Questions

      Why is my smoke detector flashing green every 16 seconds?

      If your smoke detector is flashing green every 16 seconds, it is most likely an indication that the battery is running low. You will need to replace the battery as soon as possible to ensure your smoke detector continues functioning properly.

      Why is my smoke detector blinking green at night?

      If your smoke detector is blinking green at night, it could be due to the ambient light in the room. Some smoke detectors have a feature that allows them to dim their lights at night to avoid disturbing your sleep. If you find the blinking light too distracting, you can cover it with a small piece of tape.

      Why is my smoke detector blinking green and beeping?

      If your smoke detector is blinking green and beeping, it could be an indication that there is a problem with the unit. You should check the user manual for troubleshooting tips or contact the manufacturer for further assistance.

      Should my First Alert smoke detector blinking green?

      If your First Alert smoke detector is blinking green, it could be a normal indication that the unit is functioning properly. However, if you notice any other unusual behavior, such as beeping or flashing red lights, you should check the user manual or contact the manufacturer.

      What does it mean when my smoke alarm is flashing green?

      When your smoke alarm is flashing green, it is usually an indication that the unit is receiving power. However, if the light is blinking rapidly or making chirping noises, it could be an indication that the battery is running low.

      Why is my smoke detector solid green light blinking red?

      If your smoke detector’s solid green light is blinking red, it could be an indication that there is a problem with the unit. You should check the user manual for troubleshooting tips or contact the manufacturer for further assistance.

      Conclusion

      In summary, a blinking green light on your smoke detector can be an indication of several things. It could be a power reset, interference, or an end of life warning. If you are unsure of what is causing the blinking green light, refer to your smoke detector’s manual.

      In general, if you are unsure about the cause of the blinking green light on your smoke detector, it is better to err on the side of caution and call a professional. They can help you identify the problem and take the necessary steps to ensure your safety.

    10. Don’t Panic! How to Put Out a Gas Fire in Emergency Situations

      If you ever find yourself in the unfortunate situation of a gas fire, it’s important to know how to handle it safely and effectively. Gas fires can be extremely dangerous, and attempting to put them out without the proper knowledge and tools can result in serious injury or even death.

      In this article, we’ll go over the steps you should take to put out a gas fire and keep yourself and those around you safe.

      How to Put Out a Gas Fire Safely

      Safety should always be your top priority when dealing with a gas fire. Before attempting to put out the fire, make sure that everyone in the area is safe and that you have a clear path to escape if needed.

      If the fire is too large or out of control, evacuate the area immediately and call emergency services. If you decide to try to put out the fire yourself, make sure you have the proper tools and protective gear, and never put yourself in harm’s way.

      Key Takeaways

      • Safety should always be your top priority when dealing with a gas fire.
      • Turning off the gas supply is the first step in putting out a gas fire.
      • Using a fire extinguisher or smothering the flames with baking soda or salt are effective ways to put out a gas fire.

      Safety First

      When it comes to putting out a gas fire, safety should always be your top priority. Before attempting to put out the fire, make sure that you and everyone else in the area are out of harm’s way.

      Here are some other safety tips to keep in mind:

      • Always have a fire extinguisher nearby. Make sure that you know how to use it properly before you need to use it in an emergency.
      • If you smell gas, do not attempt to put out the fire. Instead, evacuate the area and call the gas company or fire department.
      • Do not attempt to put out a gas fire with water. Water can cause the fire to spread or even explode.
      • If the fire is in a small area, try to shut off the gas supply at the shut-off valve if you can safely reach it. Turn the valve all the way to the right to close it. Do not attempt to shut off the gas if you risk coming into contact with the fire to do so.
      • If you do not have a fire extinguisher or cannot safely put out the fire, evacuate the area immediately and call the fire department.

      Remember, your safety and the safety of those around you should always come first. Do not put yourself in harm’s way to try to put out a fire.

      Remember the acronym PASS: Pull, Aim, Squeeze, Sweep. Pull the pin on the extinguisher, aim the nozzle at the base of the fire, squeeze the handle, and sweep the nozzle from side to side at the base of the flames.

      Using a Fire Extinguisher

      If you have a fire extinguisher nearby, it can be an effective tool to put out a gas fire. Here are the steps to follow:

      1. First, make sure the fire extinguisher is appropriate for the type of fire you are dealing with. Different types of extinguishers are designed for different types of fires, such as Class A, B, C, D, or K. Check the label on the extinguisher to ensure it is suitable for gas fires.
      2. Remember the acronym PASS: Pull, Aim, Squeeze, Sweep. Pull the pin on the extinguisher, aim the nozzle at the base of the fire, squeeze the handle, and sweep the nozzle from side to side at the base of the flames.
      3. Keep a safe distance from the fire while using the extinguisher, and move closer only if it is safe to do so.
      4. Continue sweeping the nozzle from side to side until the fire is completely out. If the fire reignites, repeat the process.
      5. If the fire is too large or spreading too quickly, evacuate the area immediately and call the fire department.

      It’s important to note that you should never use water to put out a gas fire, as water can spread the flames and cause an explosion. Instead, use a fire extinguisher or smother the flames with baking soda or a fire blanket.

      Remember, always prioritize your safety and evacuate the area if the fire is too large or spreading too quickly.

      Turning Off the Gas

      When dealing with a gas fire, it’s important to turn off the gas supply as quickly as possible. This will help to prevent the fire from spreading or becoming more intense. Here are the steps you should take to turn off the gas:

      1. Locate the gas supply valve. The gas supply valve is usually located near the appliance that is on fire. It may be a lever or a knob that you need to turn to shut off the gas supply.
      2. Turn off the gas supply. Once you have located the gas supply valve, turn it off by turning the lever or knob to the “off” position. Make sure you turn it all the way to the off position to ensure that the gas supply is completely shut off.
      3. Do not use any electrical appliances. When you are dealing with a gas fire, it’s important not to use any electrical appliances. This includes light switches, telephones, or anything else that could cause a spark.
      4. Do not attempt to put out the fire with water. Water should never be used to put out a gas fire. This is because water can cause the fire to spread or become more intense.
      5. Use a fire extinguisher or baking soda to put out the fire. If you have a fire extinguisher or baking soda on hand, you can use it to put out the fire. Make sure you stand back from the fire and aim the extinguisher or baking soda at the base of the flames.

      Covering the Flames

      If you find yourself dealing with a gas fire, covering the flames is a good way to extinguish it. Here are some steps to follow:

      1. Turn off the gas supply: Before you attempt to cover the flames, make sure you turn off the gas supply to the appliance. This will prevent the fire from getting bigger and spreading.
      2. Use a fire-resistant blanket: A fire-resistant blanket is an effective way to cover the flames of a gas fire. You can use a wool blanket or a fiberglass blanket. Make sure you cover the flames completely and tuck the edges of the blanket under the appliance to prevent air from getting in.
      3. Use a metal lid: If you don’t have a fire-resistant blanket, you can use a metal lid to cover the flames. Make sure the lid is bigger than the diameter of the fire and that it fits tightly over the appliance. This will cut off the oxygen supply and extinguish the fire.
      4. Use baking soda: Baking soda is another effective way to cover the flames of a gas fire. Sprinkle a generous amount of baking soda over the flames until they are completely covered. Baking soda releases carbon dioxide when it comes in contact with fire, which helps to extinguish it.
      5. Don’t use water: Never use water to cover the flames of a gas fire. Water can cause the fire to spread and can also cause an explosion.

      Covering the flames of a gas fire is one of the easiest ways to extinguish it.

      Smothering the Flames

      If you have a gas fire, one way to put it out is by smothering the flames. This method involves cutting off the oxygen supply to the fire, which will eventually cause the flames to die out. Here’s how you can smother a gas fire:

      1. Turn off the gas supply: The first thing you should do is turn off the gas supply to the appliance. You can do this by reaching for the shut-off valve and turning it all the way to the right to close it. If you can’t safely reach the valve without coming into contact with the fire, do not attempt to turn off the gas.
      2. Use a fire extinguisher: Once the gas supply is off, you can use a fire extinguisher to smother the flames. Make sure you use the right type of extinguisher for the fire. If you don’t have a fire extinguisher, you can use baking soda instead.
      3. Cover the flames: If you don’t have a fire extinguisher or baking soda, you can try to cover the flames with a heavy blanket or a lid. This will cut off the oxygen supply to the fire and eventually cause it to die out.
      4. Don’t use water: Never use water to put out a gas fire. Water can cause the fire to spread and make the situation worse.

      The gas itself can be flammable and explosive, so it’s important to take all the necessary safety precautions.

      Using Baking Soda or Salt

      If you have a gas fire in your home, using baking soda or salt can be an effective way to put it out. These substances work by smothering the fire and removing oxygen from the flames.

      To use baking soda or salt to put out a gas fire, follow these steps:

      1. Turn off the gas supply at the shut-off valve, if it is safe to do so. This will help prevent the fire from spreading.
      2. Grab a box of baking soda or a container of salt and pour it onto the flames. The amount you need will depend on the size of the fire, but a good rule of thumb is to use about a cup of baking soda or a handful of salt.
      3. If the fire is not completely out, try adding more baking soda or salt until it is extinguished.

      It’s important to note that you should never use flour to put out a fire, as it can actually make the fire worse. Additionally, be sure to avoid using water to put out a gas fire, as this can cause the fire to spread or even explode.

      Of course, using baking soda or salt can be an effective way to put out a gas fire in your home.

      Never Use Water

      When it comes to putting out a gas fire, using water is not always the best option. In fact, it can actually make things worse.

      Water is not effective at extinguishing gas fires because gas is not a combustible liquid and does not burn. Instead, water can cause the fire to spread or even create an explosion if the gas comes into contact with an electrical source.

      If you try to put out a gas fire with water, the water will sink to the bottom and the fire will continue to burn on top. This can create a dangerous situation where the fire is still burning but you can’t see it because it’s hidden under the water.

      In addition, using water on certain types of fires, like Class B and C fires, can also be dangerous. These types of fires involve flammable liquids or gases, and using water can cause the fire to spread.

      So, what should you do if you encounter a gas fire? The best thing to do is to shut off the gas supply at the shut-off valve if you can safely reach it. Turn the valve all the way to the right to close it. If you can’t safely shut off the gas, leave the area immediately and call emergency services.

      Remember, when it comes to putting out a gas fire, never use water. It’s important to know the proper techniques and tools to use in order to safely extinguish the fire and prevent further damage.

      Conclusion

      Putting out a gas fire can be a daunting task, but with the right tools and knowledge, you can do it safely and effectively. Remember to always prioritize your safety and evacuate the area if the fire is too large or out of control.

      Here are some key takeaways to keep in mind:

      • Shut off the gas supply at the shut-off valve if you can safely reach it.
      • Use a fire extinguisher to put out the fire, aiming at the base of the flames.
      • Never use water to put out a gas fire, as it can make the fire worse.
      • Baking soda or salt can be used to smother a fire, but never use flour or sugar.
      • Always have a fire extinguisher on hand and know how to use it.

      By following these tips and being prepared, you can feel confident in your ability to handle a gas fire if one were to occur. Remember, safety is always the top priority, so never hesitate to call for professional help if needed.

      Frequently Asked Questions

      What can you use to put out a gas fire?

      To put out a gas fire, you can use a fire extinguisher, sand, baking soda, or a fire blanket. However, it is important to note that not all fire extinguishers are suitable for putting out gas fires.

      How do you put out a class B fire?

      Class B fires involve flammable liquids such as gasoline, oil, and grease. To put out a Class B fire, you should use a fire extinguisher that is rated for Class B fires, such as a foam or carbon dioxide extinguisher. Do not use water as it can spread the fire.

      How do you put out a natural gas fire?

      To put out a natural gas fire, you should first turn off the gas supply at the shut-off valve if you can safely reach it. Then, you can use a fire extinguisher or other suitable method to put out the fire.

      How do you put out an electrical fire?

      To put out an electrical fire, you should first turn off the power source. Then, you can use a fire extinguisher or baking soda to put out the fire. Do not use water as it can conduct electricity and make the situation worse.

      What is the best way to put out a fire at home?

      The best way to put out a fire at home is to have a fire extinguisher readily available and to know how to use it. You should also have a fire escape plan in place and practice it with your family.


      How can you put out a gas fire without an extinguisher?

      If you do not have a fire extinguisher, you can try using sand, baking soda, or a fire blanket to put out a gas fire. However, it is important to remember that these methods may not be as effective as a fire extinguisher and may not work in all situations.

    11. Where To Place Radon Detector: Expert Recommendations

      Radon is a radioactive gas that can be found in homes and buildings. It is odorless, colorless, and tasteless, making it impossible to detect without specialized equipment. Exposure to high levels of radon can lead to lung cancer, making it crucial to detect and mitigate its presence in homes. One of the most effective ways to do this is by using a radon detector.

      When it comes to placing a radon detector in a home, there are a few key factors to consider. First and foremost, it is important to choose a location that is representative of the home’s living space. This means placing the detector in a frequently occupied room, such as a bedroom or living room, rather than in a basement or storage area. Additionally, the detector should be placed at least two feet off the ground and away from walls, windows, and doors to ensure accurate readings.

      It is also important to consider the specific type of radon detector being used. Some detectors are designed to be placed in a single location for an extended period of time, while others are designed to be moved around the home. The type of detector used may impact where it is placed and how long it needs to be in each location. By taking these factors into account, homeowners can ensure that their radon detector is placed in the most effective location to detect any potential radon hazards.

      What is Radon?

      Radon is a colorless, odorless, and tasteless radioactive gas that occurs naturally in the environment. It is formed by the decay of uranium and radium in soil, rocks, and water. Radon gas can seep into buildings through cracks in foundations, walls, floors, and other openings.

      Exposure to high levels of radon gas is the second leading cause of lung cancer after smoking. Radon gas can accumulate in enclosed spaces like homes and offices, and long-term exposure to high levels of radon can increase the risk of lung cancer.

      The United States Environmental Protection Agency (EPA) recommends that radon levels in homes should be below 4 picocuries per liter (pCi/L). However, any level of radon exposure can increase the risk of lung cancer. Therefore, it is important to test homes and workplaces for radon levels and take action to reduce radon levels if necessary.

      Radon testing is simple and inexpensive, and there are several types of radon detectors available on the market. Homeowners can purchase do-it-yourself radon test kits or hire a professional to test their homes for radon. It is recommended that radon tests be conducted every two years to ensure that radon levels remain low.

      Why is it Important to Place a Radon Detector?

      Radon is a colorless, odorless, and tasteless radioactive gas that can seep into buildings from the ground. It is a naturally occurring gas that is produced by the decay of uranium in soil, rocks, and water. Radon is the second leading cause of lung cancer after smoking and is responsible for about 21,000 deaths in the United States each year.

      Placing a radon detector in your home or workplace is essential to ensure that you and your loved ones are not exposed to dangerous levels of radon. Radon detectors measure the level of radon in the air, and if the level is above the recommended limit, steps can be taken to reduce the exposure.

      The Environmental Protection Agency (EPA) recommends that all homes and workplaces be tested for radon. Radon levels can vary widely from one building to another, even if they are located next to each other. Therefore, it is essential to test each building individually to determine the radon levels.

      Radon detectors can be placed in various locations in a building, including the basement, first floor, and second floor. The EPA recommends that detectors be placed in the lowest level of the building that is used regularly. For example, if the basement is used as a living space, the detector should be placed there. If the basement is only used for storage, the detector should be placed on the first floor.

      What then?

      In conclusion, placing a radon detector in your home or workplace is crucial to protect yourself and your loved ones from the harmful effects of radon. The detector will measure the level of radon in the air, and if the level is above the recommended limit, steps can be taken to reduce the exposure. It is important to follow the EPA’s guidelines for placing the detector to ensure accurate results.

    12. Hearing Impaired Smoke Detector

      The world has grown more accepting of persons with different abilities. New electronic devices are being developed to make their lives simpler. As you would expect, the tendency is shifting for groups who have historically been overlooked by the technology sector, such as the hearing impaired. 

      The hearing impaired smoke detector, for example, is a gadget developed to assist persons with hearing disablement in detecting smoke and fire in their houses.

      This article will take you through this heaven-sent invention and its significance.

      When it detects smoke or fire in the home, an ordinary smoke detector sounds an alert. On the flip side, if intended for deaf or hard of hearing persons, it should warn with a visual signal, such as a flashing light.

      Some versions additionally contain a vibrating alarm, which might be beneficial for persons who have a narrow field of vision or are visually impaired.

      Because typical smoke detectors rely mainly on sound, the introduction of the hearing impaired smoke detector is a huge advance for those with hearing issues. The sound of a smoke detector is loud and high-pitched, making it nearly hard to ignore for persons with normal hearing.

      However, for people with hearing impairments, the sound may go unheard, particularly if they are sleeping or are not in the room.

      According to the National Fire Protection Association (NFPA), fitted smoke alarms can significantly reduce fire deaths and injuries. The smoke alarms, on the other hand, must be in good functioning order and, most significantly, audible.

      Every second matters in the case of a fire.

      A hearing impaired smoke detector may guarantee that persons with hearing impairments are instantly warned, giving them more time to leave their house.

      Drive Inclusion: Smoke Detector for the Deaf

      There are several varieties of hearing impaired smoke detectors on the market. The most prevalent variety is the strobe light alarm, which signals possible danger with a flashing light. The vibrating alarm is another sort of hearing challenged smoke detector.

      This alarm is intended for persons who have substantial hearing loss and includes a vibrating pad that may be placed under a pillow to wake them up in the event of a hazard.

      The combination detector is another form of hearing challenged smoke detector that has gained popularity in recent years.

      A combined detector detects not just smoke but also carbon monoxide, a deadly gas that endangers human life. It is critical to differentiate between the two sorts of alerts since they necessitate distinct replies.

      The hearing challenged smoke detector performs the same functions as a standard smoke detector. It has a smoke sensor that generates an alert when the smoke level reaches a specified threshold.

      The major distinction is how the warning is communicated. As opposed to depending on sound, the hearing impaired smoke detector alerts the user by a visual or tactile alarm.

      It is critical to select a hearing impaired smoke detector that satisfies the NFPA criteria. Smoke detectors must be put on every floor of a property, within bedrooms, and outside sleeping areas, according to the regulations. Smoke detectors should also be inspected on a regular basis to ensure that they are in excellent working order.

      The cost of installing a hearing-impaired smoke detector is reasonably low, ranging from $20 to $200 per unit depending on the kind of alarm and features included.

      The investment of a hearing impaired smoke detector is definitely worth it for those with hearing problems, given the possibility for saving lives and avoiding property damage in the event of a fire.

      Strobe Light Fire Alarm

      For many years, strobe light fire alarms have been a standard in the arena of fire safety. These alerts not only offer the typical audible warning of a fire alarm, but also a visual warning with their brilliant flashing lights. They are especially crucial for people who are deaf or hard of hearing who may not hear the standard fire alarm.

      Strobe light fire alarms are commonly used in locations where disturbances or distractions make standard fire sirens difficult to hear. This includes dorm rooms, medical institutions, and other places where people may not be able to hear a standard fire alarm – for example noisy places.

       Furthermore, these alarms are employed in outdoor locations where they may be seen from a distance, and are frequently used in combination with standard fire alarms.

      Strobe Light Fire Alarm

      A strobe light fire alarm installation is a reasonably straightforward operation, and newer systems have grown fairly inventive. These systems may now be linked to various types of fire protection equipment, such as smoke detectors and sprinkler systems.

      This implies that if a fire is detected, not only will the strobe light activate, but the sprinkler system will also activate, increasing the safety of all present.

      Strobe light fire alarms are available in a variety of forms and sizes, making them appropriate for placement in both big and small structures.

      The commercial market offers a variety of devices, some of which include wireless connectivity and so give even greater safety features. These wireless systems can link to the building’s emergency notification system, alerting employees or building residents to an emergency.

      Furthermore, these warnings aid those with unique sensory demands, such as those with autism. Because they may not be responsive to hearing, a visual signal can help to notify these unique people in an emergency.

      Finally, the strobe light fire alarm plays an important function in emergency circumstances. They give crucial visual clues in an emergency and are a necessary tool in protecting the safety of deaf or hard of hearing persons. 

      Technology improvements have made these alarms more efficient and inventive than ever before. They are an essential component of any comprehensive fire safety strategy, including characteristics like wireless communication and interaction with other fire safety equipment.

      Conclusion

      In summary, the hearing impaired smoke detector is a remarkable breakthrough that meets the specific requirements of persons with hearing impairments.

      It provides safety and peace of mind to persons with hearing impairments who might not be able to rely on standard smoke detectors.

      A device like this can greatly minimize fire-related injuries and deaths in households with hearing-impaired persons by using the alarm’s visual or tactile signals.

      We hope that this post shed some light on this critical technology and increased awareness about the importance of hearing-impaired smoke detectors in every home.

    13. How Do Circuit Breakers Work to Prevent Electrical Fires? 

      A circuit breaker is a crucial component in an electrical system. It is designed to detect abnormalities within the electrical network and isolate power and consequently this prevents electrical fires and other hazards. 

      The device works by interrupting the flow of electricity in the event of a fault, failure to which prolonged over current or over voltage may cause overheating and arching of conductors. 

      How Do Circuit Breakers Work to Prevent Electrical Fires

      It is no doubt that circuit breakers saves lives, and protects property. 

      In this article, we’ll explore the workings of circuit breakers, how they detect and respond to electrical faults, and their role in keeping us safe. 

      What is a Circuit Breaker? 

      A circuit breaker is a safety device that automatically cuts off the flow of electricity in a circuit when it detects an abnormal electrical condition. 

      The basic function of a circuit breaker is to protect electrical circuits and appliances from excessive currents and overloads that can lead to electrical fires or equipment damage. 

      Circuit breakers are typically found in the electrical distribution panel or fuse box of a home or building. 

      They are also widely used in industrial facilities, power plants, and other applications where electrical overloads and faults can occur. To a great extent, circuit breakers have replaced the historical fuse system.

      How Do Circuit Breakers Work? 

      Circuit breakers operate on the principle of electromechanical or electronic sensors that detect electrical overcurrent and trip the breaker mechanism in a fraction of a second. 

      The basic working of a circuit breaker can be explained in the following table:: 

      Mode of OperationWhat Actually Happens
      1Normal Circuit OperationDuring normal circuit operation, the breaker’s switch is in the closed position, allowing current to flow through the circuit and power electrical devices.
      2Abnormal Current FlowIn the event of abnormal current flow, such as a short circuit, the breaker senses and trips the breaker mechanism.

      This is possible because excessive current operated the magnetic circuit 
      3Switch Operates to Open PositionThe tripping mechanism of the breaker cuts off the electricity supply by moving the switch to the open position, and the flow of electrical current is interrupted.
      4Fault IsolationBy cutting off the electrical current, the fault is isolated. 
      This eliminates further power or heat strain to the conductors or appliances hence reducing the risk of electrical fires, and preventing potential damage to electric devices. 
      5Resetting the Circuit BreakerIf the fault is no longer existent, the circuit breaker can be set back to the ON position.

      But in case the fault conditions still exist, setting the breaker to ON position will still cause it to trip again.

      It is apparently clear that, without a circuit breaker to discontinue electricity to a faulty appliance or conductor short circuit, a fire is likely to occur. 

      Read Also: How to Put Out an Electrical fire

      What are The Different Types of Circuit Breakers?

      Circuit breakers come in diverse types, each designed to manage distinct levels of electrical voltage and current. The most common types of circuit breakers are: 

      1. Miniature Circuit Breaker (MCB) 

      MCBs are common in residential and small commercial applications. 

      These breakers are designed to handle up to 100 amps and are usually reset manually. 

      2. Molded Case Circuit Breaker (MCCB)

      MCCBs are commonly used in industrial applications. 

      They can interrupt high levels of electrical currents (for example 2.5kA) and you can either reset them manually or automatically. 

      3. Residual Current Circuit Breaker (RCCB)

      RCCBs are designed to detect ground faults and provide protection against electrical shock. 

      They are now a legislative requirement in the US and UK, for example, and are commonly used in bathrooms, kitchens, and other areas where water may be present. 
       

      4. Ground Fault Circuit Interrupter (GFCI)

      A close associate to the RCCBs are the GFCIs.  They are also safety devices designed to protect against electrical shock. 

      They are installed in areas prone to wet conditions such as kitchens, bathrooms, and outdoor outlets. GFCIs operate by detecting a ground fault and interrupting the flow of electrical current instantaneously.

      Benefits of Circuit Breakers 

      Circuit breakers offer a number of notable advantages over the traditional fuse system that include;
       

      1. Easy to Reset

      Circuit breakers can be easily reset by flipping the switch on the breaker panel unlike a fuse that would need to be replaced.

      It is also very easy to spot a tripped CB as opposed to a blown fuse in the majority of the situations. This saves time and reduces the cost of maintenance.

      2. Protection Against Over Currents and Over Voltages

      Circuit breakers protect against electrical overloads, short circuits, and other electrical hazards that could lead to equipment damage or fires. 

      Therefore, you are likely to use your electrical appliances for a long period of time with no need to replace them every time there is an electrical fault.

      3. Durability

      Circuit breakers last longer than fuses as they are not damaged when tripped, eventually saving you cost and hassle.

      4. Safety

      Circuit breakers are recognized by leading safety organizations as a necessary means of protection against electric shock and injury.

      Of course this is achieved by cutting off the electrical supply when an abnormal condition occurs in the electrical system. 

      Conclusion 

      Circuit breakers are essential safety devices that play a critical role in preventing electrical fires, electrocution, and other hazards. 

      They work by interrupting the flow of current when an abnormal electric current is detected to isolate the fault.

       Knowing how circuit breakers work and their role in protecting electrical systems and appliances can help you better maintain and protect your electrical systems. 

    14. Why is my Carbon Monoxide Detector Beeping?

      Before you press the silence button or remove the power from your beeping carbon monoxide detector, you may want to consider the following.

      I know it is annoying, let’s see how I can help.

      For this article I did not rely on my own experiences only, but I skimmed through the leading carbon monoxide detectors manufacturers to give justice to my research.

      Don’t worry, I won’t bother you with a history of carbon monoxide gas and its properties which you must be knowing very well – (that is why you got a carbon monoxide detector – right?)

      The main important concept to note is that your co detector does not have another way of communicating with you apart from lighting LEDs and producing sound.

      Because you may not always be in a position to see this life saving device at all times to interpret the meaning of the LED lights, it is necessary to have another form of reporting that appeals to a different sense – and that is sound.

      The sound is deliberately loud and inconvenient that you have no choice of ignoring.

      Why is my Carbon Monoxide Detector Beeping

      I can bet most people (apart from those with hearing impairment) will hear the beep even if you were in another room or your attention was drawn to something different. 

      So then, why does my carbon monoxide detector beep? Or rather, what is my co detector telling me?

      Similar to humans who have different words to communicate different ideas, your device is also configured to communicate different things.

      It does this by varying the number of beeps in a given time. For example, it could beep once, then stop for some time before repeating. 

      the number of beeps could be two or four, followed by a long pause before repeating.

      Hence, the first thing you need to know is the pattern your device is producing / generating the chirping.

      Once you get this important piece of information, I can then get to the next step of interpreting the beeps and giving them meaning.

      The caveat here is this – it is misleading to have a common interpretation that all CO beeping should be interpreted like two peas in a pod.

      Different manufacturers have different rhythms for CO detectors beeping . For example, first alert and Kidde have different configured chirps recurrences. 

      Beeping Once Every Minute: Low Batteries

      This is to notify you of a low battery. You will hear a chirp every 60 seconds. 

      For some of us, keeping track of how many seconds have passed may be difficult, but if you need to use your stopwatch to correctly judge the situation, then go ahead. 

      This alarm is common for CO detectors that use a battery to operate or as a backup

      You simply need to replace the battery.

      Saving for the fact that the use of lithium batteries have eliminated the need for battery replacement within the lifetime of the CO device. Actually, you are strongly advised to purchase a CO alarm with ‘sealed for life’ batteries.

      But if your CO monitoring device is still on the AA or AAA batteries, it is likely you are going to get this beep maybe once per year.

      The above observation applies to both first alert and Kidde carbon monoxide alarms. 

      A large number of carbon monoxide detectors beeping is attributed to drained or depleted batteries. 

      Beeping Four Times: Dangerous CO Gas Detected

      Hopefully, you do not get to hear this in your home! This means that dangerous levels of carbon monoxide gas have been detected in the house.

      Therefore, this is an emergency situation and you and all occupants need to evacuate quickly to a safe place. 

      For a place to be considered safe, there must be plenty of fresh air and must not be in the same building where CO was detected.

      It is advised you should engage the local fire fighters services and only go back to the house once it has been verified to be safe to do so.

      Beeping Five Times: Expired Carbon Monoxide Sensor

      This is a message to warn you that the carbon monoxide sensor has reached its end of life. 

      No CO sensor is built to last forever. Its monitoring ability deteriorates with time. When proper functionality cannot be guaranteed, then it is time to retire – but not without a ceremony. 

      Hence, to inform you that a replacement and new installation is necessary, the smoke detector beeps five times.

      This beeping sequence is true for the First Alert but do not expect it from Kidde. Kidde is expected to chirp every 30 seconds. This Kidde pattern is also used to mean that the CO alarm has a malfunction or error condition that may include a low battery.

      The carbon monoxide gas sensor can have a life between 5 years and a maximum of 7 years. Most detectors will have the date of manufacture labeled at the back. Therefore, you can confirm if your CO monitor has expired or not.

      Avoid these Causes of CO Detector Beeping

      I would assume that your carbon monoxide detector was certified by a credible standard, for example, the UL 2034 in the United States or against British Standard EN 50291 in the UK.

      If not, it is possible that the monitoring sensor of your device may be below acceptable performance (either due to temperature, humidity) and hence keeps triggering falsely. This is more than annoying as it would be very difficult to know what is causing the beeping or chirping in your smoke detector.

      Avoid buying cheap products. Always buy certified quality products and especially from leading manufacturers who have a proper research and development function.

      Otherwise you will not sleep or have peace in your own house! Furthermore, you may end up buying the quality product you were avoiding the first time because now you have confirmed that having peace of mind is worth more than the difference of bucks you were trying to save!

      Furthermore, there is a high likelihood that the location where your CO detector is positioned may also be a factor that contributes to beeping.

      For example, if your device is near the source of carbon fuel burning appliances such as gas boilers or gas cookers in the kitchen or even gas heaters in the living room.

      You may want to reconsider if the location of your CO detector is the most suitable for your home.

      You can read this article and find out what you need to know about the location of your carbon monoxide detector.

      How Do I Stop the Nuisance Noise

      Okay, let us face it. I know I have a faulty  CO alarm or low battery or even require to change the CO detector.

      Do I need to endure the chirping that can afford to keep me awake the whole night? 

      No, you don’t have to.

      Majority of the carbon monoxide detectors have a hush or silence button. You can press this button and you will not be hearing from the detector at least for now. 

      You may have a lee way of 7 days or 30 days depending on your model before the chirping begins again. At least in the meantime, your little human or pet would also not be terrified by the unnecessary noise.

      With online purchases and next day delivery, you do not need to exert too much on this issue. Keep it to mind, that during this period, the device cannot warn you if there is a carbon monoxide gas hazard. Hence, you are prone to carbon monoxide poisoning.

      In cases where the hush feature is not present, you can remove power to your device for the sake of mental wellbeing, but promise yourself to resolve the issue as soon as practicable. 

      Conclusion

      Either of the above described beeping, carries an important message that should not be ignored.

      Please act accordingly as it is to the best of your interests.

      Each set of beeping could either mean that you need to evacuate the house and find a safe place with fresh air, or it could be that your device may not work properly unless an issue is addressed.

      All of which are important – you agree?

      Taking everything into consideration, see to it that you are aware about what your product manual says for each of the beeping scenarios.