Author: James B. Bartlett

  • Stages of A Fire

    Fire has been used by mankind for thousands of years. Curiously, man has experimented to understand this mystery of burning flames. 

    Various groups, from scientific communities to firefighter and fire prevention organizations agree on the fact that fire has different stages. One such organization is the International Fire Service Training Association, established in 1930s. 

    Namely:  

    1. incipient 
    1. growth 
    1. fully developed 
    1. decay 

    Before we share details on each of these stages, let me remind you that fire is a common hazard at home. When uncontrolled, damage to property and sometimes injuries or loss of life has been reported. 

    I am a strong advocate of prevention rather than reactive response. That means that education and human behavior that drive human activity are very important.  

    Secondly, investing in smoke detectors that alert you in case of fire is a wise decision. Do not say you were not told! 

    The awareness of the four stages of fire gives you a chance to make correct judgements and predictions. This is a must have knowledge for firefighters. 

    Source: http://cfbt-us.com/pdfs/FBIandFireDevelopment.pdf 

    The Four Stages of Fire

    The Incipient Stage of Fire

    Common knowledge has it that for a fire to start, three things must be present. That is oxygen, fuel and a source of ignition. Once combustion is attained, the heat generated warms the fuel and the process of fire growth is imminent. 

    The flames keep reaching higher and in no time, they devour the ceiling. The volume of the fire expands and with more oxygen the fire is ready to grow much faster. 

    It is also possible that the fire may go out on its own at this stage. Of course this depends on factors that affect oxygen or the material under fire. 

    Characteristics: 

    • Fire is small 
    • Less smoke hindering visibility and breathing 
    • Low temperatures around the fire 
    • Enough to trigger the smoke detectors if present 

    What you should do 

    • Put out the fire using either an extinguisher or a fire blanket (you should be trained to use these items) 
    • In case you are not sure what to do or cannot suppress the fire, run for dear life  
    • Call for help, for example the fire brigade 

    The Growth Stage 

    The rising temperature of the objects or fuel together with the enriching oxygen make this stage possible. 

    The transition from incipient to growth happens very fast. As a matter of fact, fire doubles in size every 30 seconds if all the 3 elements in a fire triangle are present. 

    On the other hand the hot air around the fire expands and hence if the fire was in a room or confined space, pressure will build up. This pressure tends to push the fire beyond its current spot. 

    If there are other combustible materials in the path of the fire, they are ignited by the advancing flame.  

    This is the shortest stage of the fire. 

    Characteristics: 

    • The area around the fire has significant temperature increase 
    • Smoke is noticeable on top of the fire and visibility and breathing begins to deteriorate. 
    • Surfaces start to darken, and change color and windows may break due to high temperatures and pressure. 
    • Fire sustains itself 
    • Fire spreads to places beyond where it started 

    What you should do 

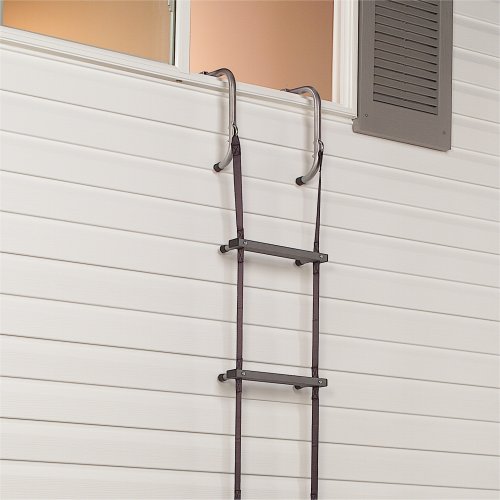
    • The environment is risky, and you must evacuate out of the building immediately. If the normal escape route is unsafe, use an emergency evacuation ladder. 
    • Call the fire emergency support services in your area 
    • Do not go back in the house 
    • Follow your fire emergency plan 

    The Fully Developed Stage 

    In this stage, the total surfaces are on flames. There is significant heat energy contained in the burning material. For instance, temperatures may reach up to 1000 degrees celsius. 

    Hot gases and flames exit through the windows, doors and other openings. 

    It is possible to have a fully developed fire in one area while in another part an incipient fire. 

    A smoke detector should be able to warn you while fire is in the incipient stage. That is the purpose, since conditions become too dangerous after this stage. 

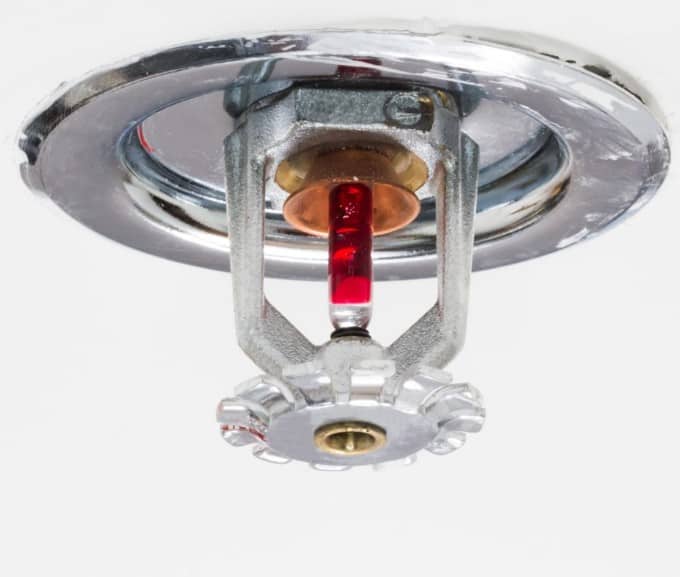
    A fire suppression system, for example a sprinkler system would easily put out fire at this early stage too. 

    Characteristics: 

    • Fire is at its hottest 
    • The fire is very intense 

    What you should do: 

    • Stay away from the fire 
    • Even firefighters fight the fire from a safe span 
    • Ensure no new combustible material is brought in 

    The Decay Stage of Fire

    Fire enters this stage by either depleting the available fuel or due to insufficient oxygen. At this stage too, conditions are still dangerous for humans or first responders because of the accumulated heat and potential presence of carbon monoxide. 

    There may be reignition if either fuel or oxygen is reintroduced. 

    The decay stage is the longest is the longest phase of a fire and may last to weeks depending on the magnitude of the fire. 

    What you should do: 

    • Ensure no new materials that can ignite are in the vicinity of the decaying fire. 
    • Stay away from areas with decaying fire as there are many health hazards including dangerous gases such as carbon monoxide.  
    • Do not enter buildings that have decaying fire since the structural integrity may be compromised 
    • Keep your pets and animals away 

    The stages of a fire are key to assessing the risk a fire posse to both the first responders and those involved. As well, it helps in establishing the best strategy to put out the fire. 

    Experts can also be able to predict the behavior of the fire. 

    In between the incipient and growth stage, some of the fires may experience what is popularly known as a flashover. 

    The flashover is fostered by a significant amount of heat energy release sponsoring a spontaneous ignition of fuel around.  

    Notably, due to the excessive heat generated, the fuel may reach ignition temperature at the same time causing a sudden explosion. 

    The fire may consume an entire space instantaneously.   

    Here are some of the ways a fire could start: 

    1. A candle may fall over a wooden table.  
    1. An electrical fault or arc may cause the adjacent material to start burning. 
    1. The dry leaves in the backyard may start a fire in areas prone to wildfires due to the advancing flame front. 
    1. A cigarette may fall over combustible materials thus starting fire 
    1. Children playing with fireworks may start fire accidentally 

    Final Verdict 

    Safety is number one and hence engaging professionals such as your local fire brigade is highly recommended. 

    Largely ignored is the periodic maintenance and inspection of your smoke detectors as well as other fire protection systems.  

    This equipment is vital in response in case of a fire incidence.  

    Fire is as a result of a chemical reaction and the process can be slowed or stopped by using appropriate techniques. 
    More Info 

  • Find Out the Best Place to Store a Fire Extinguisher on a Boat

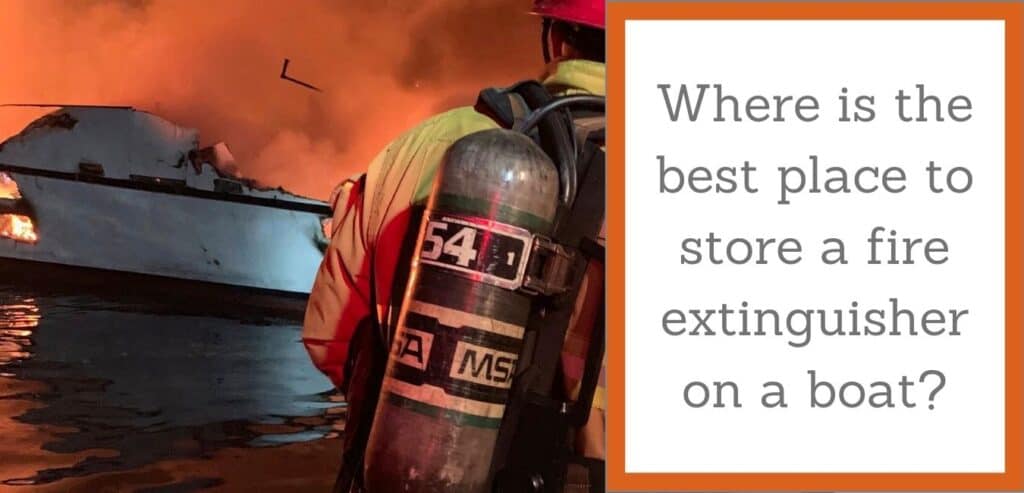
    Where is the best place to store a fire extinguisher on a boat?

    Picture this:

    You’ve decided to take your family on a cruise trip, all you want is to have a good time. Everything is going on well until a fire breaks the party!

    Everyone is running all over the place, and it is all chaos. You cannot trace the fire extinguishers, and the fire progresses quickly.

    Although surrounded by a mass of water, that doesn’t seem to help!

    By the time you manage to put it out, the damage caused is beyond repair, and some people are injured. More importantly, the loss of life for example in this California boat is beyond regret.

    So, where exactly should you place a fire extinguisher in a boat?

    A lot of people are asking, “where is the best place to store a fire extinguisher in a boat?”

    But first, let’s get to understand the different types of fire extinguishers.

    Get the Right Fire Extinguisher for your Boat!

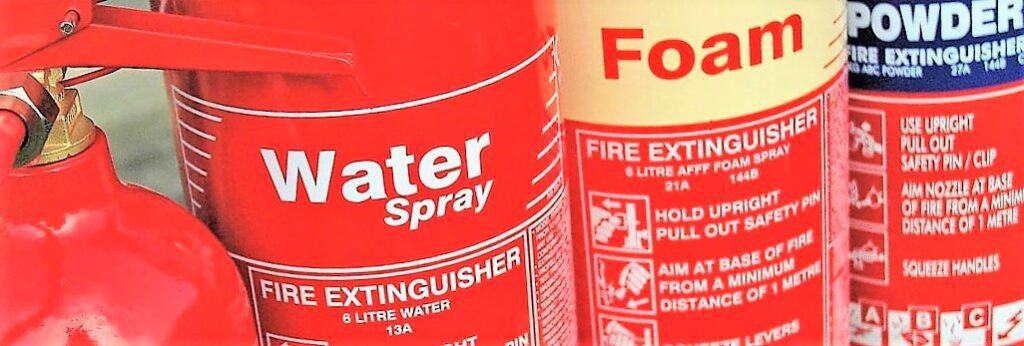
    Fire extinguishers have ratings as either  A, B, C, D, or K depending on the type of fire it can put out. All fires aren’t the same, and it’s paramount to understand what fire extinguisher works where.

    Usually, the fire extinguishers have a label on the side of the tank.

    boat fire extinguisher requirements

    Type A Fire Extinguisher

    A fire extinguisher classified as type A puts out fires that start from the trash in the boat, wooden beams, or ash.

    These fires are easily put out using water and foam or a mixture of the two. Type A fires are the most common in boats.

    Type B Fire Extinguisher

    Class B fires start from barrels of gasoline, petroleum, paint, and other highly flammable oils and gases. If you’re aboard a vessel burning from oils or gases, don’t make the mistake of using water to extinguish it.

    Notably, water has a lower boiling point than most oils and gases. Therefore, if you try putting the fire out using water, it will evaporate, leaving steam, which can accelerate the fire or even burn you.

    Class B fires are put out using dry powder, halogen, ammonium phosphate, carbon dioxide, or foam.

    Type C Fire Extinguisher

    Electric faults cause class C fires. For these fires, you want to make sure that you use a fire extinguisher filled with carbon dioxide or other dry chemicals.

    As you put out the fire, make sure not to use water because we all know water is a good electricity conductor.

    Class C fires are also very common in boats.

    Type D Fire Extinguisher

    Class D fires are rare in boats because they mainly start from flammable metals such as titanium and magnesium.

    For these types of fires, you want to make sure you use dry chemicals in your fire extinguisher.

    Type K Fire Extinguisher

    Type K fires start from the kitchen. It’s not uncommon for boats to have small kitchens and which are prone to fire outbreaks.

    The fires are triggered by cooking oils, fats, and grease. These fires are notorious for causing explosions that can quickly spread to other areas of the boat.

    To put out class K fires, you want to make sure you use dry chemicals, halogen, pressurized carbon dioxide, ammonium phosphate, or foam.

    Now that we know the different fire classifications let’s find out where to keep the fire extinguishers for easy access.

    Boat Fire Extinguisher Requirements

    As a minimum requirement, you need to have a B-1 fire extinguisher in your boat if your boat is smaller than 26 feet. If your boat is bigger than this, you need to have at least 2 B-1 fire extinguishers.

    Here is a table summarizing the legal requirement of fire extinguishers in a boat.

    Boat SizeWithout a fire extinguishing systemWith a US Coast Guard Fire system
    Less than 26 feet1 B-1 fire extinguisherNone
    26 to 40 feet2 B-1 fire extinguishers1 B-1 fire extinguisher
    40 to 65 feet3 B-1 fire extinguishers2 B-1 fire extinguishers

    If you have a US Coast Guard fire extinguisher system installed within your vessel, then you may not need many fire extinguishers.

    Probably you’re wondering who can get the US Coast Guard fire extinguisher system. Here is the checklist.

    • Installed fuel tanks
    • Enclosed cooking areas
    • Parts of the boat don’t have flotation materials
    • Presence of engine tanks in the seat areas
    • Engine compartments that are fully enclosed
    • Unsealed double bottoms

    Best Place to Mount a Fire Extinguisher in a Boat

    The best answer to where you should place a fire extinguisher in a boat is, “it depends.” There are several factors to consider, but as a general rule of thumb, the area should be easily accessible in an emergency.

    Consider the following:

    Where do people spend most of the time?

    Depending on where you and the other passengers spend most of their time, the fire extinguishers should be within an arm’s reach.

     Where can a fire start?

    Usually, a fire is most likely to break out from areas with flammable gases, the kitchen, or the engine compartment. Now, you want to make sure that you place fire extinguishers close to these areas.

    In as much as you ought to place fire extinguishers close to fire-prone areas, you want to make sure they aren’t so close that you cannot safely access them in the event of a fire.

    In a Nutshell

    It’s always important to be prepared for fire outbreaks, especially in boats, because you need to save yourself before getting professional help.

    Boat fires mainly start from the kitchen, engine compartments, and fuel storage. The best place to store fire extinguishers in a boat is in areas where passengers spend the most time and near the areas where a fire is likely to start. 

  • How to Clean a Smoke Detector

    How often do you check to ascertain that your smoke detector is in good condition? Once, maybe twice a year?

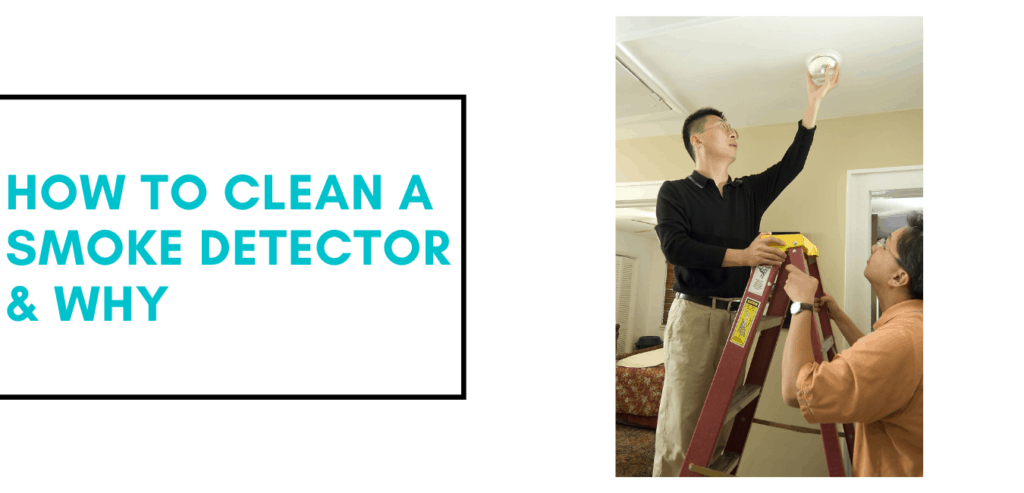
    How to Clean a Smoke Detector and Why

    If this is you, you are doing a subpar job! Consequently knowing or unknowing, you are somehow subjecting yourself and family to a lot of harm. Albeit not now but in the future!

    Just like any other device in your home, smoke detectors need proper maintenance and thorough cleaning often.

    For all you know, it maybe the first time you have thought about it! No problem. I get a lot of questions around this topic from so many people!

    I will get you set up for success. That is why I have written this article. If you want to ensure your smoke detector does not fail to live up to your expectations (especially you when you need it most), read on.

    General Smoke Detector Maintenance Routine

    All year through, there is something you should be doing to ensure your home is safe. For smoke detectors, ensure that the batteries are in good working order by testing them at least once monthly.

    To do this, press and hold the test button for not less than five seconds. Then wait for the beeping sound. If the batteries are working properly, you will hear a beeping sound after the five seconds.

    Next, to keep a smoke detector clean, dust and vacuum it twice a year. While at it, ensure you do not leave any free particles around its surfaces. This is very important.

    You can do this even thrice or four times a year just to be extra careful. However, if you are constrained by time, twice a year should be fine.

    Remember, the cleaner the smoke detector, the less false alarms you are likely to have.

    The smoke detectors batteries are replaceable once every 12 months. Although you can still continue using them if they are still working.

    However, by doing so the batteries may suddenly drain, which you do not want happening in emergency situations.

    With this in mind and to be on the safe side, change them periodically as stated (even if they are not entirely dead). Please note that this does not apply to lithium batteries which last the full life of your smoke detector.

    You ought to replace your smoke detectors every ten years. However, check the manufacturer’s guidelines on this in case you need to replace them earlier.

    If you ever feel that something is not right with your detector, call your manufacturer for further guidelines or a technician to assist efficiently.

    Concurrently, you can contact the nearest fire department. In my experience they are more than willing to help.

    Why You Should Clean and Maintain Your Smoke Detector

    How would you prefer it; having a smoking detector that you discover is not working during an emergency, or having one that works at all times?

    I bet most, if not all of us, would prefer the latter. While it can sometimes seem a bit too exhausting to clean all your smoke detectors, it is entirely worth it.

    Check this article also: How to test your smoke detector

    For starters, the cost of cleaning and maintaining a smoke detector is relatively low. Besides, replacing the batteries annually is also feasible and worthwhile. If you prefer not to clean the smoke alarms, you can hire someone to do it.

    Admittedly, this only takes 30 to 60 minutes per smoke detector. Cumulatively, it will only take few hours yearly. And what does that even account for? Quite a small fraction of your time if asked!

    Smoke Detectors Come in Two Types; Ionization and Photoelectric

    The photoelectric smoke detector has a light-sensitive sensor and emitting diodes within its sensing chamber. They are the most popular of the two and specialize in detecting smoke and not flames necessarily.

    Ionization detectors use radioactive substances to ionize air within the sensing chamber. They work best in the kitchen since they are less likely to cause a false alarm during cooking.

    Both types need thorough cleaning and proper maintenance, as illustrated in the manufacturer’s guide. If you do not pay attention to their performance, you are likely to spend more replacing them before their time.

    Dust accumulates naturally around the smoke sensors regardless. Of course the frequency and magnitude is dependent on the environment.

    When dust particles build up around a smoke detector, you will likely have more false alarms, making you imagine that the system could be faulty.

    While the latter might also be a valid reason, it would help if you first checked the detector’s hygiene state before reaching any conclusion.

    Other items that might clog up your sensor include cooking vapor, smoke, pet dander, and pollen.

    How to Clean the Smoke Detector

    As recommended by many manufacturers, ensure you clean your smoke detectors twice yearly.

    You can add a reminder in your phone, so that you do not forget or miss the frequency.

    To properly clean the sensor:

    1. Vacuum it to clear out all dust and foreign particles in the device.
    2. Wipe clean the outside for a thorough and spotless finish.

    Most manufacturers also include a cleaning guideline in the detector’s package. Read this to ensure you are using the right formula when cleaning your unit.

    To be specific, you will need to:

    1. Take of the detector’s cover or face
    2. Use a brush to scrub off the dust
    3. Use a vacuum cleaner to complete the process
    4. Attach the detector’s face back
    5. Use a clean cloth to wipe the detectors surface and the area around it
    6. If the area around the detector was also overwhelmingly dusty, use a vacuum cleaner to clear out the dust (However, vacuum the surface first before vacuuming the detector’s internal components, since the air blowing out the dust might re-accumulate into the device)
    7. Check that the detector is working accordingly before concluding the task is complete

    As evident in the step by step guide, it is not too much trouble to get a smoke detector spic-and-span.

    Once you do it for the first time, repeating the process will be much easier.

    If an accident occurs during cleaning and you presume that it has interfered with the detector’s functioning, call the manufacturer or an experienced technician to check it.

    Proper Maintenance for Lasting Benefits

    Many devices last as long as you keep maintaining them the right way. That is true for your home appliances for example your laptop, washing machine, refrigerator, air conditioner etc.

    Hence, this is no different for a smoke detector. The only way you will ensure it serves you as it should and maybe longer is by taking care of it. Show it some love!

    You cannot risk having a detector that is not working appropriately just because it’s dirty. The effects could be catastrophic!

    As has been noted, the effects maybe significant to the extent of a house burning down to ashes only because you didn’t detect the fire early. Keep your home safe from unforeseen fires by having a well-functioning smoke detector.

    For further guidelines on how best to clean and maintain your detector, consult with the brand’s support team. 

    If you are considering replacing your smoke detector, please check our reviews here.

  • Wondering How to Test Your Smoke Detector Today?

    Smoke signals send an alarming message; that there’s fire around. When this happens during the day, you can smell it and do something.

    But when it happens at night, the fire steals oxygen and produces the silent-killing carbon monoxide. Fortunately, technological advancement has led to the production of affordable smoke detectors. 

    The detectors are essential fire protection equipment. They’ve saved uncountable lives by providing early fire warning. In spite of this, the secret lies in how well you maintain them.

    You’re probably aware of the fundamental smoke detector maintenance practices.

    These include replacing the alarms after every ten years and checking the battery’s functionality in every month. However, it is worth noting that both commercial and residential facilities need additional requirements.

    In the meantime, statics will help to explain why this is so. Read along!

    What Do Statistics Say?

    According to statistics, more people die from house fires than all the natural disasters combined. Fifty-three house-fire deaths per every 100 fires homes are reported to occur in homes that didn’t have working smoke alarms.

    Out of these fifty-three deaths, 17% occurred in houses that had non-functional smoke alarms. 

    Simply put; having a non-functional smoke detector is worse than not having a detector. It gives a false sense of security, and this can be fatal.

    So how can you be sure that your smoke detector is working correctly?

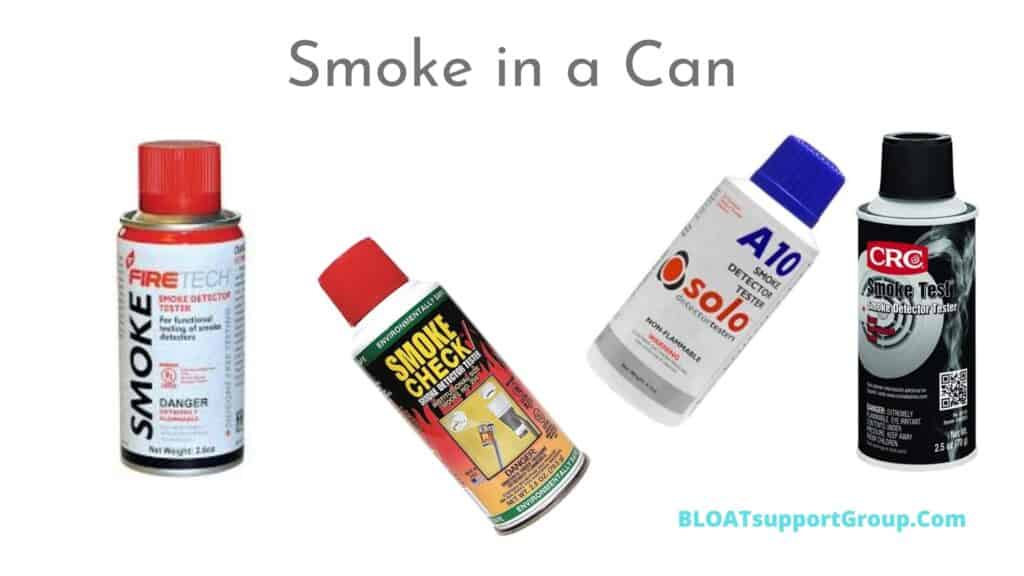
    Here’s where smoke in a can comes in!

    So, what is Canned Smoke?

    Smoke in a can is simulated smoke. It is a sprayable aerosol that imitates the properties of real smoke. By design, the canned smoke can activate ionization, beam, and photoelectric smoke detectors just like real smoke.

    Smoke Detector Tester

    It is, therefore, the best solution for large facilities and homes where testing the functionality of smoke detectors is required.  

    How Safe is the Canned Smoke?

    They do not have a notable odor, making them suitable for hospital use. They’re also safe and convenient. The smoke-in-a-can are designed to extend the users’ reach to up to 6-feet. 

    They’re widely appreciated because they do not produce staining residue. Be sure that they’ll not discolor or contaminate your ceiling.

    Additionally, the spray does not give harmful residues like the class II or class I ozone-depleting chemicals. The smoke in a can comes packed in safe containers. This convenient aerosol packaging eases the testing process. 

    When choosing canned smoke for your requirements, it’s always advisable to consider the flammability impact of the spray. 

    How to Use

    Smoke detectors are often mounted on ceilings. Therefore, it becomes difficult and risky to climb a ladder and test every smoke detector in buildings.

    In such cases, you can use poles designed with dispenser heads to spray the canned smoke without climbing. This method offers flexibility and gives on-site convenience.

    If you have a reachable ceiling, you can hand-hold the aerosol and spray it on your smoke detector. 

    NOTE: Before testing a centrally-monitored smoke detector, be sure to notify the monitoring company prior. 

    When to use the Tester?

    The recommendable protocol to use the can tester is quarterly inspection (at least four times a year). Before testing, replace the smoke detector’s batteries first.

    Inspect the gadget, dust it off, and then test it using the smoke in a can. Areas with a high concentration of airborne particles should carry out the maintenance and testing practices more frequently.  

    Who uses the Detector Tester? 

    Every building, whether commercial or residential, needs a smoke detector. Better still, every structure should have several smoke alarms installed in key places.

    With this in mind, it is obvious that all properties will also need a smoke tester. Large organizations should buy the spray in wholesale to ensure that there’s a backup in the store.

    The following facilities and people need the smoke detector testers:  

    • Fire Departments
    • HVAC electricians, technicians, and plumbers
    • Marinas
    • Shipping Companies
    • Airports
    • Distribution Companies
    • Manufacturers
    • Public Facilities
    • Property Management landlords and companies 
    • Restaurants

    Conclusion

    The much work that a detector’s test button can do is to check whether the device has sufficient power. Therefore, this means that battery and other power-source tests aren’t sufficient to guarantee safety in a property.

    That is why facilities and homes should consider these aerosol smoke checkers. The smoke in a can is cost-effective and value-worth. It is also simple and fun to use. 

  • Here Are The Leading Causes of Firefighter Injuries

    Each career poses certain risks, and firefighting is no different. Most injuries experienced by firefighters are minor, but some are life-threatening and can end the career of a firefighter.

    What is the Leading Cause of Firefighter Injuries?

    Every year, more than 60,000 firefighters get injured either during training, to, or from the rescue mission. Most injuries occur on the fire ground.

    Here are some of the leading causes of firefighter injuries.

    #1 Overexertion  

    What is the leading cause of firefighter injuries? According to NFPA, out of all the firefighter injuries that occurred in 2019, about 58 percent were due to overexertion.

    Undoubtedly, firefighting is a muscle straining career, and minor muscle strains are a common phenomenon.

    exhausted firefighter

    However, severe strains and spraining of muscles can cause disability or even death.

    Overexertion occurs when a firefighter tries to push through obstacles during an emergency rescue mission, especially in buildings.

    Pushing and pulling of objects in a building can also lead to overexertion and stress to the muscles.

    #2 Explosions

    Statistics by the National Fire Protection Association indicates that fire explosions are the other leading cause of firefighter injuries. Usually, when the firefighters are called to task, they aim at rescuing all life and also extinguishing the fire.

    home fire gas explosion threatens firefighters lives

    The unexpected may happen during a fire fighting mission if an explosion occurs. Explosions can leave the victims with severe burns that may render them completely disabled or worse still lead to death.

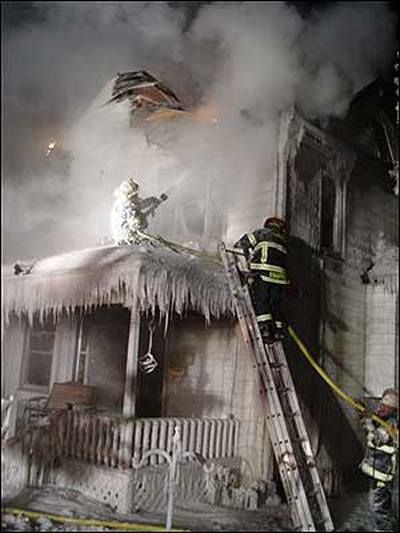
    In May, a fire happened in downtown Los Angeles and Engine 9 fire truck was involved with the rescue. The one-story building was emitting some smoke and fumes of fire.

    As usual, the firefighters went to the rooftop to put out the fire while others embarked on saving the people trapped inside. However, the building exploded in a massive fireball that injured many firefighters and even left the truck in charred pieces.

    This example is just one in so many cases that happen every day across the United States.

    #3. Falls/slips

    Another leading cause of firefighter injuries is falling or slips during operation. A firefighter may be forced to jump out of a building during operation if they realize the fire hazard is beyond their training capabilities.

    However, some buildings don’t have traction on the fireground, posing a risk to the firefighters.

    tall building fires can cause firefighers fall to their death

    Miscommunication between the incident commander and the officer executing an operation may prompt the officer to jump out when they realize incoordination. Such falls may lead to fatal injuries, especially if the chinstrap for the helmet comes out on the way down.

    During winter, most buildings accumulate ice on the surfaces. Unfortunately, most buildings don’t have ice melting mechanisms. If the firefighter boots don’t have good traction, they may slip over and fall to the ground.

    Firefighters who wear helmets and also fasten the chinstraps often survive falls and may only have minor injuries to treat.

    Usually, the fatality of a fall, slip, or jump is dependent on the height of the building, and how well the firefighter puts on their protective gear. Most fire departments in the US and globally ignore safety policies.

    #4. Injuries on Transit

    Firefighters responding to emergency calls or returning from their missions account for so many fire truck accidents every year.

    During these accidents, so many firefighters die while others suffer minor to severe injuries. For instance, in 2006 alone, there were 16,000 fire truck accidents, and the number doesn’t include accidents involving firefighters using their vehicles. Car accidents account for over 5,000 injuries to firefighters every year.

    fire engines accident

    The truth is that most firefighters are notorious for ignoring traffic laws. The drivers over speed and also overlap other vehicles on the road. Having a big truck and a loud siren shouldn’t give a reason for a firefighter to risk their lives and those of other road users.

    #5. Weather Related Injuries

    Fire accidents can occur at any time of the year, and as is expected, the fire department should respond to emergency calls promptly.

    fighting fire on winter

    Well, during extreme weather conditions such as heat or cold, the firefighters may endure weather-related injuries. For example, during winter, the firefighters out in the cold may suffer frostbites, and during hot weather, they can become dehydrated.

    Fire departments should offer rotational relief to the officers so that they don’t get exposed to harsh weather. Besides, training is also paramount so that the firefighters know what symptoms to observe so that they can ask for help before it’s too late.

    You may also be interested to know why bagpipes are played in firefighter funerals. Check on that link.

    In a nutshell, firefighters suffer minor to severe injuries each year while some even die during the operation.

    The leading causes of injuries are falls, overexertion, explosions, motor-vehicle related injuries, and weather-related injuries.

    With proper training, awareness, and strict adherence to safety measures will help reduce the casualties.

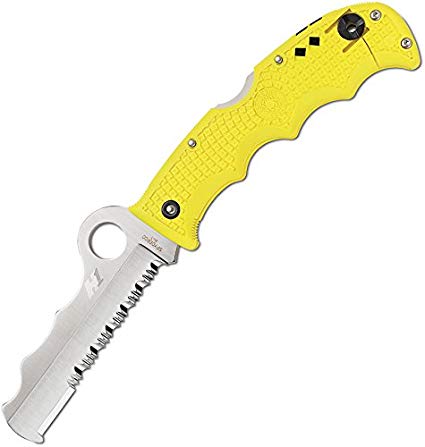
    Equally important, it is always great to have the right knife for the rescue job as well as appropriate fire safety boots as part of your personal protective equipment (PPE).

  • Disposal of Old and Radioactive Smoke Detector

    A lot has been written on smoke detectors and the safety they generously give you and your family. But is it fair to say that there is less penned down when it comes to smoke detector disposal!

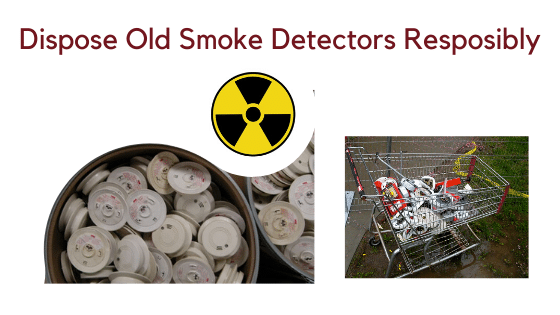
    Responsible disposal of old smoke detectors

    I know you may not need to do this as often, as majority of smoke alarms can last up to ten years! However, if you are part of the thousands that statistics show dispose their old or expired smoke detectors annually, then this article will shine some light to your dilemma.

    As others are looking forward to throw their old or expired smoke alarms that have served to their end of life; you may be unlucky that you are disposing them because they have failed prematurely.

    On the other hand you may be the proactive individual who is upgrading the technology to tap into the best that is in the market. Yes, you don’t have to wait for ten years to replace your smoke detectors.

    New Technology in Smoke Detectors

    The market already has smoke detector with voice technology that can talk to you to let you know the hazard and location.

    Furthermore, today’s technology has made smoke and fire detection more accurate reducing on false alarms that are annoying.

    So there is quite a significant change on this fire detection space, think of how they integrate with other home devices e.g. alexa, z wave devices, smart phone apps and the list continues.

    It may sound as if disposing smoke detectors is as simple as removing them and dumping them in that trash bin. But hold on, you need to think through by considering the following.

    The regulations may differ from state to state and it is important you keep touch with your local fire department. Generally and to start with, you should be knowing the type of smoke detectors that you want to dispose.

    NY state smoke detector disposal regulation

    We are in an age that is environmentally conscious that wants to make sure everything is disposed off safely and in the most harmless way. Our society is no longer ignorant on hazardous wastes anymore.   

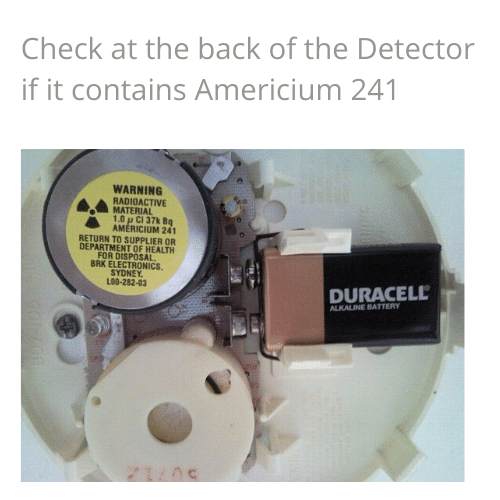
    Important to note is that some of the smoke detectors you are using contain radioactive elements. The most common is Americium-241. Hence, a lot of consumers may be unsure of how to dispose responsibility.

    Americium-241

    Americium-241 is an isotope of Americium.

    Any substance with unstable nucleus in their atoms is classified as radioactive. That means it can release excessively high energy impromptu. You are likely to find americium-241 in ionization smoke detectors.

    The working principle simply put, leverages on the fact that smoke interrupts the flow of the radioactive particles, hence triggering an alarm.

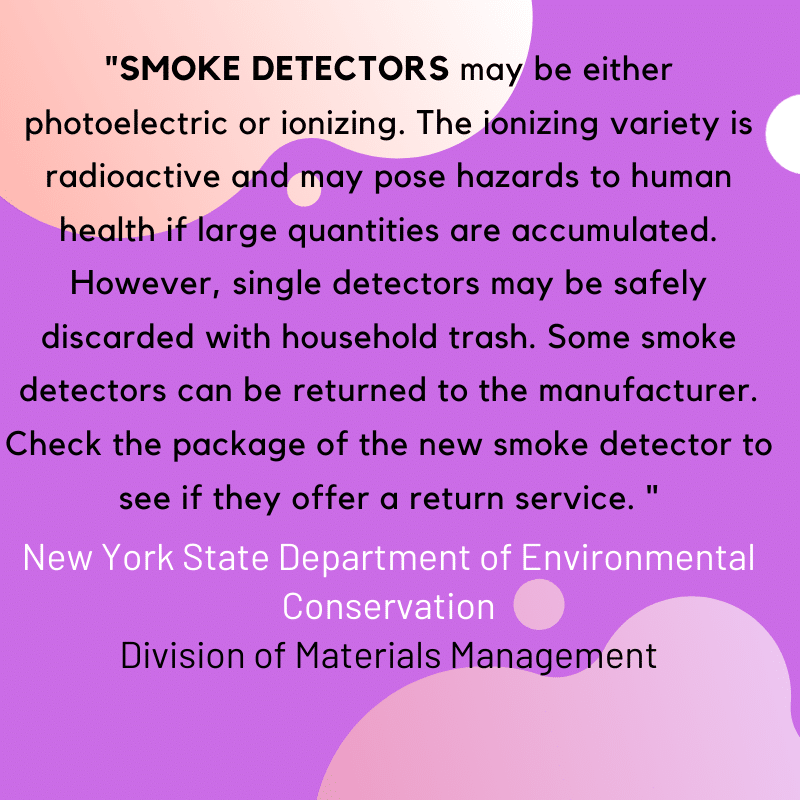
    However, the amount of Americium-241 used in the smoke detectors is miniaturized. Consequently, the tiny levels are regarded as harmless to humans. Americium-241 is considered harmful when inhaled or ingested.

    Tampering with the smoke detector whether it is functioning or not, is highly discouraged because of the health hazards it may pose especially if it contains the radioactive substance.

    Photoelectric smoke detectors on the other hand do not contain radioactive elements. Contrary they use a ray of light that is interrupted in the chamber by smoke triggering an alarm.

    How Do I tell if my Smoke Detector is RadioActive?

    It is a requirement by law that any smoke detector containing any radioactive components have a warning on the label. The label will usually be behind the smoke detector.

    first alaert and kidde smoke detector disposal

    If you therefore do not find any warning, you are safe to assume that it is radioactive free.

    Comparatively, to identify an ionization smoke detector, check for a letter “I” or the name “ionization” at the label section.

    How do I dispose My Smoke Detectors Near Me?

    Some manufacturers have a plan to recycle their smoke detectors. Therefore, they should be your first point of contact. At the end of life, the detectors can be shipped back to the manufacturer for further action.

    In situations where you are unable to return the expired, unwanted or faulty smoke alarms to the manufacturer, then following the local regulations on waste management and smoke detector disposal is okay.

    Check for a hazardous collection point near you.

    For example, you can trash them in a land fill. The radioactive elements are not considered harmful as explained earlier.

    However, in cases where there are radioactive detectors installed as a prerequisite to allow waste, for instance some incinerators, the waste may be rejected.

    Smoke Detectors Consist of Much More

    Although we have put emphasis to the subject of radioactive elements present in some of the smoke detectors, that is not all the reason you need to recycle or dispose responsibly.

    Smoke detectors are also made of the following materials:

    The Casing

    Mostly made of plastic that takes many years to degrade. A lot of plastics have made their way into the seas. It is estimated that about 8 million tonnes of plastic end up in the world oceans each year!

    We cannot exhaust the detriments these delinquencies cause on the general ecological balance. Scientists have found plastic elements in fish.

    Take note that you do not dismantle the chamber for ionization smoke detectors otherwise you may expose the Americium-241!

    Electronics

    In the same way it is important to recycle electronics e.g. computers, TV, radio, phones etc, so it is for smoke detectors. The circuit may contain copper and gold that can be recycled and reused.

    Batteries

    For majority of smoke detectors, a battery is present. Either as a backup or as the sole source of power for the smoke detector.

    Batteries should also be disposed cautiously. If just placed in a trash, the positive and negative terminals may come in contact with other batteries or metal objects. This in turn may cause excessive heating that can result in a fire. Hence, batteries can be a fire hazard.

    It is advisable to tape the terminals with an electrical tape or masking tape before throwing them away. In fact, some states prohibit dumping batteries in the general trash.

    Check with your state if they require you to dispose battery waste in dedicated places. Given these points, always remove batteries from the smoke detectors before you dispose. 

    Batteries are also known to contain harmful metals that can compromise the lives of humans and animals.   

    In conclusion, we congratulate you for being an environmentally conscious member of our society!

  • Tamper and Flow Switches Wiring Made Easier

    As strange as it may seem, sprinkler systems are one of those things that you want to have in your building but you never want to use!

    Step by step guide to wire tamper and flow switches into fire alarm

    By the time you are utilizing the fire sprinkler system, it means that your property is in trouble! Hence, it’s everyone’s wish that you will not need it at all. But on the other hand, they can save lives and properties, so they’re necessary to install.

    The thing is, they can be quite complicated. Conspicuously, the sprinklers themselves can be fail-proof but the other elements in the system are very prone to the elements.

    To be more specific, the valve is one of the most vulnerable, so regular checking and maintenance is highly necessary.

    To make things simpler, a tamper and flow switch can come in handy. These items will help you properly monitor the status of your sprinkler system, so you should certainly look into them.

    What are Tamper and Flow Switch?

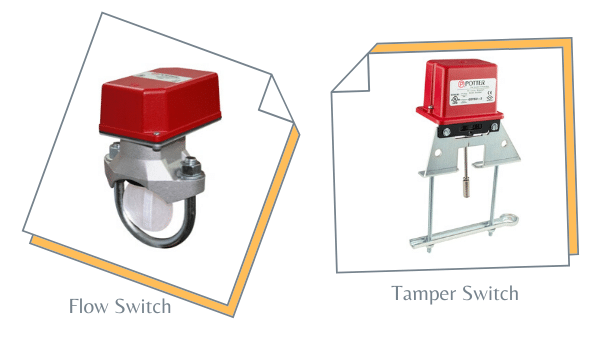
    Tamper and flow switches are two of the most commonly used automatic fire alarm triggers available today. In their most basic forms, they inform the fire alarm system that the fire suppression system has been activated at one point of the building, without requiring human intervention or activation.

    Flow switches detect the flow of water inside the pipes of a fire suppression system. As you would expect, flow in the pipes would generally mean that the sprinklers or other connected fire fighting equipment has been activated.

    As a result, this functionality makes flow switches an integral part of automated fire alarm systems as they do not require a user to pull down the fire alarm switch.

    tamper and flow switches

    On the other hand, tamper switches try to ensure that human interaction with the fire suppression system, like partial or full closure of the sprinkler system valves, is detected and an alarm is triggered.

    Depending on the implementation of the end-user, tamper switches can also be set up to trigger an alert notice or trouble signal instead of a full alarm.

    Can you install Tamper and Flow switches in your System?

    There are a lot of factors that would affect the process of installing tamper and flow switches in a fire alarm system. For instance, some of them are design considerations, system compatibility, local laws and regulations, and end-user preference.

    Most systems that can make use of these switches require that they are installed in particular parts of the installation. And this sometimes makes it difficult for plumbing and wiring that were already in place before the decision to add the switches.

    If this is the case in your structure, make sure that there is enough space and allowance for the switches and that the diameter and directionality of the pipes are compatible and taken into account.

    In addition, take special care in planning the wiring for the switches as they may need additional conduits if the switches are new additions

    Watch outs

    Foremost, compatibility between the switches and the fire suppression switches need to be checked before installation. Some manufacturers have very specific requirements regarding the switches allowed to interface with their control boards, but it is often possible to purchase between brands if they are confirmed to be using the same specifications and protocols.

    Besides, the local regulations will also dictate some of the aspects of the installation. For example, in some jurisdictions, the fire suppression system is required to initiate a general alarm if the tamper switches are triggered, while others only require a fault notice or alert on the control panel.

    That being so, check with your national and local fire and building codes to make sure that your fire suppression system will remain compliant.

    Finally the end-user will also have a say in how the switches will be installed. The effective number of Tamper and Flow Switches can often be limited by the budget of the buyer.

    If the budget is limited, it is better to position the switches to cover as much of the system as possible within the maximum allowed by the specifications.

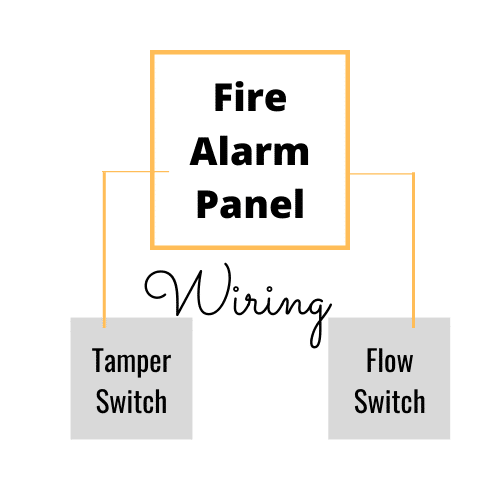
    How do You Wire a Tamper and Flow Switch into a Fire Alarm?

    wiring tamper and flow switches

    Laying down the wiring is a good first step in the installation of these switches. There are often many physical limits and constraints on the wiring that would not be immediately visible just looking at the building and electrical plan.

    Double check that your installation is equipped to adjust to such things.

    Prior to installation, carefully study the specifications and wiring diagrams that come with your particular switch.

    Be cautious, some switches are actually two switches in one, these can be used to alert and operate through a regular control unit as well as activate a local visual or audible alarm.

    Take careful steps to follow the switch wiring diagram as failing to follow them will result in false alarms or render the switch non-functional.

    Final Thoughts

    Finally, during physical installation, take special care in ensuring that the terminal connectors are properly tightened.

    Knockouts, the pieces of housing often made of plastic that is meant to be removed depending on the installation requirements, should be properly removed with the appropriate tools.

    Check to see that the edges are not cutting into the wires.

  • How To Properly Clean Firefighter Gear

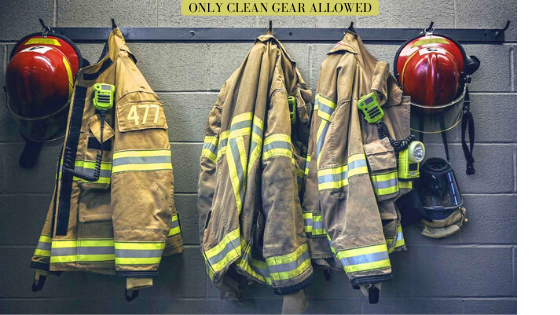
    how to clean firefighter turnout gear

    Tattered, frayed, and rugged are just a few of the adjectives to describe firefighter gear. Some veterans will even tell you that during their day, the more worn out their gear is, the better their street cred. Their beaten up equipment signifies how seasoned they are in the field.

    While looking stained is a definitive sign of being in the heart of the action for firefighters, keeping one’s gear dirty is not recommended. It might look great while you’re in motion but it can affect the quality and safety performance of your gear.

    The Importance of Proper Firefighter Turnout Gear Maintenance

    But one may think: why should you clean up your turnout gear if it’s going to get soot, ash, and smoke all over it anyway? Why bother, right?

    Well, it’s all about the maintenance of the gear. Cleaning your turnout gear will help restore it to a great working order. Furthermore, this prevents the damaging debris and other stuff from further harming the material and integrity of the garments.

    SEE ALSO:

    Firefighter knives

    Firefighter Boots

    By properly caring for your turnout gear, the longer its shelf life can last. In turn, it can protect the wearer effectively for longer as well.

    Turnout gears are pieces of safety equipment, too, as you would know. So if you let it deteriorate by not restoring it to a good condition after use, the easier it will get damaged. Once it’s in bad shape, it won’t be very effective in keeping the wearer safe anymore.

    You may as well sell your used firefighting gear in the future. Of course, the better it looks, the higher the market price it may attract.

    How to Clean Turnout Gear

    Regularly cleaning your firefighter gear is an essential step to keep them in good condition. How do you do this? Here are the steps:

    1. Brush off the debris from the surface and rinse off the gear after every use. Pre-treat the areas that are heavily soiled using a mild detergent.
    1. If the liners of the gear are detachable, take them out and wash them separately. This will prevent damage and the transferring of contaminants from one layer to another.
    1. Turn the liner inside out for more thorough washing and drying.
    1. Fasten all closures and cover all hooks and loops to prevent snagging, damage, and premature wear.
    used firefighting gear
    1. Machine washing is not recommended for proximity gear. This isn’t the case for structural gear as you can wash them in front-loading machines without agitators. There are some special machines made for firefighter gear, that you can use for such garments, too. Strictly stick with 85-100 Gs for the extractor G-force. For top-load washers, use a laundry bag to prevent snagging and damage on the turnout gear. Never use the same washer for your regular clothes to wash turnout gear.
    1. Always dry the garment properly after cleaning, especially if it got wet.

    Guidelines to Keep the Firefighter Gear Immaculate

    So how do you maintain your turnout gear properly? Due to the specificity of these items, you can’t just wing the upkeep and care of your turnout gear. This is why the National Fire Protection Association came up with its guidelines for this specific task.

    firefighter turnout gear

    The NFPA 1851, Standard on Selection, Care, and Maintenance of Protective Ensembles for Structural Firefighting and Proximity Firefighting notes the minimal requirements in the proper care and maintenance of firefighter gear. Here are the basic requirements:

    • Inspect your clothing after each use to quickly spot and address issues right away. Advanced inspections are recommended to be done at least once a year.
    • Keep your firefighter protective gear clean all the time as doing so will help ensure its good performance. There are three required ways to clean one’s gear:
      • Routine cleaning that only requires brushing off debris and rinsing off after. Pre-treat the areas that are heavily soiled.
      • Advanced cleaning is required every 6 months and involves more thorough steps in cleaning the gear.
      • Specialized cleaning is necessary when the protective clothing got contaminated by a toxic liquid or pathogens.
      • Always dry the garment properly after cleaning, especially if it got wet.
    • In case your gear got damaged, have it repaired by professionals. Do not try to DIY it as there’s a chance that it won’t be effective enough to provide protection to the wearer again.
    firefighting turnout gear storage
    • Store your gear properly, preferably away from direct sunlight and away from contaminants.
    • Let your gear go when it’s already considered to be unsafe. These things may not have definitive best before dates but they can still get expired when they can’t effectively do their jobs anymore. Be willing to retire them if they’re already very worn out.
    • Machine washing is not recommended for proximity gear. Structural gear, on the other hand, are best washed with washing machines that do not come with agitators and are designated for washing firefighter gear. These are crucial to keep your protective clothing in clean status.

    Aside from the recommendations of the NFPA, you should also heed the cleaning tips of your gear’s manufacturer.

    The folks behind the protective gear will tell you lots of useful information about their product that will further help you keep your gear in the best state. Keep them in mind and use them alongside the NFPA 1851 guidelines and you can be sure to keep your firefighting protective gear in good shape.

    Conclusion

    Keeping your firefighter gear in great condition will help guarantee better protection, so proper maintenance for these items is always a must.

    The process is not too complicated, so do not be daunted by it. Since the gear is special, it certainly deserves some tender love care. Make sure to exert the effort for their upkeep.

  • Residential Fires Are Usually Controlled With How Many Operating Sprinkler Heads?

    A residential sprinkler system may not necessarily be required for all structures and buildings around the United States. However, there is no denying that they can be advantageous. They easily add a layer of protection to a property. Hence it would always be a great idea to have it installed.

    how many sprinkler heads control residential fires

    As they say, many would covet to have this system on their properties but no one should need it.

    Are you thinking of setting up a home sprinkler system in your residential property? If your answer is yes, then one of the things that you need to know is how many sprinkler heads you require to install. This might sound like a very complicated question but we will try to make it relatively straightforward in this article.

    Benefits of Residential Fire Sprinkler Heads

    Let us first look at the purpose of these systems. Fire alarm sprinkler systems are designed to control the initial outbreak of fire. To the end that the fire won’t get bigger and cause severe damage to your property. To clarify, residential sprinklers are not meant to put out a raging fire. Obviously they shouldn’t have to if they function accordingly.

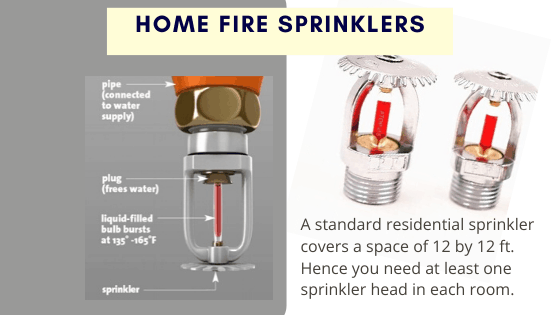
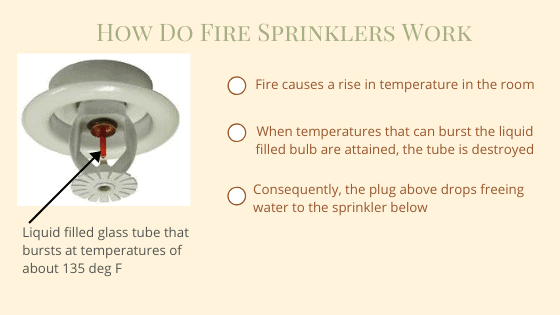
    You see, a good sprinkler system would go off as soon as its sensors felt a significant increase in temperature. Sprinkler heads are designed to go off individually when they detect temperatures of 135° Fahrenheit and beyond. After which, it will release water from its pipes.

    In many cases of residential fires, one sprinkler head did the trick. Hence many residential fires are usually controlled with one operating sprinkler head.

    This shouldn’t be too surprising since most residential fires originate in just one area of the home. For example, the kitchen or the garage. Most sprinklers can cover spaces that measure 12’ x 12’ but you can also find ones with extended coverage that can cover 20’ x 20’.

    And since it’s recommended that sprinklers should at least be 8 feet apart, most homes only really need 1 sprinkler head per room. With this amount of coverage, if a small fire gets detected by the sprinkler system early on, (as they should), it can be put out by the sprinkler head’s water release effectively and right away.

    Important Points to Keep in Mind about Residential Sprinkler System

    How does a sprinkler system work?

    How does a sprinkler system work

    You might be feeling a bit confused about water sprinklers and that’s alright. So, here are a few additional points that you should know to help you better understand how many sprinkler heads you need to install in your home:

    It does not make all sprinkler heads go off when it detects a problem.

    As mentioned earlier, sprinkler heads are activated individually and not as a collective system. Their sensors are separated so a small fire in the kitchen will not trigger the activation of all of your sprinkler heads all over your home.

    So if you’re worried that the fire in the kitchen will get all of your stuff soaked, you got it wrong. The activation of sprinkler heads are localized to better respond to the home’s needs.

    It’s best to get fire sprinkler heads with various heat ratings.

    Different sprinkler heads have varying heat ratings so buyers have the option to match their ceiling’s maximum expected ceiling temperature.

    Since different areas of your house can have different heat levels all throughout the day, it would be ideal to get sprinkler heads with different heat ratings. This will ensure that they’ll be able to respond accordingly to the heat changes in their surroundings.

    It’s required that you have spare sprinkler heads on hand if you have water sprinklers installed.

    Residential fire water sprinklers system

    According to the NFPA (National Fire Protection Association), every property with a sprinkler system installed needs to have spare sprinkler heads on hand. As per the NFPA 13 (2010 6.2.9), there should be at least 6 spare sprinkler heads available on the premises of a property with water sprinklers.

    The bigger the system is, however, the more spares are necessary. This is so damaged or malfunctioning heads can be replaced promptly.

    For residential homes, the NFPA has detailed guidelines for the installation of residential fire water sprinkler systems. The NFPA 13 provides the information you need to ensure that your home’s sprinkler system is adequate and meets the minimal requirements of the agency.

    What Next?

    Installing a fire sprinklers system for your home may not be required where you live but it has many benefits. Not only will you be able to provide protection to your property but some cities may also award concessions and perks for those who wish to install one to their new homes.

    Take it into close consideration as it can also be well worth the investment.

  • Why Are Bagpipes Played At Firefighter Funerals?

    Why Are Bagpipes Played At Firefighter Funerals?

    Fans of cop shows and those who’ve been able to pay their respects to a fallen firefighter would know that the resplendent music made by bagpipes are one of the key components of hero funerals. It’s such a common practice that some people just accept the custom with no questions asked. But when you think about it, it’s actually quite interesting why this is a common tradition.

    Why do firefighter funerals have bagpipes playing in the background?

    True to what lots of people assume, this is a tradition in the fire departments in the US. This custom has a lot to do with the roots of the early firefighters in the country and it goes as far back as the Great Famine.

    The Great Famine Pushes Irishmen to the New World

    In 1845 to 1849, the disaster known as the Great Famine took place in Ireland. Also known as the Great Hunger and the Irish Potato Famine, it was a period of disease and starvation in the region caused by a blight that led to potato crop failures for years.

    This has caused Irish and Scottish people to look for other places to live. And with the New World a promising location for many, mass immigration to the United States took place.

    history of bagpipes

    While the immigrants escaped the famine in their homelands, they faced a different kind of challenge in the New World. With racism and discrimination going against them, jobs proved to be hard to find and secure.

    It came to a point that shopkeepers even had signs posted in their windows and doors to keep the immigrants away. They used the acronym ‘NINA’ which means, ‘no Irish need apply’.

    But obviously, these immigrants were no quitters. They were built to survive. These people didn’t leave a famine for nothing. They didn’t uproot themselves from everything they know just to starve halfway across the globe from where they were born. Pulling themselves by the bootstraps they took on the only jobs that were available to them.

    Irish Immigrants Become Firefighters

    Unwittingly, they became what we know as heroes. They were forced to take on some of the most labor-intensive and dangerous posts available – firefighting and other law enforcement jobs.

    firefighter bagpipes

    Immigrants became the best candidates for such professions because locals were not too keen on putting their lives on the line when there are other opportunities available. The extreme dangers and high death toll related to these posts kept a lot of people away.

    They then became ripe for the picking for those without any other choices. And this is how lots of Irish and Scottish immigrants found themselves risking their lives putting out fires all over the new territories.

    Playing Bagpipes takes root in Firefighter Funerals

    And because it’s a Celtic tradition that bagpipes are played on celebrations and funerals back in their homeland, the fallen Irish and Scottish firefighters were honored in the traditional manner. By having bagpipes play in their funerals, their roots are honored and their culture celebrated even if they met their demise on foreign soil.

    Some also suggest that playing bagpipes in firefighter funerals is a way for the fire department to remind everyone that Irish and Scottish immigrants are the very ones that risk and sacrifice their lives to protect the community. The loud and distinctive sounds of bagpipes are hard to miss or mistake for anything else. This made them very iconic and remarkable.

    After a while, with so many immigrant officers, marshalls, and volunteers meeting their end in the job or even after retirement, bagpipes just became a staple in the funerals of the folks in the service. It eventually became a common practice to have a bagpiper to play music in honor of a fallen serviceman even if they’re not necessarily of Irish or Scottish descent.

    Over time, the tradition has been carried on that bagpipes already ingrained itself in the culture of the said line of service. So much so that nowadays, it’s still being practiced and is a widely known tradition.

    Wrap Up

    why are bagpipes played at firefighter and police funerals

    Having bagpipes played in firefighter funerals will always be about paying tribute to the force’s roots. For the Scottish and Irish immigrants, it’s about honoring their homeland. For the later generations of firefighters, it’s about honoring the tradition of their profession.

    This tradition is also going strong, thanks to the Emerald Society. This organization upholds the traditions of Irish firefighters. They also serve as the pipers at police and firefighter funerals. It’s a beautiful way to honor their lineage and keep alive the customs of this honorable vocation.

  • Starting a Fire with a 9volt Battery & Steel Wool or Gum Wrapper

    How To Start a Fire With a Battery

    Starting a fire with a battery is one of the most basic things you should learn if you want to make sure that you can survive or just have fun. Getting a nice fire going can get you out of a lot of different kinds of trouble. Luckily, there are quite a lot of different ways how you can start one using random items.

    If you are reading this to teach children, make sure you explain to them the dangers of fire!

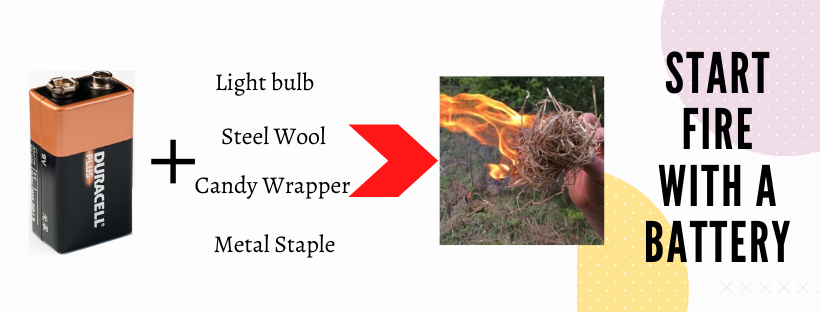
    In this article, we’ll show you how to start a fire with a battery. It might not seem like it, but with the stored power batteries contain, they can definitely light something up. Here are a few quick techniques that you can try to start a fire with batteries:

    1. Using an Incandescent light bulb

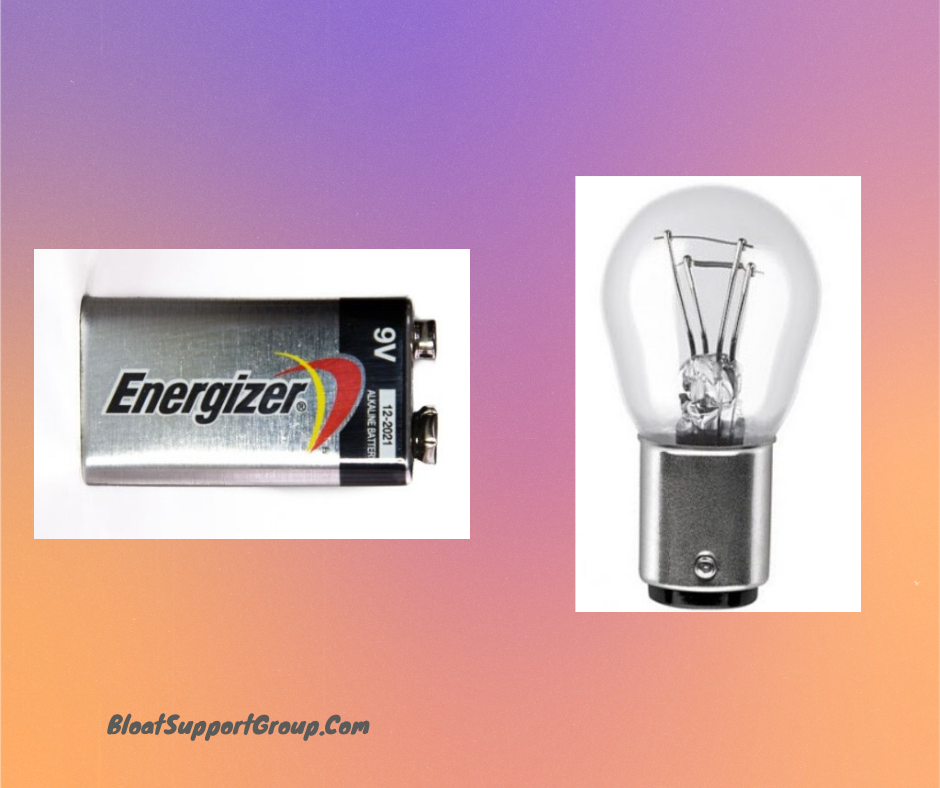
    1. Grab a 9v battery, incandescent light bulb, available or your choice of tinder, and whatever stuff that you want or can use as firewood. The 9V batteries are readily available from old items such as smoke detectors.
    start fire with battery
    1. Break the glass of the bulb to access the tungsten filament inside. Don’t remove it from the base of the bulb.
    2. With your tinder nearby, touch the base of the light bulb to the positive and negative terminals of the battery. Do this carefully.
    3. Carefully touch the filament to your tinder and it should instantly catch fire.

    2. Using a steel wool

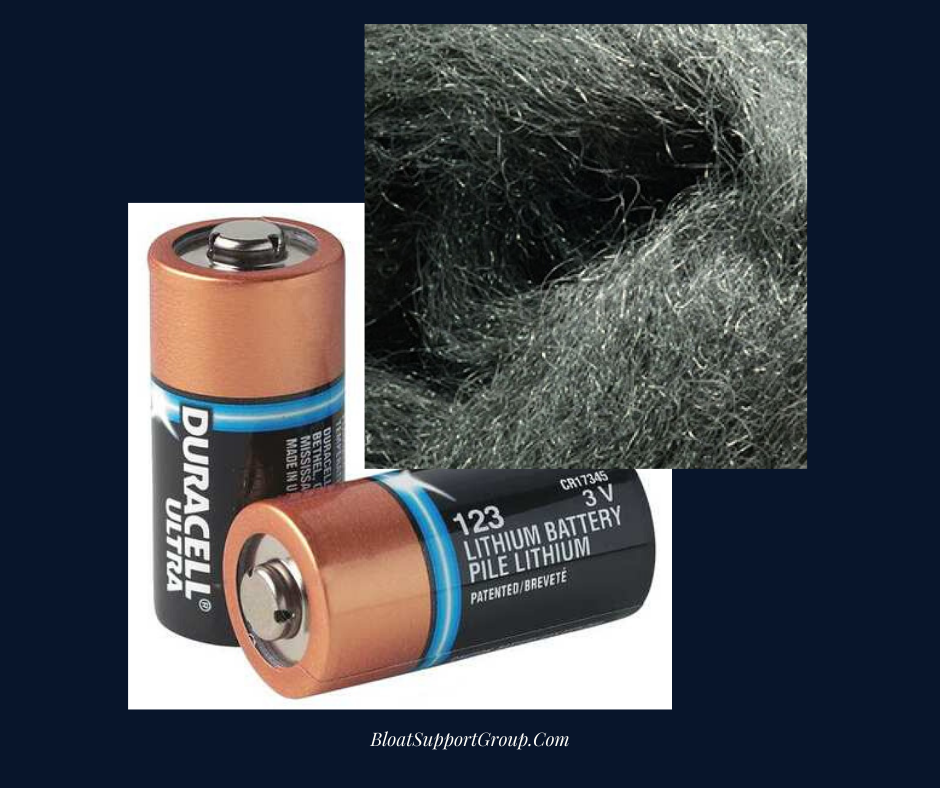
    1. Grab any kind of battery that is at least 3v in power, a steel wool, some tinder, and stuff you can set on fire.
    how to start a fire with steel wool and a battery
    1. Touch the steel wool fibers to the positive and negative terminals of the battery. This will immediately produce a flame.
    1. Place the fiery wool steel into your tinder then stoke to your desired size.

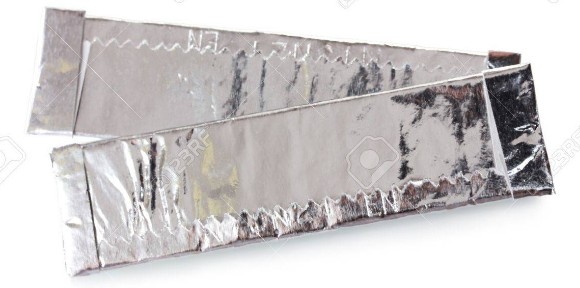
    3. Using a battery and a paper-lined foil gum wrapper

    how to start a fire with a battery and foil
    1. Grab a D-cell battery, some metallic gum wrapper, tinder, and stuff that you can set on fire.
    2. Cut the gum wrapper into a relatively long strip that will reach the negative and positive terminals of the battery with a narrow center point.
    3. Touch the wrapper’s foil side to the negative and positive terminals and hold them in place. A fire will soon start in the middle of the strip.
    4. Transfer the foil gum wrapper to your tinder and stoke the fire to create a bigger one that you can use for whatever purpose you have in mind.

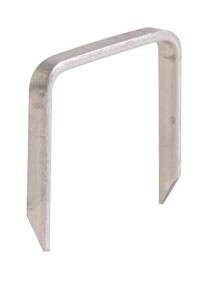
    4. Using a metal staple or paperclip

    1. Get a D-cell battery, a staple, a cutter or small knife, some tinder, and firewood or other stuff that are flammable enough for getting a fire going.
    2. Hold your battery with the negative terminal on the side up. Grab your cutter and peel of a little of the plastic covering at the tip of the negative end. This will expose a small amount of positively charged area of the battery.
    how to start a fire with a battery and a paperclip
    1. Grab the staple and touch it on the negative terminal while also touching some of the exposed part of the battery. A fire should instantaneously be created.
    1. Grab some tinder and make the fire bigger according to your needs.

    How It Works

    You can easily create a fire using a battery because batteries contain a good amount of energy. Tapping into that by creating a weak circuit and not giving the energy any direction to go will result in a nice fire.

    All you need is a conductor that will grab the energy from the battery and that’s pretty much it. It will set itself on fire quite easily so you just then need some tinder to create a bigger fire.

    Add more flammable items to the mix and you’ll have a good size fire in no time.

    Important Tips to Successfully Create a Fire Using a Battery

    Aside from using the right flammable material to ignite a fire from a battery, you should also remember the following things to ensure that you’ll successfully create the fire you need:

    • Have some tinder or kindling nearby. If you can position the battery and the other materials you need to use to create a fire right on top of the tinder, it would prevent the loss of energy in the process and will let you make use of the fire that the battery will create right away.
    • Be careful in handling the battery and the other material you’re going to use to create a fire. These things can get quite hot, so to keep yourself safe, don’t directly touch items made of metal. You might end up throwing away the material you’re using to make fire. If you’re in an emergency and with scarce supplies, such a knee-jerk reaction can be costly.

    Storing 9V batteries haphazardly in a drawer for example is a hazard. The positive and negative terminals can come in contact through a metallic object and start a fire unintentionally. Hence, make sure you keep your batteries safely (including the old ones).

  • Honeywell Thermostats: Changing the Batteries

    how to change Honeywell thermostat battery

    Honeywell is a famous brand in the thermostat industry, and it stands to reason that plenty of people use their thermostat. Honeywell actually offers several different lines and models of thermostats, and they all have their own unique features.

    Some of them offer basic functions, but others are more advanced. Some models have programmable functions as well as an LED screen, and they may need batteries. If they do need batteries, eventually you’ll have to replace those batteries when they run out of power.

    When Should You Change Honeywell Thermostat Batteries?

    You shouldn’t wait until the batteries run out of power completely before you change them with new ones. You will get a warning about low battery power if you have a thermostat with an LED screen. The low battery warning will come on, usually saying either BATT LO or Replace Battery.

    If you do see this warning, it’s best if you just change the batteries right off. If not, then your next warning is a blank screen. If you still don’t replace the batteries, eventually your thermostat stops working altogether.

    Maybe you’re not all that worried about changing the batteries too quickly because your thermostat only uses the batteries for backup. However, you’ll still have problems. While most of the other programmable functions will continue working, the low battery power can cause you to lose your date and time settings. That can be rather annoying.

    Replacing Honeywell 8000 Series Batteries (TH8110U, TH8320U and TH8321U)

    This series offers some of the best and most advanced thermostats that Honeywell has to offer. With this, you can gain control over 2 cooling systems and 3 heating systems, plus dehumidification as well. If your thermostat is directly wired to AC power, then you may need 3 AAA batteries.

    Changing the batteries involves a few simple steps:

    1. Find the cover plate and take it off.
    2. Take out the spent batteries.
    3. Put in 3 new AAA batteries
    4. Place the cover plate back on.

    Honeywell 6000 Series Battery Replacement

    These will need AA batteries instead. The steps are also quite simple when it’s time to change batteries. Follow these steps to change the honeywell thermostat battery:

    1. Find the battery compartment.
    2. Press the tab to open it. This will open from the face plate to show the batteries.
    3. Take out the spent batteries and put in new ones.
    4. Swing the cover back into place, and it will snap shut.

    Changing Honeywell Focus PRO 5000 Battery

    This category covers 3 thermostat models. Whichever model you have, you’ll find the battery compartment on the side of the thermostat.

    If you have the TH5110D, you’ll need AAA alkaline batteries. If you have either the TH5320U or the TH5220D, you’ll need AA batteries.

    The process here is almost the same as with the 6000 series.

    1. Open the compartment by pressing the tab first.
    2. The tab will then swing out from the face plate.
    3. Get out the old batteries and replace them with new batteries.
    4. Close the compartment, snapping it down.

    Honeywell 4000 Series Battery Replacement

    This series includes TH4210D and the TH4110D models. These thermostats are programmable models, and built to run with cooling and heating systems with or without a heat pump.

    You’ll see the REPLACE BATT icon flash on the LED screen when the battery power gets low. The good news is that you’ll still have a month or two to replace the batteries before they die out completely.

    Still, you may as well replace them right away so you won’t have to keep worrying about it. Follow this guide to change the honeywell 4000 thermostat battery:

    1. First you need to remove the thermostat from the wall. You do this by pulling at the bottom of the face plate.
    2. Turn the thermostat over and you’ll find the AA batteries.
    3. Take out the spent batteries and put in 2 new AA batteries.
    4. Place the thermostat back on the wall plate. This will snap on securely if you do it right.

    Change Battery for Honeywell 2000 Series

    The TH2210D and the TH2110D models are part of this series. You’ll find an LED screen, along with push- button controls. These thermostats are meant for standard heating and cooling systems and heat pumps.

    Normally, a thermostat in this series will be connected to 24-VAC power. The batteries will be for backup, just in case you lose power during a blizzard. However, even if you don’t use the batteries, you should still replace them regularly. Put in new ones about once a year, perhaps just before the winter or summer season. How to change honeywell thermostat battery:

    1. First switch the system off.
    2. Take out the cover plate from the wall plate.
    3. When you turn the cover plate over, you’ll find the 2 spent AAA batteries.
    4. Replace them with 2 new AAA batteries.
    5. Snap the cover plate back to the wall plate.
    6. Switch the system back on.

    Which Batteries are the Best?

    You don’t really have to worry, since most AAA and AA batteries tend to work adequately. You just need to make sure you’re putting in the right type of batteries. However, if you’re insisting on putting in the best batteries, you should pick out the following brands:

    Duracell

    More specifically, get the Duracell Ultra Power Alkaline Battery. This is Duracell’s longest-lasting batteries, and even high-drain electronics can last for 90 hours on so on these batteries. They’re great for thermostats. By a few in reserve, as these batteries will still be good when not in use for 10 years.

    Panasonic

    Try the Panasonic Evolta Alkaline Battery. Plenty of people are surprised at how long these batteries last. Panasonic claims that these will outlast other batteries in its price range by 20%, and lots of users have confirmed this. This will also last 6 years in storage.

    Kirkland

    Get the Kirkland Signature Alkaline Battery if you’re looking for cheap batteries that offer terrific performance. They’re great for electronics that use up a lot of battery power!

  • Best Emergency Fire Escape Ladder [Complete Buyers Guide]

    Best Emergency Fire Escape Ladder [Complete Buyers Guide]

    Best Fire Escape Ladder for Emergency Evacuation

    There are dozens of emergency ladders out there but which is the best non permanent fire escape ladder?

    Before we dive into it, there are important aspects that you would like to consider before purchasing that emergency escape ladder.

    How Do I Choose The Best Fire Escape Ladder?

    Now, you need to consider these 9 factors discussed below:

    1. How Big is the ladder when not in use? A compact and fold-able ladder will occupy less space in your home. Majority of us do not want additional items especially if they are going to occupy a lot of space in the home. A ladder that can be stored in a closet or under the bed will save a lot of home space.
    1. Rungs – they are better off with anti slip characteristics. Remember the evacuation will happen in a hurry and you do not want someone falling from height because they slipped.
    1. Ease of Use – how quick the ladder is to deploy matters a lot. Every second counts in an emergency situation. Delays should not emerge because the ladder you have is not deploying with ease. That could mean life or death or serious injuries. Your ladder should be easy to attach to your window frame for evacuation and roll down easily.
    1. The Length of the Ladder – how high is the window or emergency exit to he ground or safe location? How many storeys is your building? These will determine the length of your fire escape ladder. Generally, a storey is 14 feet high.
    1. Supported Weight – this has to do with the maximum tested weight the ladder can support. This is an important factor. Make sure the ladder can support all the members of the family at the same time.
    1. Flame Resistant – imagine a ladder that can easily be affected by flames or high temperatures! It would definitely not make sense to have it. To be a good emergency fire escape ladder, the material used to make the ladder must be flame proof. It will most likely be used in extreme high temperatures after all.
    1. Stabilizers – this feature helps to steady the ladder away and against the wall. A dangling ladder increases the chances of slipping and missing a step as people are evacuating.
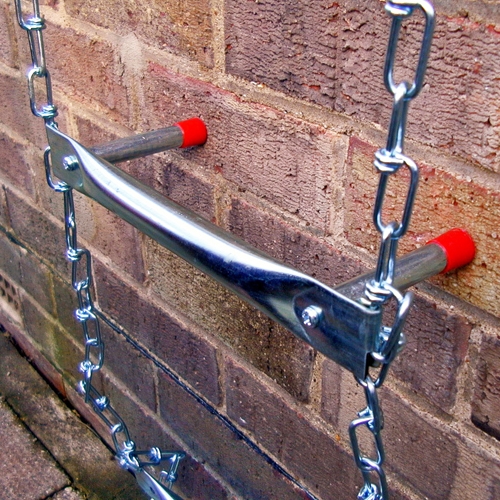
    metal fire escape ladder
    1. Hook Sizes – ensure you have known the dimensions of the your wall thickness especially around the windows which you intend to use the ladder. The hooks should be able to fit in well and support the weight of a person. If the hooks do not fit properly, you may introduce other unnecessary hazards like fall from height.

    If the walls are a limitation to the type of ladder you have chosen, consider if a strong metal bar or eye bolts can be installed from which you can hook the ladder.

    1. Potential Users – children below 5 years may require adults to carry them. A rapid baby evacuation device bag can be very useful. Children above 5 years may need an adult to guide their feet. Additionally, the elderly and the disabled may require more than an emergency evacuation ladder. Factor these in your fire emergency plans.

    Having said that, here is the best fire escape ladder and why we have chosen it.

    What is the Best Fire Escape Ladder?

    Hunting for your best emergency ladder is no longer an uphill task as this article has made it easier for you.

    Our No. 1 choice that is a great addition to your family fire plan with customer rating of 4.6 ⭐️ out of 5 ⭐️

    Kidde 468093 KL-2S Two-Story Fire Escape Ladder

    Customer Reviews for best escape ladder
    emergency escape ladder

    Features

    • ✔️ Anti-Slip Rungs
    • ✔️ 13-Foot long – enough for a two storey house
    • ✔️ Ladder tested up to 1000 lbs
    • ✔️ It is easy to use
    • ✔️ Ladder is flame resistant
    • ✔️ Fits over a window sill of 11 inches maximum
    • ✔️ 5 year warranty


    What is a Fire Escape Ladder?

    Most commercial buildings are constructed with a permanent fire escape ladder. However, in residential houses that do not have the ladder as part of the building, then a portable non permanent emergency evacuation ladder is a requisite.

    Permanent Fixed Escape Ladder

    permanent fixed fire escape ladder

    Despite permanent ladders being in existence, fire could potentially cut them off from being used when they are needed most.

    Portable fire escape ladders become the best alternative to the primary fixed ladders. Hence the benefits of a non fixed emergency evacuation ladder cut across for all buildings, whether they have a fixed escape ladder or not.

    The hooks of the ladder are placed on the wall hanging outside the wall to a place of safety outside. The material used to make them range from metal or rope with consideration to strength and durability.

    It is recommended to have one large window where persons can escape from in case of fire emergency situation. It is from this window, that the ladder will be placed and every one can run for their dear lives.

    Remember to consider all members in the building as to whether they can all be able to use the portable fire escape ladder. If not, please put alternative measures or controls to address their safety. There are clear regulations on emergency escape ladder safety and fire evacuation that you can get for your State.

    How Many Fire Escape Ladders Do I Need?

    The National Fire Protection Association, recommends one ladder in every occupied room on floors above the main level. The minimum you can have if you stay in a two storey house is one emergency escape ladder.

    You have about 100 seconds to escape before the fire is all over the house. Moreover, you are not stuck if the normal exits are blocked by fire and neither do you have to depend or wait for fire emergency services to get to a safe place.

    However, in case you use the emergency escape ladder in a real fire situation, it is recommended you replace it. The heat may have compromised the strength integrity. It may be unsafe for resuse. If you must reuse, have it checked by a professional.

    Final Verdict

    The best fire escape ladder is meant to save lives. Practice regularly with members of your family or office on the the use of the ladder. You want it to be effective when the moment demands for it! Everyone should be ready. Figuring out everything in the midst of an emergency could be very costly and regrettable at the end.


  • Looking for HEPA Air Purifiers for Smoke, Pets or Dust?

    Looking for HEPA Air Purifiers for Smoke, Pets or Dust?

    Are you looking to find out what is the best air purifier for smoke under $100 without spending a fortune? Then you are in the right place.

    To get started;

    Fresh air is related to a lot of health and psychological benefits. You can increase immunity, improve blood circulation as well as relieve stress from an aura of fresh air. Your kids and pets will also enjoy these advantages.

    Best Air Purifier for Smoke Under $100

    Why should you be concerned about smoke whether it is from the kitchen, cigarette or car garage? The simple reason is that smoke contains particulates that are harmful to your body organs which may lead to ill health eventually. The benefits of an air purifier are considerably many.

    The respiratory system is the most affected.

    Research has established that inhaling smoke (especially from cigarette) may lead to cancer. Smoke is an air pollutant and your respiratory system may be affected.

    An air purifier works to eliminate smoke in the environment hence giving you a chance to breathe fresh air. You also get rid of odors and any harmful bacterial/microorganisms.

    You may not realize it, but generally there is a better atmosphere at home especially considering non smoking members of the family who stay with smokers.

    I will quickly take you through some of the best air purifier for smoke under $100. The good news is; It is possible to get a quality air purifier on a low budget – no need to break the bank!

    In a hurry? check these Air Purifiers (all under $100)


    Review of Top Air Purifiers for Smoke

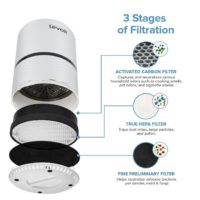
    LEVOIT Air Purifier for Home Smokers Allergies and Pets Hair

    Whereas, other brands may ironically be producing harmful air pollutants – ozone, LEVOIT air purifier is 100% completely ozone free.

    Air is filtered through a 3 stage process. A pre-filter stage, true HEPA filter, and a high efficiency activated carbon filter that removes the odor, allergens, dust particles and smoke.

    The product has an inbuilt reminder of when filter replacements are due. The filters are very pocket friendly compared to other air purifiers in the market. Hence the long term cost of having this air purifier is low to comparable brands. It is recommended you change your filters after 6 months.

    The product is made in USA (California specifically) and is compliant with all the regulations of the state of California.

    Customers have been impressed by the ability of the air filter to continuously keep fresh air circulating in a timely manner. Air is circulated up to 4 times within an hour.

    The product has a 2 year warranty.

    This is our no 1 choice in the category of best air purifier for smoke under $100.

    VEVA 8000 Elite Pro Series Air Purifier

    Veva 8000 elite pro uses activated carbon to eliminate allergens, Smoke, dust, pet dander & odor

    Before the HEPA Filter, there are 4 pre cut filters that help to increase the life of the main filter. The life of the filter depends on usage and the general quality of the air where the purifier being used. The filter life may extend up to 12 months.

    veva 8000 elite pro series air purifier

    The 3 stage speeds gives you options to choose from depending on demand.

    The design also is very flexible; by removing the base of the VEVA 8000 elite Pro series air purifier, it changes from a tower to a table top assembly.

    With 2 year warranty and certified by UL as being ozone free, this is a high quality product suitable for your home or office. 

    It is recommended for spaces not exceeding 325 Sq Ft.

    Envion by Boneco – Therapure TPP240 – UV Germicidal Hemispheric Purification 

    Therapure TPP240 works for large rooms (not exceeding 343 square feet capacity).

    It uses ultraviolet irradiation to clean the air and get rid of harmful microbes.

    The HEPA filter is cleanable hence no need to replace if you do not want to spend money on new filters.

    therapure tpp240 reviews

    PARTU Hepa Smoke Air Purifier – for Home with Fragrance Sponge

    It’s a 100% Ozone Free and also uses 3 stage filtration that includes a true HEPA filter.

    Additionally, it has a feature where you can add droplets of your favorite fragrance.

    A lock button prevents unintended operation by kids or pets.

    It is best suited for rooms not exceeding 10 meters squared. You can place it anywhere without taking a lot of space in the room. The sleek design adds some beauty into the room as well.

    Customers liked it very much for its ability to remove pet odor and eliminate smoke.

    Ozone Free Air Purifier for Smoke

    MOOKA Air Purifier – Eliminator for Smoke

    The air intake and discharge is omnidirectional (360 degrees) making fresh air circulation very efficient.

    It uses a true HEPA filter that ensures particles as small as 0.3 microns are eliminated.

    Its easy to operate and comes with a 3 year warranty.

    true HEPA air filter for fire smoke

    Benefits of having an Air Purifier in Your Home or Office

    If you leave near areas prone to forest fires, the smoke can be overwhelming and mess even the air in the house. A good air filter can help you have some fresh air inside your house. No need to feel uncomfortable anymore.

    Air full of smoke around the house could also cause false alarms from your smoke detectors. You may also experience deterioration of the detectors, reducing their useful life.

    Some air purifiers would remove 99.97% allergens, dust, pollen, pet dander and mold in the air. Hence giving you multiple advantages when using an air purifier for smoke.

    The video below explains a HEPA filter and why it is very useful.

    Polluted or contaminated air may cause sinus conditions, allergies and worsen the situation for asthmatic persons.

  • Best Firefighter Knives

    Best Firefighter Knives

    In this post I will get to the details that will help you identify the best firefighter knives.

    Thanks to the firefighters for the great job they do.

    Firefighters are the first responders in most cases of fire emergencies. Whether you are a firefighter or you just want to buy the best knife as a gift, you will find this article informative. Every 30 seconds, firefighters respond to an emergency in the United States.

    What features would a firefighter be interested in a rescue knife?

    You will know shortly.

    best firefighter and pocket rescue  knives

    Firefighters and other first responders require a knife that is strong, easy to open and one that can be firmly gripped even when wearing safety gloves. There should be no struggle using the knife with gloves.

    Easy Opening
    In the heat of the moment, you do not want to be struggling with a fold-able knife that is stuck or requires some intervention to open. A fixed blade knife is stronger than a foldable knife. 

    Good Grip
    You want to grasp the knife firmly and be in control of the knife. Handling ergonomics is an important feature.

    Durability
    After spending your money, you will be more satisfied and glad if the knife you bought is a long lasting knife. Hence, considering the quality of the knife (the blade and the handle materials) becomes important. The advice is, stay away from the cheap knives!

    Size
    Your knife should also fit in the pocket comfortably. The pockets would usually be having other pocket tools; hence the size of the knife matters.

    Serrated Blade
    You also want to consider this option as well. A serrated blade will have advantage while cutting through certain materials unlike a plain edge blade. Although it requires some skill to sharpen.

    For push cuts a plain blade works better and on the other hand a serrated blade will do a better job for slice cuts especially through tough or hard materials.

    Best firefighter knives will have a good blend of the above characteristics. Lets see from our selection below.


    Spyderco Assist Lightweight Combo | Best First Responder Knife

    We have chosen this emergency rescue knife as our top choice because it offers extra functions for a knife. You can do a lot with this knife.

    Furthermore it has awesome ratings from customers who have purchased and used it. It makes to the top of the list of best firefighter knives for various reasons.

    best firefighter knives

    It has both serrated and flat edge on one blade. The handle is designed to give the user total control of the blade while cutting.

    The blade is made of VG 10 stainless steel material and hence very strong and durable. It also means the blade will never rust.

    On the blunt side of the blade is a feature that enables firefighters cut ropes quickly by pressing the handle against it.

    The knife is about 5 inches when folded and about 8.4 inches when opened. This makes it easy to carry in the pocket.

    Additionally, you can use the knife to whistle and break glass quickly and safely.

    Spyderco is at the top as far as knives are concerned. They are economical, carefully designed to function in the most intense rescue moment and very durable.

    Victorinox Swiss Army Tool | Firefighter Pocket Rescue Knife with Pouch

    We love this knife because it has lots of well constructed features (about fifteen).

    firefighter pocket tool

    You will get a serrated blade, a screwdriver, a window or glass breaker among other functions. All of these are made from stainless steel.

    In fact, it is more of a tool than a knife as some would say. I suppose the best gift a firefighter can have among many selection of knives.

    The knife is about 4.5 inches long. So confident is Victorinox that they offer a lifetime guarantee for this knife. Therefore, this knife makes you feel very confident no matter the situation you will come out.

    4.5″ Closed Firefighter Rescue Folding Knife

    This foldable knife has both serrated and plain edge blade. In addition, its a simple knife yet will satisfy the needs of a first responder. Also, the window punch works very well.

    A safety latch prevents you from hurting yourself by keeping the blade in position.

    best rescue knife

    The blade is sharp and strong while the handle is not flimsy at all. The knife is very affordable.

    Intense use may cause the blade to break though!

    Gerber Hinderer First Responder Rescue Knife [22-41534]

    first responder knife

    The knife is of reasonable quality with window punch and oxygen tank valve opener.

    The tip of the blade is blunt and very good for prying on items, doors and locks.

    It is a fold-able knife and very portable. It cuts through seat belts easily.

    Case 5468 Smooth White Synthetic Handle Mini Trapper 4207 SS |Best Firefighter Pocket Tools

    We would not complete our review without mentioning a flat edge blade knife. And we got a small knife with great features and a classic American appeal.

    You can choose from many colours. The knife comes with two blades; clip and spey. The folded knife is 3.5 inches long and about 6 inches when open.

    Customers like the fact that the knife is made in the USA very much.

    In Conclusion

    To sum it all, best firefighter knives must be easy to use and be made of durable material. It must be able to cut through hard and soft materials quickly.

    For a firefighter, any delayed second could be the line between death and life. Emergency preparedness is very important both for the firefighter and those involved.